Archive for the ‘Pasta and Pizza’ Category

Once More onto the Crust

Monday, November 15th, 2010

 
Neighbors returned recently from a dinner at the Charlemont Inn with tales of being fed squash pizza.
 
As a fan of both squash and pizza, I was intrigued. It was only a matter of time before I fed a version of this dish to my family.
 
My success was mixed although generally positive.
 
As I note in the recipe below, I think the squash needed more spices to offset its sweetness. And it DEFINITELY needed the thinnest crust possible.
 
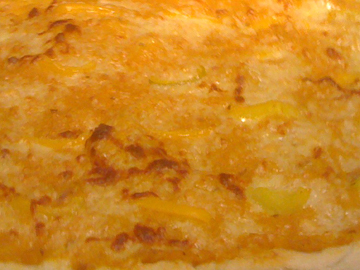
On the other hand, the color was pretty gorgeous, and we definitely ate the slightly sweet/slightly spicy combination. So I have decided to post the recipe. 

If any of you try it (and/or adapt it), please let me know what you think! I’ll probably make it again next fall and post an update.

 
First Try Butternut Squash Pizza
 
Ingredients:
 
extra-virgin olive oil as needed for sautéing and roasting
2 cloves garlic, minced
1/2 onion, finely diced
1-1/4 pounds butternut squash (cut into chunks)
salt and pepper to taste
1 teaspoon cumin seed (I will increase this next time!)
1 teaspoon chili powder (ditto)
3/4 cup water
more water or cream to thin the squash as needed (I used a couple of tablespoons of cream, but I think water would do as well)
1 pizza crust
grated extra-sharp cheddar cheese as needed (I used about 1-1/2 cups)
1/2 bell pepper, cored and cut into thin strips (I used a yellow pepper because I had it, but green or red would make a prettier contrast with the squash.)
 
Instructions:
 
Preheat the oven to 350 degrees. If your pizza dough is refrigerated, take it out of the fridge so it can come to room temperature while you are doing the rest of the work.
 
Place a Dutch oven on the stove top, and heat a couple of tablespoons of oil in it. Toss in the onion and garlic and sauté until they begin to brown.
 
Toss in the squash, salt and pepper, and seasonings, and stir to coat the squash with spices and oil. (Add a little more oil if necessary.)
 
Place the pan in the oven, uncovered, and cook for 20 minutes, stirring from time to time. Stir in the water and continue to cook, covered, until the squash is very soft—about 1/2 hour longer.
 
Remove the pan from the oven, and mash the squash and remaining water together. Preheat the oven as indicated in your pizza dough instructions.
 
Mash in a little liquid to make the squash puree spreadable. Next, roll and/or stretch the pizza dough out gently (this may take a few tries) so that it forms a 14-inch circle (or a rectangle to go onto a cookie sheet if you don’t have a pizza pan). Use a little flour to help with this if necessary.
 
Spray your pan lightly with cooking spray and oil it even more lightly. Place the dough on the pan. Spread a very thin film of olive oil on top.
 
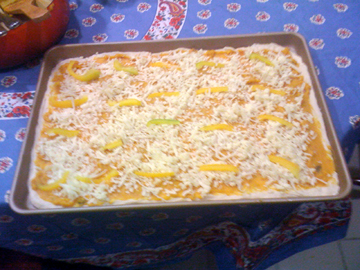
Spread the squash puree on top of the crust, and top that with the grated cheese. Arrange the pieces of pepper onto the cheese topping.
 
Bake the pizza until the cheese is nicely melted and the bottom of the crust turns golden brown. With my crust (from Trader Joe’s) and my oven this took about 20 minutes.
 
If you are using a thicker pizza crust, you may want to cook the crust a bit before you spread the toppings on so that the pizza cooks all the way through. 

Serves 4 to 6.


If you enjoyed this post, please consider taking out an email subscription to my blog. Just click on the link below!

Subscribe to In Our Grandmothers’ Kitchens by Email.

Pizza Margherita

Monday, September 27th, 2010

 
Tomatoes are still with us, joy of joys, and I was recently inspired by the bounty around me to make one of the world’s simplest and most delicious pizzas.
 
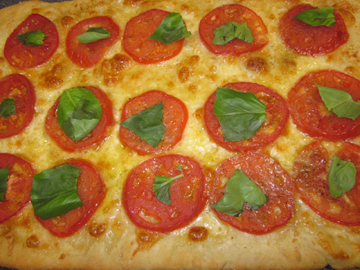
Pizza Margherita is about as basic as pizza can be—a crust topped with fresh mozzarella cheese, sliced fresh tomatoes, and fresh basil leaves. (One can use tomato sauce when fresh tomatoes are not in season, but the taste of the fresh tomatoes really comes through if you have them.)
 
This classic Neapolitan pizza was named after Margherita, the consort of Umberto I of Italy. Umberto was the second king of Italy, which was still gathering itself together in the 19th century. In 1889 she asked one of the premiere pizza makers in Naples to make her some pizza, then considered peasant food.
 
Margherita was delighted with the red, white, and green of this pizza, which reflected the colors of the Italian flag. It is still made in her honor at the Antiqua Pizzeria Brandi in Naples—and elsewhere.
 
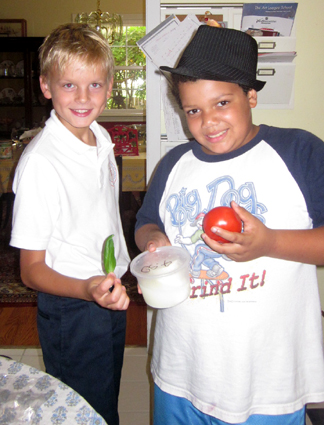
I told my nephew Michael and his friend Carson about Queen Margherita, and they immediately grabbed red, white, and green ingredients to celebrate her pizza.
 
Pizza Margherita embodies the “less is more” philosophy that I frequently try to espouse when cooking (although I don’t always succeed). The fresh, high-quality toppings really shine here. At this season of the year it’s my favorite pizza. 

Play with it a bit if you will—flavored oil would be nice—but don’t mess with its simplicity.

 
The Pizza
 
Ingredients:
 
1 pizza crust, store bought or homemade
olive oil as needed
1/2 pound fresh mozzarella cheese, sliced thinly
grated Parmesan-Reggiano cheese to taste
2 to 3 medium-sized ripe yet firm tomatoes, sliced thinly
salt and pepper to taste
several basil leaves, torn
 
Instructions:
 
Bring the pizza dough to room temperature and preheat the oven as indicated in your dough instructions.
 
Roll and/or stretch the pizza dough out gently (this may take a few tries) so that it forms a 14-inch circle (or a rectangle to go onto a cookie sheet if you don’t have a pizza pan). Use a little flour to help with this if necessary.
 
Spray your pan lightly with cooking spray and oil it even more lightly. Place the dough on the pan. Spread a very thin film of olive oil on top.
 
Arrange the mozzarella pieces over the crust, and top them with the grated cheese. Arrange the tomato slices on top. Sprinkle salt and pepper on top, and drizzle a tad more olive oil over all.
 
Bake the pizza until the cheese is nicely melted and the bottom of the crust turns golden brown. With my crust (from Trader Joe’s) and my oven this took about 20 minutes.
 
Remove the pizza from the oven, and arrange the basil leaves on top of the tomatoes. 

Serves 4 to 6. 

Queen Margherita (photo by Henri Le Lieure)

P.S. I would be remiss if I wrote about Pizza Margherita and forgot to mention my favorite place to eat it, the Green Emporium in Colrain, Massachusetts. It’s a bit far flung from Naples, but the ambiance and pizza can’t be beat. (The entertainment is pretty fabulous, too!)


If you enjoyed this post, please consider taking out an email subscription to my blog. Just click on the link below!

Subscribe to In Our Grandmothers’ Kitchens by Email.

Adventures in Real Estate

Monday, August 9th, 2010

Daffodil Cottage

 
Regular readers may have wondered at my recent uncharacteristic silence. (In fact, a few of you wrote to ask whether I was all right, which was very sweet.)
 
I have indeed taken a break from writing lately. My whole family has been busy helping my mother get ready to sell her house in Millburn, New Jersey.
 
For several years now, she and I have been traveling from Massachusetts (my home) to New Jersey (her home) to Virginia (my brother’s home) and then back to New Jersey and so on.
 
Frankly, living in three places has been exhausting and confusing for me, let alone the almost 92-year-old Jan!
 
So this spring she decided to put the New Jersey house on the market with the help of Reali. She and I spent a couple of weeks at the house (known as Daffodil Cottage) in June de-cluttering and making sure that all the little repair jobs we had been saving up got done. 
 
We then turned the place over to our realtor, the amazing Wendy Drucker.

 
Recently, my friend Peter asked me for advice about choosing a realtor. I sent him a long letter, and OF COURSE I can’t find it now. The gist of it was that the ideal realtor understands the unique features of one’s home and looks not just for the most money but also for the best fit for the house and its owner.
 
I also suggested that the best realtors were rooted in the communities in which they sold property.
 
Peter told me I was brilliant. Well, of course, I am—but my description of the ideal realtor had nothing to do with my brilliance and everything to do with Wendy’s.
 
She is cheerful, knowledgeable, and competent—and she cares about my mother, me, and the past and future of Daffodil Cottage. She has found a buyer who wants to bring up his children in Daffodil Cottage. The closing will take place next week!
 
Whenever we have been in a jam—locating a repairman while out of state, trying to figure out how to get rid of decades’ worth of garbage, looking for a real-estate lawyer who would reassure my mother that selling the house was indeed the right thing to do—Wendy has come through. 

She and her terrific husband Chris have spent more time in Daffodil Cottage lately than we have. Chris and my nephew Michael bonded when Chris stopped by to help my brother David install a fire extinguisher in the kitchen.

 
We call Chris Our Hero. We call Wendy a Goddess. (She is actually Goddess Number One. Number Two is my sister-in-law Leigh, who has been acting as the family organizer and archivist.)
 
What with all the sorting and packing, we haven’t had much time for cooking. We have eaten some yummy takeout, about which I’ll write soon. But we did invite Wendy and Chris over last week for a quick pasta supper.
 
We served the simple sauce below over whole-wheat rigatoni purchased at one of Millburn’s best places to shop, Mia Famiglia.
 
This little Italian deli sells tasty sandwiches and soups, aged Italian cheeses, and crusty breads.
 
Naturally, we prepared the sauce with Mia Famiglia’s own sausage, which is flavored with tons of fennel. If you can’t shop there (we won’t be able to soon!), you may make it with any Italian sausage you like (I’d mix hot and sweet if you don’t have the natural spiciness we enjoyed)—even vegetarian faux sausage.
 
Jan and I will be embarking on more adventures in real-estate soon: another experienced realtor, Carol Cooke, is looking for an apartment for us in Virginia. In the meantime, here is the sauce we served to Wendy and Chris. 

You don’t actually have to sell real estate to enjoy it.
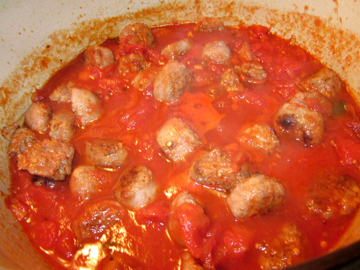
 
Daffodil Cottage Pasta Sauce
 
Ingredients:
 
12 ounces real (or veggie) Italian sausage, cut into small chunks
2 to 3 tablespoons extra-virgin olive oil (use only if using faux sausage or if your real sausage is quite lean)
2 to 3 cloves garlic, minced
another 2 to 3 tablespoons extra-virgin olive oil
1 large can (28 ounces) Italian tomatoes, crushed by hand or with a gentle knife
1 teaspoon salt
1/2 teaspoon black pepper
2 pinches red pepper flakes (or to taste)
1 teaspoon oregano leaves
fresh, chopped basil to taste
 
Instructions:
 
In a frying pan brown the sausage chunks, using oil if they are made of soy or are very lean. Drain and set aside.
 
In another large frying pan or a Dutch oven sauté the garlic in the olive oil just until it turns golden brown.
 
Add the tomatoes, salt, peppers, oregano, and sausage. Cook this mixture down for at least 20 minutes, uncovered. Stir occasionally. The sausage gets richer and denser if you simmer it for up to an hour; if you want to extend the cooking, make sure you cover the sauce almost all the way after it begins to thicken. 
Toss in the basil just before serving over pasta. Top with grated, aged Romano cheese from Mia Famiglia. Serves 4.


Goodbye, arts-and-crafts living room of Daffodil Cottage!
Thistle Be Yummy!

Friday, May 14th, 2010

 
Every few years my yard in Hawley, Massachusetts, is beset by a plague of thistles. Despite their gorgeous flowers, I detest the prickliness, the invasiveness, and the sheer tenacity of these plants.
 
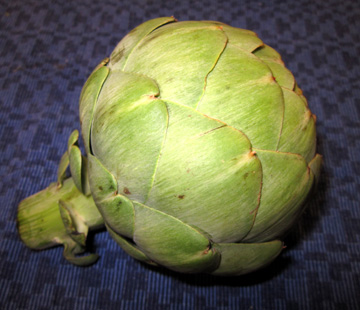
I do absolutely adore a certain kind of thistle—one that thrives in only one garden in Hawley: the ARTICHOKE!
 
My neighbors who grow it have asked to be nameless since they have very few thistles to share each year. I can tell you this much: they’re MUCH better gardeners than I.
 
(Actually, just about anyone in Hawley is a much better gardener than I. But that’s another blog post and possibly another blog.)
 
I was thrilled when my friend Peter told me recently about the annual Artichoke Festival in Castroville, California. It takes place this weekend.
 
I won’t be able to go. But I will enjoy thinking of the joy of the folks in Castroville on Saturday and Sunday as they attend the festival’s gala parade, the exhibition of fruit and vegetable art, the classic car show, and the wine exposition.
 
 
Naturally, I’ll also eat some artichokes this weekend. They aren’t quite as fresh here as they are in Castroville, but they’re looking pretty perky in local grocery stores.
 
I’m a traditionalist when it comes to artichokes. Generally, I just boil or steam them in water and vinegar. (I may try lemon juice this weekend.) And I can’t resist serving them with a little melted butter.
 
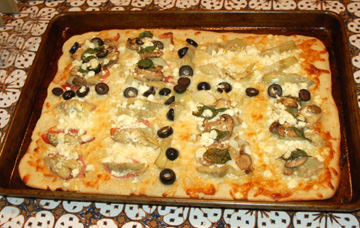
The Artichoke Festival has inspired me to play with artichokes a little more. My nephew Michael adores pizza so the other evening we prepared an artichoke pizza.
 
I wasn’t sure what to put on the pizza so we tried a number of different topping combinations in different sections of the pan.
 
We experimented with mushrooms, prosciutto, ripe olives, and fresh basil leaves. Surprisingly since I love it, the only thing I decided to leave out of the final recipe was the basil. The herb overwhelmed the delicate flavor of the artichoke hearts.
 
I highly recommend this recipe for those of you who want to hold your own artichoke festival this weekend. With my usual modesty, I think our pizza would qualify as vegetable art in the festival’s Agro Art Show.
 
 
Artichoke Plus Pizza
 
Since I was experimenting with this pizza, I don’t have exact quantities for most of the ingredients. Sprinkle happily but not too lavishly and you should be fine!
 
Ingredients:
 
1 1-pound package of commercial pizza dough (make your own if you want to)
10 ounces mushrooms, washed, trimmed, and sliced
a small amount of butter and extra-virgin olive oil for sautéing
1/2 teaspoon dried oregano (or 1 teaspoon fresh)
a sprinkling of salt and pepper
a SECOND small amount of extra-virgin olive oil for the pizza
2 to 3 handfuls of shredded mozzarella cheese
4 to 6 thin slices of prosciutto cut into small pieces
1 12-ounce jar of marinated artichoke hearts, drained and cut into quarters
1 cup (or so) feta cheese
1/2 cup pitted ripe olives, cut into rings
 
Instructions:
 
Bring the pizza dough to room temperature and preheat the oven as indicated in your dough instructions.
 
While the oven is preheating sauté the mushrooms in a little butter and olive oil until they are gently browned. Toss on the oregano, salt, and pepper, and set aside.
 
Next, roll and/or stretch the pizza dough out gently (this may take a few tries) so that it forms a 14-inch circle (or a rectangle to go onto a cookie sheet if you don’t have a pizza pan). Use a little flour to help with this if necessary.
 
Spray your pan lightly with cooking spray and oil it even more lightly. Place the dough on the pan. Spread a very thin film of olive oil on top.
 
Sprinkle the mozzarella all over the pizza, and arrange the pieces of prosciutto in a pleasing fashion, followed by the artichoke hearts, feta, and olive rings.
 
Bake the pizza until the cheese is nicely melted and the bottom of the crust turns golden brown. With my crust (from Trader Joe’s) and my oven this took 15 to 20 minutes.
 
Serves 4 to 6. 

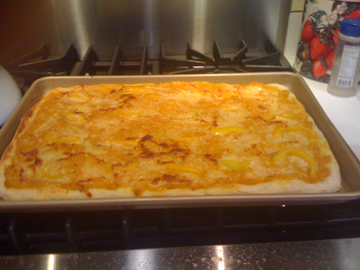
Here's the pizza just before baking......

If you enjoyed this post, please consider taking out an email subscription to my blog. Just click on the link below!

Subscribe to In Our Grandmothers’ Kitchens by Email.

Mexican Chicken Pizza

Tuesday, December 22nd, 2009

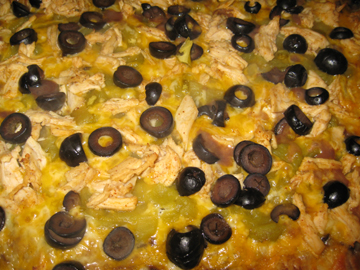
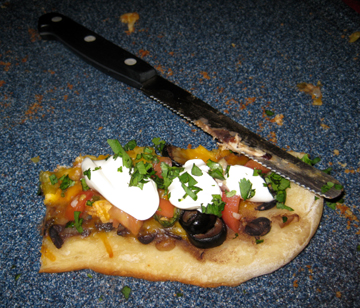
tacopizzaweb


My family and I were looking for something simple to make and eat while trimming our Christmas tree—and then Erin Cosby Idehenre posted a picture on Facebook of a pizza she had just made!
 
Erin is the great-granddaughter of Mary Parker (a.k.a. Gam), the late matriarch of my Hawley, Massachusetts, neighborhood. So we’re sort of related.
 
A multitalented young woman, Erin has two spirited little daughters, five-year-old Paige and five-month-old Mina, and a darling marine husband, Azi.
 
(I may be predisposed toward Azi because we met at a family event at which everyone was singing. When he heard my voice he asked whether I was an opera singer. Some people might say this indicates that he doesn’t know a lot about music. I say it indicates that he’s insightful!)
 
Erin’s picture of her creation looked so good that I had to make the pizza. She gave me the basic outlines, and I adapted a few things as is my wont.
 
My family was skeptical of the pizza’s original name, Chicken Taco Pizza. So I changed it to Mexican Chicken Pizza. (Sorry, Erin! You’re still a great cook!) The pizza isn’t really Mexican since Erin lives in North Carolina and I live in Massachusetts, but it is influenced by Mexican cuisine.
 
You’ll note that the recipe makes two pizzas. You may make two and freeze one, cut the ingredients in half, or use the ingredients listed and just pile them on a bit thicker.
 
You may also add to the pizza as you like. I was feeding a small child and didn’t want to get too spicy, but adults might like jalapeños on the thing.
 
However you make it, the recipe is a winner. We’re thinking of making it again Christmas Eve (and maybe even New Year’s Eve with leftover Christmas turkey!). It’s simple, tasty, and satisfying.
 
We’re confident that Santa will enjoy the piece we plan to leave out for him. No coal for us this year!
 
Left to right: Paige, Azi, Erin, and Baby Mina
 
 
Ingredients:
 
for the crust:
 
2 1-pound packages of commercial pizza dough (make your own if you want to; I got lazy)
 
for the black beans:
 
extra-virgin olive oil as need for sautéing
1 medium onion, finely chopped
1 garlic clove, minced
1 bay leaf (optional)
1 teaspoon ground cumin or cumin seed
1/2 teaspoon salt
several turns of the pepper grinder
1/2 cup chicken stock
1 15-ounce can black beans (either with liquid or partly drained, depending on how moist you like your pizza)
 
for the chicken:
 
1/4 cup chicken stock
2 to 3 cups cooked chicken, shredded
1 teaspoon chili powder
1/2 teaspoon ground cumin or cumin seed
 
for assembly:
 
the black bean mixture above
12 ounces shredded cheese (a mixture of Monterey Jack and cheddar works well)
the chicken mixture above
1 7-ounce can chopped green chiles
1 6-ounce can pitted ripe olives, drained and chopped into little rings
 
optional garnishes:
 
salsa fresca (or jarred salsa if fresh is unavailable)
sour cream
guacamole (we didn’t have it and thus didn’t use it, but it would be good!)
minced fresh cilantro
 
Instructions:
 
Bring the pizza dough to room temperature and preheat the oven as indicated in your dough instructions.
 
While the oven is preheating do the quick cooking of the beans and the chicken.
 
Start with the bean mixture. In a 2-quart saucepan with a fairly wide bottom (so you can start by sautéing) heat a splash of oil over medium-high heat until it begins to shimmer. Throw in the onion and garlic pieces, and sauté them for a couple of minutes to release their aroma and juices. Add the seasonings and stir for a minute; then stir in the stock and beans.
 
Bring the bean mixture to a boil, reduce the heat to medium, and simmer, stirring frequently, for 5 to 10 minutes—until the seasonings have mellowed a little and some of the liquid has evaporated. Set aside, and move on to the chicken mixture.
 
In a small frying pan over medium heat bring 1/4 cup chicken stock to a boil. Throw in the chicken, chili powder, and cumin, and cook for a minute or two, stirring. The seasonings should be well distributed throughout the chicken, and most of the stock should have evaporated. Set this mixture aside as well.
 
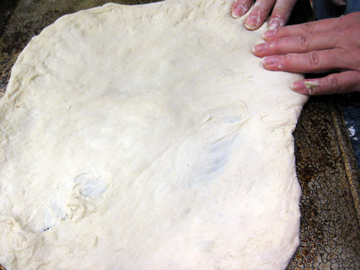
Next, roll and/or stretch each piece of pizza dough out gently (this may take a few tries) so that it forms a 14-inch circle (or a rectangle to go onto a cookie sheet if you don’t have a pizza pan). Use a little flour to help with this if necessary.
 

shaping doughweb

 
Spray your pans lightly with cooking spray and oil them even more lightly. Place the dough on the pans.
 
Divide the bean mixture between the two pizzas, and use a spatula to spread it almost to the edges of the pizzas. Sprinkle the cheese on next, followed by the chicken, green chiles, and olives.
 
Bake the pizza until the cheese is nicely melted and the bottom of the crust turns golden brown. With my crust (from Trader Joe’s) and my oven (old) this took 10 to 12 minutes.
 
Place the garnishes on bowls at the table so people can help themselves. (Erin put them on herself before serving the pizza; you may also do this.)
 
Makes 2 pizzas.
The last piece of pizza looked lonely. Fortunately, it didn't have to wait long to be eaten!

The last piece of pizza looked lonely. Fortunately, it didn't have to wait long to be eaten!

If you enjoyed this post, please consider taking out an email subscription to my blog. Just click on the link below!

Subscribe to In Our Grandmothers’ Kitchens by Email.