Archive for June, 2010

Barbacious Brownies

Monday, June 21st, 2010

 
I admit that I put rhubarb in a lot of things. This is one ‘barb recipe that would never have occurred to me, however.
 
I got the idea for these fudgy squares from Dennis Duncan of High Altitude Rhubarb, a bustling organic rhubarb farm in the foothills of the Rocky Mountains in Colorado. Like me, Dennis is a major rhubarb fan.
 
Dennis was a little vague about how much rhubarb to add to the brownies, suggesting that I simply add unsweetened rhubarb to my favorite brownie recipe. So I just punted. I wasn’t sure whether the brownies were a success … until my neighbors started asking for more!
 
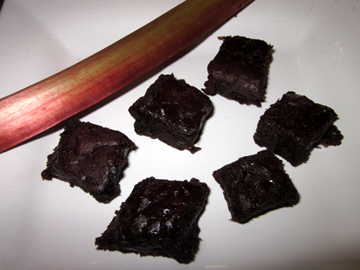
The result was a moist, DARK-chocolate brownie. Be prepared for a definite tart taste from the rhubarb. Your friends may not be a able to figure out what’s in the brownies, but if they’re fans of dark chocolate they’ll definitely be happy. 

By the way, High Altitude Rhubarb has a number of recipes available on it web site. My family is lobbying to try the rhubarb margaritas!

 
The Brownies
 
Ingredients:
 
1/2 cup (1 stick) sweet butter
1/2 cup unsweetened rhubarb puree, slightly warm
1 cup sugar
1/3 to 1/2 cup Dutch process cocoa (depending on how dark you want them; they’ll be dark either way!)
1/4 teaspoon salt
2 eggs
1/2 cup flour
2 teaspoons vanilla
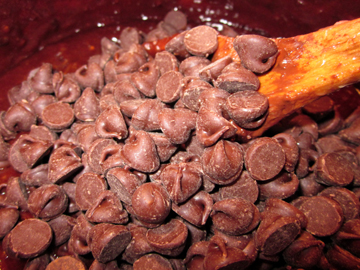
1 cup chocolate chips
 
Instructions:
 
Preheat the oven to 350 degrees. Generously butter a 9-inch-square pan. (Line it with buttered foil to omit any worries about sticking. I used a silicone pan so I didn’t have to.)
 
In a 2-quart saucepan melt the butter. Stir in the rhubarb, followed by the sugar. Heat, stirring, over medium heat until the sugar dissolves. Remove from heat.
 
Stir in the cocoa and salt. Beat in the eggs 1 at a time. Stir in the flour, followed by the vanilla and the chocolate chips.
 
Spoon the batter into the prepared pan. 

Bake the brownies for 25 minutes. Remove them from the oven. Loosen the edges gently with a table knife; then allow the brownies to cool. Cut into tiny pieces. Makes between 20 and 40 brownies, depending on how big you cut them.


If you enjoyed this post, please consider taking out an email subscription to my blog. Just click on the link below!

Subscribe to In Our Grandmothers’ Kitchens by Email.

Very Berry Salad

Friday, June 18th, 2010

 
We’re lucky enough to be enjoying lovely fresh baby spinach right now in my corner of Massachusetts.
 
My mother and I have been wallowing in it! First, we purchased a bag at the new Charlemont Farmers Market from Sheila Velazquez of Pen and Plow Farm in Hawley.
 
A couple of days later we went to pick up a share at our CSA, Wilder Brook Farm in Charlemont, and we were treated to more spinach!
 
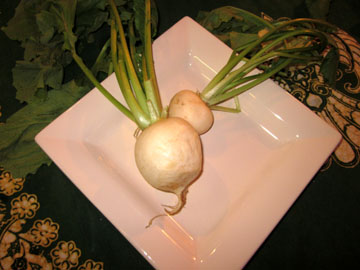
Kate and John at Wilder Brook also gave us some lovely strawberries—tiny, almost wild ones. In addition, among other veggies they handed out a root called hakurai. Hakurai is white and resembles a radish although it may be a little sweeter.
 
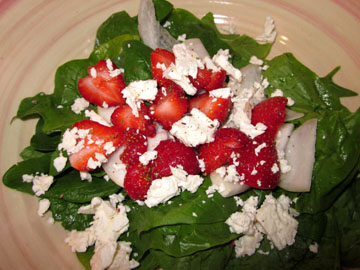
I decided to put together a salad featuring the spinach and some of our other goodies. I don’t believe one can ever have too many strawberries when they are in season so I used them in the vinaigrette as well as the salad.
 
The strawberry vinegar recipe I employed is from my Pudding Hollow Cookbook. Of course, I assume that everyone reading this blog either owns this lovely tome or is about to buy it! Just in case you’re waiting for a special occasion to add it to your cookbook library, I’m giving you the vinegar recipe here.
 
I haven’t specified exact measurements for the vinegar or a yield because the proportion of liquid you get from this recipe depends upon the juiciness of the berries you use—and how many you choose to use! 

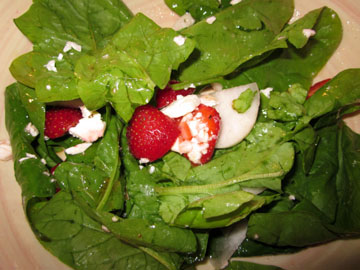
Do try this salad. It’s sweet with a touch of savory. The contrasting textures of the spinach, berries, hakurai, and cheese really work together. My mother looked doubtful when I put it in front of her, then promptly ate every bite and asked for more…….


Ingredients:
 
for the strawberry vinegar:
 
strawberries (don’t use too many at a time or this will take forever)
enough distilled white vinegar to cover them
equal amounts of sugar and water
 
for the salad:
 
1/2 pound fresh spinach
4 small or 2 larger (more or less to taste) hakurai bulbs (use radishes if you don’t have hakurai), thinly sliced and cut in half if they seem a little big
15 to 20 tiny strawberries
crumbled feta cheese to taste
 
for the vinaigrette:
 
2 tablespoons extra-virgin olive oil
1 tablespoon strawberry vinegar
salt and pepper to taste
 
Instructions:
 
The day before you want to eat your salad (or any time up to a year before!) start the vinegar.
 
Place the berries in a non-aluminum pan (I use a porcelain dish). Cover them with the vinegar, and leave them to soak, covered, overnight. If you forget them for a day and wait 2 nights, they will still be fine.
 
The next day (or the day after that), gently strain the juice through cheesecloth. You may squeeze the berries a little, but don’t overdo; letting the juice drip out on its own is best.
 
Measure the juice. Then measure a little under 1-1/2 times as much sugar and water as juice (i.e., if you have a cup of juice, use just under 1-1/2 cups of sugar and 1-1/2 cups of water) into a saucepan.
 
Cook the sugar/water mixture until it threads. Measure the resultant sugar syrup. Add an equal quantity of berry juice to it, and boil the mixture for 10 minutes. Strain this boiled vinegar through cheesecloth, and decant it into sterlized bottles. Cork or cover. Stored in the dark, strawberry vinegar should keep its color and flavor for up to a year.
 
 
When you’re ready to make the salad, combine its ingredients in a pretty bowl.
 
Combine the vinaigrette ingredients in a small jar with a tight lid. (Depending on your taste, you may want a little more or a little less dressing than I specify here, but the oil/vinegar proportion of 2 to 1 should hold.) 

Shake to combine, and toss the vinaigrette onto the salad. Serves 4 generously.


If you enjoyed this post, please consider taking out an email subscription to my blog. Just click on the link below!

Subscribe to In Our Grandmothers’ Kitchens by Email.

Chocolate-Covered Strawberries

Wednesday, June 16th, 2010

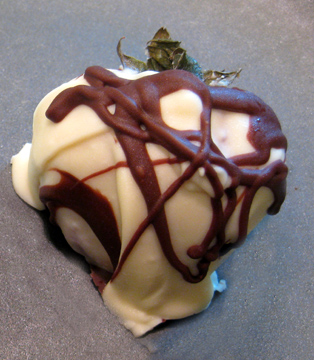
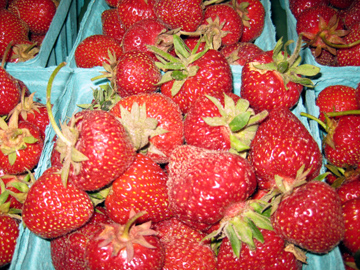
strawberrychocweb


Like many sweet lovers in Franklin County, Massachusetts, I make a pilgrimage each year in June or early July to Richardson’s Candy Kitchen in Deerfield for chocolate-covered strawberries. The store indicates that the strawberries have arrived by setting a giant fake fork spearing an equally fake strawberry on the front lawn.  


The strawberries at Richardson’s are delectable. They feature a layer of filling between strawberry and chocolate that is particularly appealing. Of course, these treats have to be eaten within 24 hours—but my family never seems to have trouble with that rule!


The version below omits the filling since I have no idea how Richardson’s manages to put it inside the chocolate. The recipe merits making nonetheless. How can you go wrong with strawberries and chocolate? 


I apologize for the vagueness of the list of ingredients. Basically, one uses as much chocolate as one likes (or has). I had a lot so I used about 1-1/2 to 2 ounces per strawberry, which was definitely excessive. Since I only make these treats once a year I don’t mind a little excess. But you may definitely use less chocolate than I did.


I suggest using good chocolate rather than chocolate chips. The chips fit around the berries very well since they have extra ingredients that make them congeal. Plain chocolate tastes a little better, however. And if you use white chocolate, make sure it is indeed white chocolate and not some white “confection.”


Ingredients:


strawberries to taste (you really don’t need more than 1 or 2 per person)
chocolate to taste—milk, dark, white, or a combination


Instructions:


Gently rinse the strawberries and drain them thoroughly.


In the bottom of a double boiler boil an inch or two of water. If you don’t have a double boiler, use a wide shallow pan such as a frying pan. Find a heat-proof bowl or saucepan to put inside. (Obviously, if you are using more than one chocolate, you will need more than one double boiler and/or set of pans.)


While the water is coming to a boil, chop the chocolate into small fairly uniform pieces. Turn off the heat below the water, and place the chocolate in a pan or bowl on top. Stir the chocolate as it melts over the hot water.


When the chocolate has melted, remove it from the water, carefully wiping the outside of its bowl or pan. Let it cool for a few moments so that it won’t make your strawberries go bad before you get a chance to eat them!


Carefully dip each strawberry in the chocolate, holding it by the hull. Place the covered strawberries on a silicon- or wax-paper-covered plate to cool. As soon as they are at room temperature either eat them or pop them into a covered container to cool in the refrigerator until you are ready to eat them.


Enjoy within 24 hours.


strawberriesweb

If you enjoyed this post, please consider taking out an email subscription to my blog. Just click on the link below!

Subscribe to In Our Grandmothers’ Kitchens by Email.

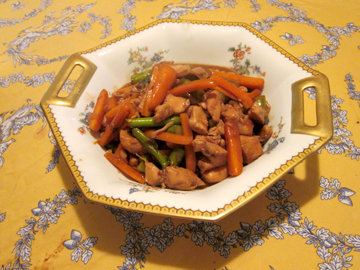
Chicken and Asparagus Stir Fry

Monday, June 14th, 2010

 
I’m afraid this may be my last asparagus recipe for the season. (Sob!) I’ll keep eating asparagus, of course. But it is beginning to disappear from our local farm stands.
 
I’m always up for a stir fry. You can do the chopping in advance and just throw the thing together in minutes.
 
This recipe is flexible. You may add just about any vegetables you like. I’ve used peppers, water chestnuts, and broccoli. I just look in the refrigerator! And I don’t see why vegetarians couldn’t substitute tofu for the chicken.
 
You may also skip parboiling the asparagus and carrot pieces, but then you will have to cook this dish longer.
 
The Stir Fry
 
Ingredients:
 
for the marinade:
 
4 teaspoons low-sodium soy sauce
4 teaspoons dry sherry
2 teaspoons cornstarch
1 tablespoon canola or peanut oil
 
for the sauce:
 
6 tablespoons low-sodium soy sauce
2 tablespoons dry sherry
2 tablespoons rice vinegar
2 teaspoons sugar
1 teaspoon cornstarch paste (1 teaspoon cornstarch dissolved in a little water)
 
for the stir fry:
 
canola or peanut oil as needed for frying
2 boned, skinned chicken breasts, chopped into bite-sized pieces
crushed red pepper to taste (I used about 3/4 teaspoon)
1 large or 2 small green onions (mostly white part), finely chopped
2 garlic cloves, finely chopped
1/2 cup asparagus, chopped into bite-sized pieces and parboiled for 2 minutes
1 large carrot, cut into bite-sized pieces and parboiled for 2 minutes
a splash of sesame oil
 
Instructions:
 
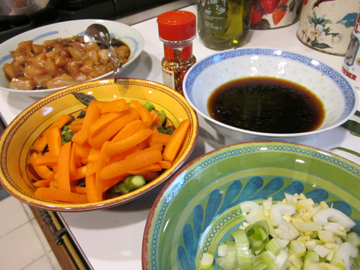
Combine the marinade ingredients in a medium bowl. Combine the sauce ingredients in a small bowl. Add the chicken pieces to the marinade. Let them marinate for 15 minutes.
 
In a wok or heavy frying pan heat enough oil to lightly cover the bottom of the pan. When it the oil is hot drain the chicken (reserving the marinade) and lightly brown the pieces, stirring. Toss in the red pepper and stir briefly.
 
Remove the chicken from the pan or move it to the sides. Quickly add and stir fry the onion and garlic pieces for a minute or two; then add the remaining vegetables. Stir fry for 1 to 2 more minutes. Return the chicken to the pot, add the sauce and the reserved marinade, and cook until the sauce thickens slightly and has coated all of the food. (This shouldn’t take more than a couple of minutes.)
 
Remove the pan from the heat and toss in the sesame oil. Serve over rice. 

Serves 4.


If you enjoyed this post, please consider taking out an email subscription to my blog. Just click on the link below!

Subscribe to In Our Grandmothers’ Kitchens by Email.

Upside Down Once More

Friday, June 11th, 2010

 
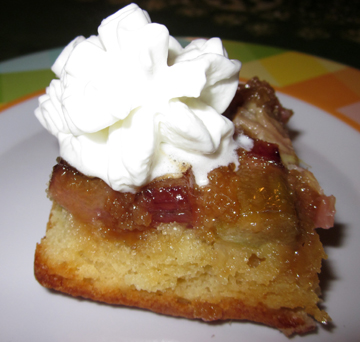
I know, I know, I just posted a recipe for rhubarb upside-down cake!
 
Let me explain.
 
After various peregrinations I am finally home in Hawley, Massachusetts, contemplating the gorgeous greenery everywhere and the abundant rhubarb in my yard.
 
(It’s even more abundant in the yard of my generous next-door neighbor Dennis!)
 
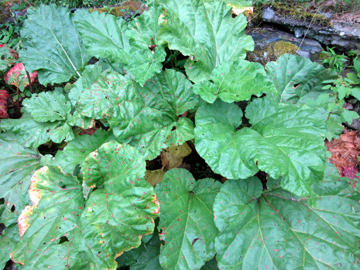
Seeing its lush (if poisonous) green leaves and strong red stalks has inspired me to try yet another upside-down cake.
 
You may recall that the previous recipe from Sue Haas featured marshmallows. This ingredient surprised some of the commenters, particularly the eloquent Flaneur.
 
Here I dispense with the marshmallows and combine Sue’s recipe with my own for pineapple upside-down cake.
 
It’s amazing how different two rhubarb cakes can be! Of course, I like them both. (I seldom dislike cake, for my sins.)
 
Sue’s Michigan upside-down cake is not too sweet and not too goopy; the marshmallows hold it together and give it a slight vanilla flavor.
 
This version is definitely sweeter and richer. On the other hand, it’s also a little more rhubarby. The marshmallows tend to tame the rhubarb in the other recipe. 

Which should you make? BOTH, of course………
 
Hawley Rhubarb Upside-Down Cake
 
Ingredients:
 
for the topping:
 
1/4 cup (1/2 stick) sweet butter
3/4 cup brown sugar, firmly packed
2 cups rhubarb (1/2-inch chunks)
 
for the cake:
 
1/2 cup (1 stick) butter, at room temperature
1 cup sugar
2 eggs
1/4 teaspoon salt
1 tablespoon baking powder
1-3/4 cups flour
1/2 cup milk
2 teaspoons vanilla
 
Instructions:
 
Preheat the oven to 350 degrees.
 
First make the topping (which goes on the bottom!).
 
Melt the butter in a saucepan. Stir in the brown sugar and cook, stirring, until it melts and bubbles—3 to 4 minutes.
 
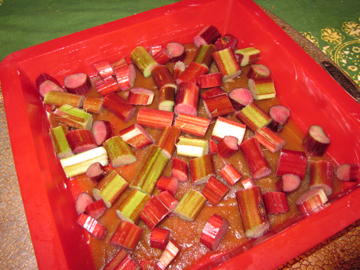
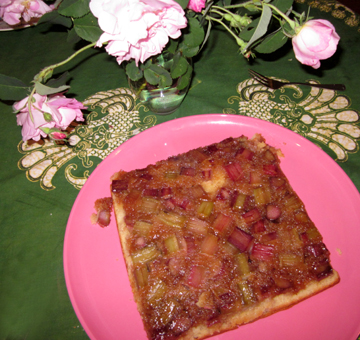
Transfer the brown-sugar mixture into a 9-inch-square cake pan. Spread it through the bottom of the pan. Arrange the rhubarb pieces on top as artistically as you can. (Mine weren’t very artistic.)
 
For the cake cream together the butter and sugar. Beat in the eggs, 1 at a time. Add the baking powder and salt. Stir in the flour alternately with the milk, beginning and ending with the flour. Stir in the vanilla, and pour the batter over the rhubarb mixture.
 
Bake the cake until a toothpick inserted into the center (but not too far down; don’t hit the rhubarb!) comes out clean, about 40 minutes. If the cake is brown but not done before this happens, decrease the oven temperature and continue baking.
 
Allow the cake to cool for 5 to 10 minutes. Loosen the edges with a knife, and invert the cake onto a serving plate held over the skillet. Turn upside-down. Remove pan.
 
Serve alone or with whipped cream. Serves 9. 

I should think you could absolutely bake this pan in a 10-inch iron skillet (heating the butter and brown sugar in it first, and then piling on the other ingredients). I couldn’t find my skillet, however, so I used a square pan and can only report on those results.
If you enjoyed this post, please consider taking out an email subscription to my blog. Just click on the link below!

Subscribe to In Our Grandmothers’ Kitchens by Email.