Archive for the ‘Condiments’ Category

Strawberry Season

Friday, June 26th, 2015

Tinkyin red web

I adore strawberries—in part because of their lovely, sweet color and juiciness and in part because (at least where I live in western Massachusetts) they ripen just as the earth does. Their arrival in local fields and farmstands coincides almost exactly with the arrival of summer.

I haven’t picked strawberries in several years. Living by myself as I currently do, I don’t need the large quantities with which one comes home after picking. I know I could make jam and freeze or dry the darn things. Somehow I’m short sighted enough to want to enjoy a few at a time while they’re ripe and not worry about putting them by too much. (I have made a little jam this year; old habits are hard to break.) I was also inspired to mix them with other fruits after I bought and tasted the 8 oz strawberry kiwi jam for sale I saw online.

This week on Mass Appeal I HAD to use strawberries. I made one savory recipe and one sweet. (Technically, the savory recipe was sweet as well; it actually included more sugar than the sweet. Because it was a little spicy and because it’s not a dessert I think of it as savory.)

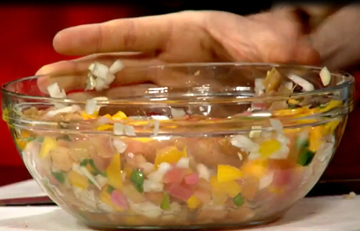
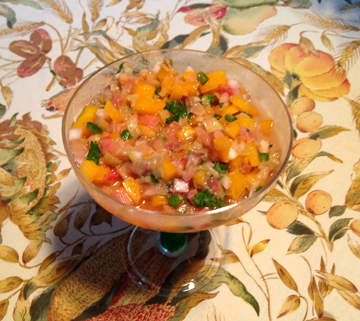
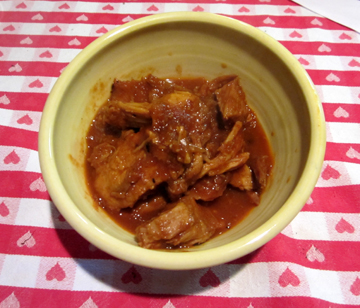
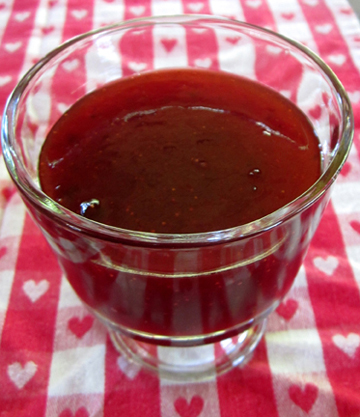
The savory recipe was strawberry chipotle sauce. This jam-like substance is wonderful as an appetizer on crackers with cream cheese, although it could also be used as a cooking sauce or condiment with chicken or pork.

The sweet recipe was my “once a year day” special. I generally consume a pretty balanced diet; I love my vegetables. Once a year, however, I like to have ONLY strawberry shortcake for supper. Shortcake is filling, and I can lose my hunger for it if I eat a real meal. If shortcake IS the meal, however, I can enjoy it with gusto. And eating it once at year can’t hurt me.

The shortcake recipe I posted before on this blog made one giant shortcake. I find it easier in general to make smaller shortcakes so I can serve as many people as I want (sometimes just Tinky!) and then give away or freeze the remaining cakes.

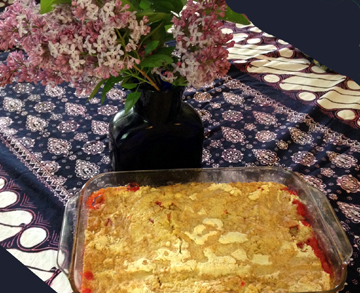
The shortcake recipe here comes from King Arthur Flour, and it couldn’t be easier. To make it more festive, I include a bit of stewed rhubarb along with the strawberries. We still have a bit of rhubarb here in the hilltowns, although it’s getting ready to leave us.

King Arthur Flour also provided the self-rising flour, the nice new sharp biscuit cutters, and the sparkling sugar for the top of the cakes.

I hope you enjoy the recipes … and the season … as much as I do.

strawberry chipotle sauce web

Strawberry Chipotle Sauce

Ingredients:

2 cups strawberry slices
1-1/2 cups sugar
1 teaspoon lemon juice
1 pinch salt
1 to 2 canned chipotles in adobo sauce (plus a little of the sauce)
1 dab butter

Instructions:

In a nonreactive pot combine the fruit, a cup of the sugar, and the lemon juice. Let the mixture sit for an hour or so to allow the berries to juice up.

Cook the fruit over low heat until tender. Add the remaining sugar, the salt, the chipotle, and the butter, and cook rapidly until thick, stirring frequently. Remove any foam you see (there shouldn’t be too much, thanks to the butter).

If you want jam, it will be ready when it sheets off a cold, stainless-steel spoon.

If you don’t cook it that long, your sauce will just be a bit more liquid. (I like it slightly more liquid so I measure the sauce with an instant-read thermometer and turn off the heat when the thermometer reads 217 or 218 degrees.)

Let the sauce cool for a few minutes; then pulverize it with a blender or immersion blender.

Refrigerate the sauce after it cools. Makes about 2 cups.

shortcakeweb

Strawberry-Rhubarb Shortcake

Ingredients:

for the filling:

3 cups chopped rhubarb
1/2 cup sugar
the juice of 1/2 lemon
3 cups chopped strawberries (lightly sweetened if you like them juicy)

for the self-rising biscuits:

2 cups self-rising flour
2 tablespoons sugar
1 cup heavy cream
1 teaspoon vanilla
1 to 2 tablespoons milk
a small amount of melted butter (optional)
coarse white sugar (optional)

for assembly:

sweetened whipped cream

Instructions:

A couple of hours before you want to begin working start the filling by sprinkling the sugar over the rhubarb. Stir in the lemon juice, and allow the rhubarb to juice up.

After an hour has passed prepare your filling. (You may also prepare the rhubarb portion of the filling in advance.) Bring the rhubarb mixture to a boil; reduce the heat; and cook, stirring, until the rhubarb becomes thick (about 5 to 7 minutes).

Allow the rhubarb to cool. While it is cooling you may begin making your shortcake biscuits. Preheat the oven to 425 degrees.

Whisk together the flour and sugar. In a separate bowl (or a measuring cup!) combine the cream and the vanilla.

Make a well in the middle of the dry ingredients. Pour the cream mixture into the well, and gently stir until the mixture is combined, adding a little milk as needed to incorporate all the ingredients into the liquid.

Turn the dough onto a floured work surface, and sprinkle a little more flour on top. Fold the dough over several times; then pat it into a circle or rectangle that is about 1/2 inch thick.

Using a sharp biscuit cutter cut the dough into rounds, about 2 to 2-1/4 inches wide (or however wide you want them!). Place them on an ungreased cookie sheet (you may line the sheet with parchment or silicone if you’re paranoid about sticking). If you like, brush the tops of your biscuits with melted butter and sprinkle a little coarse sugar on top.

Bake the biscuits until they are golden brown (12 to 16 minutes).

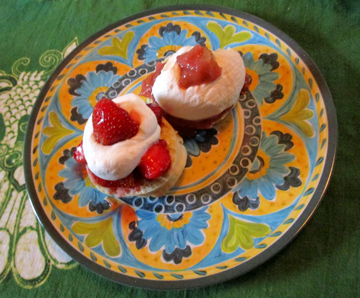
When you are ready to assemble your shortcakes, cut the biscuits in half horizontally. Decorate the bottom halves with the cooked filling followed by the strawberries; then dollop on whipped cream. Top with the biscuit tops. (Or divide each shortcake into two mini-shortcakes, one strawberry and one rhubarb, as shown in the photo above.)

Serves 8 to 10, depending on the size of your biscuits.

And now the video.…

I Love Rhubarb THIS MUCH!

Thursday, May 28th, 2015

thismuchweb

Readers, you know I adore rhubarb. It’s tangy, it’s versatile, it’s colorful, and (at least in my corner of New England, thanks to generous neighbors) it’s free.

As Judy Garland, Ethel Merman, and even I have queried in song, “Who could ask for anything more?”

Yesterday I returned to the TV program Mass Appeal to stir up a little rhubarb happiness. Seth Stutman and I made two dishes. The first (one does sometimes make dessert first) was a dump cake.

The recipe came from my friend Vicky, who reported that her kids love it. I don’t blame them. It’s a variant on a crisp or cobbler and takes only minutes to throw together. Dump cakes are one-pan desserts, often involving (as in this case) cake mixes.

I’m not a big fan of cake mixes, and I HAVE made this recipe with “scratch” ingredients. If you’d like to eschew the mix, just substitute 2 cups of flour, 2 teaspoons baking powder, 1/2 teaspoon salt, and 1-1/2 cups sugar for the cake mix; finish using 1 cup milk instead of water and add a little vanilla along with the milk.

The problem with that method is that it requires you to mix the dry ingredients together. In that case, you don’t really have a dump cake. If you’re a non-mix purist, however, you may not mind.

One solution to the mix dilemma is to use a high-quality mix like King Arthur Flour’s golden vanilla mix. I tried to get some of this—but the mix didn’t arrive in time for my TV spot!

Here is the recipe as we made it on the air. (Note that I did NOT use the strawberry gelatin, which I find excessive, although you can see it oozing in the photo here.)

dumpcakeweb

Rhubarb Dump Cake

Ingredients:

4 cups chopped rhubarb (a little over a pound, enough to fill your pan in a single layer)
1/2 cup white sugar
1 teaspoon cinnamon
1 (3 ounce) package strawberry gelatin (optional)
1 package yellow cake mix
1 cup water (or milk, according to cake-mix directions)
1/4 cup (1/2 stick) butter, melted (I tend to be a little generous with this—maybe 5/8 stick?)

Instructions:

Preheat the oven to 350 degrees. Grease a 9-by-13-inch baking dish. Spread the rhubarb evenly in the bottom of the baking dish.

Sprinkle the sugar over the rhubarb, followed by the cinnamon, the gelatin (if you are using it), and finally the cake mix. Pour the water and melted butter over the top. Do not stir. Bake for 45 minutes or until the rhubarb is tender.

Serve this treat by itself or with whipped cream, ice cream, or frozen yogurt.

making salsaweb

Seth and I also made a quick rhubarb salsa. This recipe differs from the one I have previously posted in that it is less sweet and less wet. It’s still delicious.

Rhubarb Salsa

Ingredients:

2 cups finely chopped rhubarb
1/2 inch ginger root, peeled and chopped finely
3 to 4 tablespoons minced sweet onion (e.g., red onion or Vidalia)
1 clove garlic, minced
1 yellow bell pepper, finely chopped
1 jalapeno pepper, seeded and chopped
1 handful cilantro, chopped
the juice of 1 lemon or 1 lime
2 teaspoons honey
salt to taste (about 1 teaspoon)

Instructions:

Place the rhubarb and ginger in a stainless-steel sieve or colander. Place them in a pot of boiling water. Leave them in until the rhubarb begins to soften (about 1 minute; you don’t want it super crunchy, but you don’t want mush, either).

Remove the rhubarb mixture from the boiling water, still in the sieve, and pour cold water over it briefly to stop it from cooking longer. Drain again. Let the rhubarb sit in the sieve with a couple of ice cubes to keep the cooling process going.

In a bowl combine the onion, the garlic, the peppers, and the cilantro.

In a small bowl combine the citrus juice and the honey. Stir in the salt. Add the drained rhubarb mixture (make sure to take out any remaining ice). Mix well.

Refrigerate the salsa for at least an hour before serving. Serve with chips or crackers and cream cheese, or with chicken, pork, or fish. Makes about 2 cups.

Rhubarb Salsa for Michelleweb

If you’d like to watch the video (in which I refer to another Rhubarb in my life and deliberate marrying a TV star), it appears below.

You’ll note that Seth and I refer several times to slime and sliming. His co-star Ashley Kohl was broadcasting that day from a local children’s hospital. For “Slime Day 2015” Ashley and several doctors and nurses were doused with a bright green liquid to entertain the children.

Ashley is gorgeous. Darn her, she even looked good with slime all over her! I still love her, however, and so did the kids.

The Last Bastion of Sexism

Tuesday, July 1st, 2014
My neighbors' pig doing its thing.

My neighbors’ pig doing its thing.

As July 4 approaches I know I should write about grilling. Here’s the problem: I’m not a griller. Grilling is one of the few areas of life in which I am sexist. (The others all involve home repair.) Somehow I always wait until men arrive to haul out the charcoal and the grill.

I apologize to the men in my life—and to the goddesses of feminism. One of these days I’ll work on my grilling skills. Not before this Friday, however.

So here’s my compromise: a sauce that can accompany grilled meats, poultry, or vegetables.

My neighbors the Gillans recently held a pig roast. The whole thing was incredibly impressive, and the meat was delicious. At the end of the weekend, even after giving away lots of meat to their houseguests, they had quite a bit of pork on bones remaining.

I hate to see good meat and bones get thrown out so I volunteered to take the leftovers home. (Did I mention that the Gillans are REALLY GREAT neighbors? They gladly gave me the pork.) I boiled the whole thing for a while with onions and spices so that it was easy to get the meat off the bones. I used quite a bit of the meat in a tasty bean dish.

There was still leftover meat.

So … I threw together some barbecue sauce. I know I cheated a bit with this sauce by using a ketchup base. Our tomatoes aren’t in season yet, however, so the ketchup was expedient. The resulting sauce turned out just the way I like it, with lots of sweet and lots of tart.

I wish my readers a glorious fourth! May all of you, female and male, grill up a storm.

barbecue porkweb

Kansas City-ish Barbecue Sauce

Ingredients:

extra-virgin olive oil as needed for sautéing
1 onion, chopped
2 cloves garlic, minced
2 tablespoons chili powder
1-1/2 teaspoons salt
ground pepper to taste
1/4 cup cider vinegar
1/4 cup lemon juice
1 cup catsup (use all-natural and/or organic ketchup)
1/3 cup molasses (or molasses mixed with maple syrup)
1/3 cup brown sugar
1 tablespoon Worcestershire sauce
a few shakes of hot sauce
2 tablespoons water

Instructions:

Warm the oil in a skillet. Sauté the onion for 5 minutes. Add the garlic, and toss it around in the pan for 30 seconds. Stir in the chili powder, salt, and pepper, and stir to release their oils. When the spices start drying out in the pan, stir in the remaining ingredients.

Bring the mixture to a boil. Reduce the heat and simmer, uncovered, for 15 minutes, stirring frequently.

Let the sauce cool briefly; then put it in a blender and blend until smooth. Pour the blended sauce into a clean glass jar, bring it to room temperature, and then refrigerate it. This sauce is best made the day before you want to use it. It should last for at least 2 weeks.

Makes about 1-1/2 cups.

girlcrackerweb

If you enjoyed this post, please consider taking out an email subscription to my blog. Just click on the link below!

Subscribe to In Our Grandmothers’ Kitchens by Email.

The Homemade Pantry

Friday, July 20th, 2012

I read a lot of cookbooks, although I don’t use a lot of them; I’m too busy tinkering with my own recipes! The books I enjoy the most are the ones that give the reader a sense of the author’s personality as well as his or her philosophy of food.

The Homemade Pantry: 101 Foods You Can Stop Buying and Start Making fits these criteria beautifully. The publisher, Clarkson Potter, recently sent me a review copy.

The book’s author, Alana Chernila of Great Barrington, Massachusetts, is hugely likable. (One also meets the 30-something cook’s attractive husband and two daughters in the course of reading the book.) And her passion for making as much food as possible in the home is infectious.

At the book’s beginning, Chernila lists her reasons for making food from scratch:

1. Food made at home is better for you.
2. Food made at home tastes better.
3. Food made at home usually costs less.
4. Food made at home eliminates unnecessary packaging.
5. Food made at home will change the way you think about food.

It’s hard to argue with her logic. Most of us are increasingly wary of additives in food. The simplest and most tasty way to avoid these is to control what goes into what we eat. We’re all looking for yummy, affordable food that won’t make too big a carbon footprint. And we all enjoy turning food into a joy as well as a necessity.

To me Chernila’s recipes fall into three categories. The first will be the least useful to people like me, who are country dwellers and routinely prepare many of these foods at home already.

My neighbors generally make their own applesauce, their own basic birthday cakes, and their own cornbread. If they have time and the season is good, they freeze fruits and vegetables for winter use as well. Chernila’s recipes for foods like these will interest readers like me—we’re all looking for new ways to do what we already do—but they won’t be essential.

The second category is more exotic. Chernila makes a number of foods that I have a feeling I may make only once but will enjoy making: butter, graham crackers (actually, I HAVE made these in the past, but her recipe looks better than mine!), mozzarella cheese, crème fraîche.

The third category encompasses practical foods that I can see incorporating into my regular menus: crackers, yogurt, and best of all condiments like mustard and hot sauce.

In fact, I have already made some mustard and have a photo to prove it!

Part of the charm of The Homemade Pantry is the informality and non-preachiness of its prose. A busy wife, mother, food writer, and selectman, Alana Chernila admits that her kitchen can look like a disaster … and that some days she doesn’t have time to make everything her family eats from scratch.

She does try, however. And so should the rest of us.

Homemade Pantry Mustard

We recently heard the parable of the mustard seed in church. Thanks to the parable, over the years mustard seeds have become a symbol of great things coming from small starts. It’s nice to remember that the seeds can literally create something a lot bigger than you would expect from looking at them as well!

Here is Alana Chernila’s mustard recipe, which I made last week. It makes a spicy mustard, but that suits me just fine.

Ingredients:

1/2 cup brown or yellow mustard seeds (I used yellow this time but have some brown seeds I’m going to try soon.)
1/3 cup red wine vinegar
2 garlic cloves, minced
2 teaspoons salt
3 tablespoons honey

Instructions:

Pour the mustard seeds into a medium mixing bowl and cover with water 3 inches higher than the seeds. Cover the bowl, and let it sit at room temperature for 12 hours.

Drain the water from the seeds, reserving at least 1/4 cup of the water. Combine the soaked mustard seeds, the vinegar, garlic, salt, honey, and 1/4 cup of the soaking water in a blender, and blend until smooth. Transfer the mixture to a jar, cover, and refrigerate. If you can, wait for a week before using the mustard so that the flavors can blend; on Day One it tastes very mustardy!

According to Chernila this mustard lasts for 2 months in the fridge. Makes about 1-1/2 cups.

Draining the seeds….

Hilo to Hawley Barbecue Sauce

Thursday, September 9th, 2010
 
 
Generally, I know what I’m going to get when I test a recipe. Every once in a while, however, I’m completely surprised.
 
Surprise was definitely the word of the day when I tried this recipe.
 
Devany Vickery-Davidson is a writer and ceramic artist who lives in Hawaii. Her blog, My Hawaiian Home, features delectable recipes and stories of her adventures in her tropical milieu. 

Her dog Valentine is NEARLY as cute as my Truffle. And Valentine has her own lei. (I refuse to show this picture to Truffle!)
 

Valentine in Paradise (Courtesy of Devany Vickery-Davidson)

 
Devany recently sent me her homemade ketchup recipe. I was determined to try it out.
 
I had a lot of tomatoes in the house (not enough, it turned out—Devany DID warn me that one needed a huge garden to make her recipe!). And my nephew Michael is a ketchup fanatic.
 
I adapted Devany’s Hawaiian-oriented recipe to reflect local ingredients around my home in Hawley, Massachusetts. Devany often uses palm vinegar; I used cider vinegar from Apex Orchards. She uses raw cane and brown sugar; I used maple syrup. She uses a Maui onion; I used a local Vidalia type.
 
I cooked and cooked and cooked the ketchup. When it was still wet but getting thicker I tasted it.
 
It didn’t taste ANYTHING like ketchup. My local cider vinegar was way too robust.
 
At the suggestion of my friend Chef Michael Collins I added more maple syrup and kept cooking. When I tasted the revised ketchup, it still wasn’t very ketchup like.
 
I was just about to give up when I tasted it again and experienced a moment of epiphany.
 
My concoction still didn’t taste anything like ketchup. BUT … it DID taste like really good barbecue sauce.
 
So that’s what I’m calling it.
 
You’ll only want to make this recipe if you have lots and lots of tomatoes in your garden or farm share; it’s quite expensive per ounce if you go out and buy the darn things.
 
It’s worth trying if you have a surfeit of tomatoes, however. It’s dark, sweet, and tangy—perfect barbecue sauce, in other words. 

Thank you, Devany, for leading me on this adventure! Whatever this stuff is called, it’s delicious.

 
Devany’s Sauce Adapted by Tinky
 
Ingredients:
 
1-1/2 cups cider vinegar
1/2 teaspoon mustard seeds
1/2 teaspoon allspice
1-1/2 teaspoons celery seeds
2 teaspoons whole cloves
8 black peppercorns
1 fresh bay leaf or 1/2 dried bay leaf
1 cinnamon stick
1 nutmeg nut, grated
12 pounds (5 kilograms) chopped tomatoes—6 to 7 quarts (Devany suggests using Roma or paste tomatoes, but any tomato will do; regular tomatoes, which I used, just have more liquid and will therefore yield less sauce.)
6 cloves garlic, finely chopped
1 large sweet onion, finely chopped
2 Serrano peppers, seeded and finely chopped
1 cup maple syrup
1 tablespoon kosher salt (Devany uses 2 tablespoons coarse sea salt, but I used what I had)
 
Instructions:
 
Place the vinegar in a saucepan. Tie the mustard seeds, allspice, celery seeds, cloves, and peppercorns in a piece of cheesecloth. Place the cheesecloth bag in the vinegar along with the bay leaf, cinnamon stick, and nutmeg.
 
Bring the mixture slowly to a boil; then turn off the heat and let the vinegar sit with the spices for 1 hour. Discard the spices (except for the nutmeg, which will be in the vinegar!) and set the vinegar aside.
 
In a large nonreactive kettle combine the tomatoes, garlic, onion, and peppers. Heat the ingredients over medium heat, stirring frequently to avoid scorching on the bottom of the pan. Bring the mixture to a boil and reduce the heat; allow the mixture to simmer for 25 minutes, stirring occasionally.
 
Stir in the spiced vinegar and continue to simmer for another 1/2 hour, still stirring from time to time.
 
Remove the pot from the heat and put the tomatoes and other vegetables through a food mill. Try to extract as much pulp and juice as you can. Discard the leftover solids, seeds, and skins.
 
Stir the maple syrup and salt into the tomato mixture, and return it to the heat. Continue to cook over low heat, stirring frequently, until your barbecue sauce achieves the desired consistency. (This took me about 4 hours.) 

I ended up with a little less than 1 quart of sauce, but one would probably achieve a larger yield (and a shorter cooking time) with the tomatoes Devany recommends.


If you enjoyed this post, please consider taking out an email subscription to my blog. Just click on the link below!

Subscribe to In Our Grandmothers’ Kitchens by Email.