Posts Tagged ‘Sue Haas’

Sue’s Meatloaf (and an Announcement!)

Tuesday, June 18th, 2013
Sue Haas

Sue Haas

Longtime blog reader Sue Haas of Seattle wrote several months ago to share her meatloaf recipe—but somehow or other I didn’t manage to make her loaf until a few nights ago. A friend who was coming to dinner requested something in the nature of comfort food to dispel the gloom of the weather (lots and lots of rain!). So I pulled out Sue’s recipe.

My local general store doesn’t sell veal so I used 1 pound of lean ground beef and 1/2 pound of pork. The only other changes I made (and they were minor, including the use of fresh instead of dried oregano) are noted in the recipe.

This meatloaf is tender and very flavorful. I particularly enjoyed the fresh herbs; I might throw in even more of them another time and leave the spices on the rack until winter.

By the way, in case I haven’t already bombarded you with this information, I do want to mention that my book Pulling Taffy will officially come out this Sunday and may be ordered right now from its website. (The website will also help you find the eBook and audiobook!)

In addition to talking about my final year with my mother and sharing family stories and thoughts, the book features a number of recipes—many of them from this very blog! Please consider supporting me by purchasing the book.

My mother would be celebrating this week!

My mother would be celebrating this week!

And now, on to Sue’s recipe……

Sue’s Meatloaf

Ingredients:

1-1/2 pounds meatloaf mixture (1/3 lean ground beef, 1/3 ground veal, 1/3 ground pork)
1 cup fresh breadcrumbs (I used my maple oatmeal bread, which makes great crumbs)
2 tablespoons milk
1 egg, beaten
1 small onion, finely chopped (or half of a large onion)
1 to 2 garlic cloves (according to your taste), minced
1/2 cup fresh parsley, chopped
1/4 cup fresh sage, chopped
1 teaspoon dried oregano (I used 2 teaspoons fresh since that’s what I had)
1 teaspoon ground cumin
1/2 teaspoon (sweet smoked) paprika (or regular)
1-1/2 teaspoons fine sea salt
1 teaspoon ground black pepper
1 tablespoon Worcestershire sauce
1/4 cup ketchup

Instructions:

Preheat the oven to 350 degrees.

Place the meat mixture in a food processor and pulse a bit for a finer grind. Transfer it to a large bowl. Add the remaining ingredients. Mix with hands.

Put the mixture into a 9-x-5 inch loaf pan and pat into loaf shape. (I used a regular baking pan and shaped a free-form loaf.)

Bake for about 1 hour, or until the center of the meat reaches 170 degrees on a meat thermometer. (I covered the loaf for the first half hour and then uncovered it to finish cooking.)

Serve with ketchup, if desired. Serves 6.

loaftryweb

Sue’s Enchilagna

Friday, October 15th, 2010

 
There’s a chill in the air. We have had our first frost, and comfort food is on the menu of the day.
 
Luckily for me, Sue Haas of Seattle has come forward with another tasty recipe—a layered version of enchiladas that saves prep time over rolling. She says she was inspired by Mexican food she ate in Los Angeles.
 
Sue adds that one can substitute 1 pound of cooked chicken or 10 ounces frozen spinach (thawed) for the browned ground beef. I haven’t tried either, but both sound good.
 
I received photos of Sue’s own enchilagna, which looked a lot neater than mine (presentation was never my forte), but unfortunately her camera’s focus was off so readers are stuck with my messy version.
 
I added the chili powder and cumin, which didn’t overwhelm the dish at all. Next time, I think I’ll use a little more cheese (I skimped a bit on cheese so the top of my tortillas dried up a little) and try using the green chili salsa Sue suggested. I like my enchiladas wet! 

The basic flavor of the dish as written worked very well, however. And its warmth and heartiness made my guests (and their hostess) very happy last night. Thank you, Sue!


The Casserole
 
Ingredients:
 
1 pound ground beef
1 large yellow onion, chopped
2 cloves garlic, minced
olive oil as needed
3 green onions, chopped (2 for sauce; 1 to sprinkle on top before baking)
2 4-ounce cans diced green chile peppers, mild (or use green chile salsa for a spicier flavor)
1 14.5-ounce can stewed tomatoes, chopped
2 fresh medium tomatoes, diced (optional)
1 8-ounce can tomato sauce
salt and pepper to taste (about 1 teaspoon of salt and a dash of pepper should be enough)
1/ 2 teaspoon chili powder
1/2 teaspoon ground cumin
8 ounces Monterey jack or cheddar cheese, grated (about 2 cups)
1 dozen small corn tortillas (yellow or white corn tortillas)
1 pint sour cream
3 tablespoons fresh cilantro, chopped (optional)
 
Instructions:
 
Preheat the oven to 350 degrees.
 
Brown the ground beef and drain it. In a separate pan cook the onion and garlic in just a little olive oil until the onion pieces are translucent. Add the 2 green onions, the green chiles, the stewed tomatoes, the tomato sauce, the fresh tomatoes (if you are using them) the salt, the pepper, and the spices. Simmer about 10 minutes and keep warm on low heat.
 
Meanwhile, cut the tortillas into quarters. Put a generous dab (about 1 tablespoonful) of sour cream on each piece of tortilla and make a layer on the bottom of a lightly oiled 9″ x 13″ baking pan.
 
Add a layer of the meat mixture; then add a layer of grated jack cheese. Continue layering the tortillas with dabs of sour cream, meat (or chicken or spinach) mixture, and grated cheese, until all is used. There should be about 3 layers. End with a top layer of tortillas dabbed with sour cream, grated cheese, and 1 chopped green onion (and chopped cilantro, optional).
 
Bake until the casserole is bubbly and hot, and the cheese and sour cream are slightly browned, about 30 minutes. Serve with salsa, as desired.
 
Serves 6 (large servings) to 12 (small servings).

Emma DuPuy Reed’s Pickled Peaches

Friday, September 3rd, 2010

This photo and others come courtesy of Sue Haas.

 
Canning season is in full force—and as usual I am thinking about putting food up more than I’m doing it.
 
Thanks to Sue Haas of Seattle, however, I have made my first ever batch of pickled peaches. This lovely old fashioned recipe comes from Sue’s grandmother, Emma DuPuy Reed.
 
Miss Emma was born in 1871 and died in 1962 and was, according to Sue, “quite a lady.” Sue is working on a young-adult novel about her grandmother’s life. In the meantime, here are a few recollections she shared with me.
 
Emma Louisa DuPuy was born and grew up in a French Huguenot family in Philadelphia. Her father, Charles Meredith DuPuy, an engineer and inventor, was one of the founding members of the Huguenot Society of America. He also wrote a book about the DuPuy Family. She and her sisters were neighbors of and friends with Cecilia Beaux, the American Impressionist portrait painter, in West Philly. There are several portraits of DuPuy family members painted by C. Beaux. One is now at the Williams College Museum of Art…. 

Emma was a tall, dignified, beautiful lady with big blue eyes, a generous smile, and a wonderful sense of humor. She married William Ebenezer Reed, an engineer (from Manchester, VT), in 1902. Emma lived in a rent-controlled high-ceilinged, elegant apartment in Manhattan for over 50 years. Emma and “Eben” raised their five children there and Grandma gave birth to all of them at home. They had a maid and a cook and kept the traditions of Victorian table settings. I still remember dipping my fingers in thin, glass finger bowls placed on lace doilies–possibly necessary after eating sticky pickled peaches! 

      Emma DuPuy in 1901, a year before her marriage 
 
Emma loved peaches. Peach ice cream was her favorite. She made her pickled peaches in Blue Point, L. I., where she also made raspberry jelly. I remember catching soft-shelled crabs in Blue Point, too, and occasionally seeing them escape from their bucket and scramble around on the kitchen floor before being plopped into boiling water.
 
I remember, as a child, helping my mother, Mary, make pickled peaches…mostly I remember peeling them after they’d been dipped in boiling water. Sometimes my fingers would turn purple and I remember my mother telling me to use lemon juice to get rid of the stains. (I didn’t notice that happening when I made the pickled peaches this summer, though.)
 
This summer my own daughter, Alysa, wanted me to teach her how to can. So we canned raspberry jam. She was busy on the day I canned the pickled peaches but I’m passing the recipe on to her.
 
I remember, as a child, eating juicy, cinnamon-y pickled peaches with roast turkey on Thanksgiving at Grandma’s Manhattan apartment many years ago. And I can’t wait to serve them to my own grandchildren at our Thanksgiving table this year in Seattle.
 
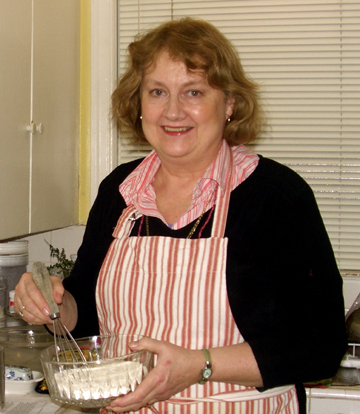
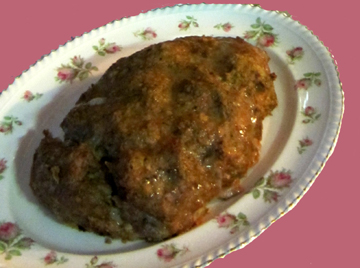
Sue’s recollections of her grandmother struck me as perfect for a project called In Our Grandmothers’ Kitchens. So did this recipe. I did get pretty sticky handling the peaches, but what sweet stickiness! I can hardly wait to eat them with a festive meal.
 
Sue suggests serving them with roast pork or ham as well as turkey. You may either take the cloves out of the peaches yourself before serving or let your guests remove their own. 

Now, if I only had a rent-controlled apartment in New York City………..


Ingredients:
 
8 pounds fresh peaches (about 16 medium peaches)
4 pounds sugar (about 9 cups)
1 pint white vinegar
whole cloves (6 per peach = 96 cloves)
4 sticks cinnamon
 
Equipment:
 
large canning pot with rack
large cooking pot for heating water to peel peaches
large cooking pot for syrup and peaches
cheesecloth (cut a piece about 8 x 12 inches)
string
teaspoon
4 to 5 sterilized pint canning jars, new lids, and screwbands (sterilize in dishwasher or in boiling water in large canning pot with rack)
 
Instructions:
 
Preparation of canning pot:
 
Fill large canning pot with enough water to cover the two quart-size canning jars. Bring water to boil and keep hot.
 
Peeling peaches in hot water & adding cloves:
 
Boil about 2 quarts of water in a big cooking pot. Remove from heat. Place peaches in hot water for about 1 minute, or long enough so that skins may be peeled off easily. Remove peaches from water and cool in colander. Peel peaches and discard peels. You may cut peaches into halves or leave them whole. I cut them in half, but it’s tricky to keep them intact. Whole peaches are easier. Insert 3 cloves into each peeled peach half. Set aside.
 
Cinnamon spice packet:
 
Make a spice packet with 4 sticks of cinnamon wrapped in a piece of cheesecloth. Tie a string to close the bag. Leave one end of string long enough to reach over the side of the pot to pull out when syrup has thickened. You may tie the long end of the string to a teaspoon to weigh it down so it won’t slip back into the pot.
 
Note from Tinky: I just made a little knot in the cheesecloth and removed the cinnamon with a slotted spoon later. I couldn’t find my string!
 
Syrup: 

Mix sugar and vinegar in a large cooking pot. Add the cinnamon packet to the pot. Heat on stove to boiling. Turn down and let simmer about 30 minutes until syrup turns golden and thickens.


Cooking the Peaches

 
Cook peaches in syrup:
 
Place peaches in the syrup and cook about 10 minutes on medium heat until soft. You may have to add the peaches in batches, depending on the size of the pot. When the peaches have finished cooking remove the cinnamon packet from the liquid. (You may save the cinnamon sticks and place one in each jar of pickled peaches if you like.)
 
Canning peaches:
 
Place peaches in the jars and pour syrup to about half an inch from the top of each jar. Seal with new canning lids and screw on screwbands. Place sealed jars on rack in hot water bath in large canning pot, making sure tops of jars are covered with water. Boil gently for about 10 minutes. Bubbles of air will come out of the jars.
 
Remove jars from water bath and let sit on a tray without moving them for about 24 hours. You’ll know jars are sealed if you hear the lids pop, and they are flat (not convex) when you press the tops with your finger. 

Makes 4 to 5 pints. You will have quite a bit of leftover syrup. You may use it to can more peaches, serve it as an appetizer over cream cheese, or make a cocktail with it. (Tinky here: I’m thinking maybe something with rum?) Since we’re talking about grandmothers, I might just bring some to my grandma in the senior home (visit https://www.chelseaseniorliving.com/locations/new-jersey/manalapan/ to get an idea).

If you enjoyed this post, please consider taking out an email subscription to my blog. Just click on the link below!

Subscribe to In Our Grandmothers’ Kitchens by Email.

Hooray for Rhubarb!

Tuesday, June 1st, 2010

 
Sometimes I find it hard to recognize my childhood memories as being about the real me.
 
I have no trouble recalling the loquaciousness, the adorability, or (I admit it!) the mule-like stubbornness of the young Tinky.
 
Nevertheless, it’s hard to believe that I spent my earliest years disliking some of the foods I now adore.
 
I thought spinach was bitter and ugly.
 
I disliked Chinese food so much that when my parents wanted to teach me to eat with chopsticks they fed me ravioli. (By the way, ravioli are A LOT harder to pick up with chopsticks than most Chinese food.)
 
And I was determined not to eat rhubarb in any form.
 
Today I’m thrilled to see fresh spinach at a farmstand. I long for Chinese food regularly.
 
Rhubarb represents my biggest conversion. Rhubarb is probably my favorite fruit. Don’t bother to tell me that it’s not really a fruit. I know. We treat it as a fruit, however.
 
Rhubarb is beautiful. It’s resilient. It’s sweet and tart simultaneously. And it’s versatile. (Gosh, I just realized that I may love rhubarb because IT’S LIKE ME!)
 
Today I am happy to post my first rhubarb recipe of this spring, courtesy of Sue Haas of Seattle, Washington, a regular reader of this blog. Sue received it in turn from her mother in Albion, Michigan, a bastion of rhubarb almost as strong as my own western Massachusetts.
 
Their cake is excellent for supper or even for breakfast. The marshmallows (yes, marshmallows!) tone down the tartness of the rhubarb, and the cake is substantial without being over heavy.
 

Before I get to the recipe, I’d like to remind readers that I have several other rhubarb recipes on this blog, including cole slaw, crumble, salsa, and soda. And then there’s the rhubarb baked Alaska….

 
Michigan Rhubarb Upside-Down Cake
 
Ingredients:
 
for the topping:
 
3 cups rhubarb (1/2-inch chunks)
3/4 cup sugar
10 large marshmallows, cut in half
 
for the cake:
 
1/2 cup (1 stick) sweet butter, at room temperature
1 cup sugar
2 eggs
1/4 teaspoon salt
3 teaspoons baking powder
1-3/4 cups flour
1/2 cup milk
1 teaspoon vanilla
 
Instructions:
 
Preheat the oven to 350 degrees. Generously grease a 10-inch iron skillet, and arrange the rhubarb pieces in the bottom. (If you don’t have a 10-inch skillet, use an 8- or 9-inch square baking pan.) Sprinkle the sugar on top, followed by the marshmallows.
 
For the cake cream together the butter and sugar. Beat in the eggs, 1 at a time. Add the baking powder and salt. Stir in the flour alternately with the milk, beginning and ending with the flour. Stir in the vanilla, and pour the batter over the rhubarb mixture.
 
Bake the cake until a toothpick inserted into the center (but not too far down; don’t hit the rhubarb!) comes out clean, about 50 minutes. If the cake is brown but not done before this happens, decrease the oven temperature and continue baking.
 
Allow the cake to cool for 5 to 10 minutes. Loosen the edges with a knife, and invert the cake onto a serving plate held over the skillet. Turn upside down. Remove skillet.
 

Serve alone or with whipped cream. Serves 12.


If you enjoyed this post, please consider taking out an email subscription to my blog. Just click on the link below!

Subscribe to In Our Grandmothers’ Kitchens by Email.

Sue’s Swedish Brown Cookies

Tuesday, March 9th, 2010
Sue Haas in the Kitchen

Sue Haas in the Kitchen

 
Here is the fourth installment in my Twelve Cookies of Christmas series. These brown cookies (they derive their color from caramelization of the sugar) will banish your March blahs.
 
The recipe comes from Sue Haas in Seattle, Washington, a regular reader of this blog and the dear sister of my dear minister, Cara Hochhalter. Sue writes children’s books when she isn’t working on art sales and appraisals. She says the recipe originated with her friend Marilynn Pray.
 
Sue and her daughter Alysa are busy planting a garden together. (I AM SO JEALOUS! We still have snow in the northeast!) Alysa writes about gardening and cooking on her own blog, Grass-Fed Goat.
 
The photos on this post come courtesy of Sue and Alysa, although I did test the recipe. (I felt it was my sacred duty.) The cookies taste of butter and honey: what could be better? Next time I may try them with maple syrup instead of the honey. After all, March is Maple Month!
 
Sue uses C&H Baker’s Sugar for the “fine baking sugar” (a.k.a. superfine sugar) called for in the recipe. I was in a hurry and didn’t have time to go to the store for superfine sugar so I put regular sugar in my blender and pulsed. It needed a little sorting through (the pulsing left a few clumps), but after the sorting it was an acceptable substitute.
 
Enjoy the cookies. I hope you’re thinking about your own garden….
 
Cookies_tableweb
 
The Cookies
 
Ingredients:
 
1/2 cup (1 stick) sweet butter at room temperature
1/2 cup fine baking sugar
1/2 teaspoon baking soda
1 cup flour
3 teaspoons honey (plus a small amount more if needed)
 
Instructions:
 
Preheat the oven to 300 degrees. Line a large cookie sheet with parchment paper or a silicone baking mat. Cream together the butter and sugar; then beat in the baking soda. (Sue actually whisks the soda into the flour, but I added it by itself.) Add the flour and continue to mix lightly until combined.
 
Drizzle the honey into the flour and sugar/butter mixture and stir. The dough will stick together a bit better with the honey added. You may need to add a little more honey to make the dough hold together. Form the dough into a large “softball” shape with your hands. Divide it into two pieces.
 
Roll and pat one of the pieces of dough onto the parchment on one long side of the pan into a long, flattened 12-inch “snake,” smushing the dough with your fingers so that it forms an even flat piece, about 2 to 3 inches wide and about 12 inches long.
 
Do the same with the second piece of dough placed several inches apart on the same sheet from the first piece. You will have two long, flat shapes of dough on one cookie sheet.
 
2 Flattened snakesweb
 
Bake the snakes until the dough is golden brown. (Sue estimated this at 15 to 20 minutes; it took a little longer in my oven.)
 
Check the dough after about 12 minutes. Take the cookies out earlier, or when they are only light brown, if you want a softer cookie. (I liked them crisp.)
 
Remove the cookie sheet from the oven. Let it cool for only 2 to 3 minutes. While the dough is still warm cut a long line down the center of each snake-shaped piece. Then cut each “snake” diagonally at about one-inch intervals to make 3-inch long cookie strips.
 
diagweb
 
If you’d rather make really long diagonal strips (about 5- to 6-inch-long cookie strips), omit making the vertical cut down the center of each snake. That would reduce the total number of finished cookies by half. OR cut each 3-inch cookie strip in half to make tiny 1-1/2-inch-long bite-size pieces to feed a big crowd.
 
“Light, buttery, and delicious,” says Sue of her cookies.  Makes 20 to 40 cookies, depending on how you cut them.
Alysa and Sue

Alysa and Sue


If you enjoyed this post, please consider taking out an email subscription to my blog. Just click on the link below!

Subscribe to In Our Grandmothers’ Kitchens by Email.