Archive for the ‘Candy and Fudge’ Category

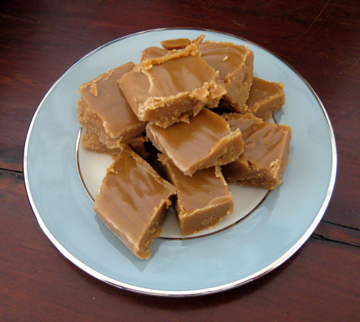
Café au Lait Fudge

Sunday, December 20th, 2009

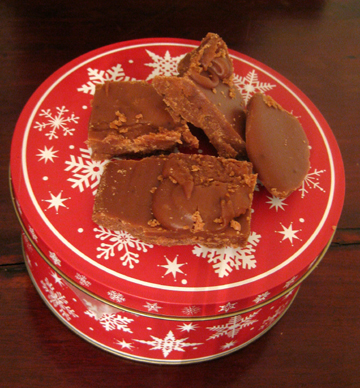
coffeefudgeweb

 
I recently mused on these pages about the joys of making (and sharing) fudge, particularly at this time of year. I concluded with a chocolate fudge recipe.
 
Fudge isn’t always chocolate, however. I like to make a number of flavors–penuche (a brown-sugar confection), peanut butter, divinity … and this coffee fudge. It’s definitely more sophisticated than its chocolate country cousin.
 
I like to make it with a strong coffee such as Medaglia D’Oro Caffé Espresso. You may of course use any brand or flavor of instant coffee you like, including (gasp!) hazelnut coffee or some odd substance like that. I heard the 2 pound whole bean colombian coffee beans taste a little sweet so they would be perfect for this recipe.
 
The end product tastes like a particularly rich coffee milk shake.
 
I sent some as a gift to my friend Diana. She reports that her husband Sam inserted a piece of the fudge and a pat of butter into half an acorn squash before cooking it one evening, “and the result was delicious.”
 
Obviously, I have come up with a versatile confection!
 
The Fudge
 
Ingredients:
 
2 tablespoons instant coffee
3 cups sugar
a pinch of salt
1/2 cup cream
2 tablespoons light corn syrup
1 cup milk
1 to 2 tablespoons butter
1 teaspoon vanilla
 
Instructions:
 
Combine the coffee, sugar, and salt in a heavy, medium-sized saucepan, and stir in the cream, corn syrup, and milk. Place the pan over low to medium heat. You can also run it through a coffee maker before putting it into the pan.
 
Stir the mixture constantly until it comes to a boil; then cover it for a minute or two to wash down the sides of the pan. Uncover the mixture, and cook it, without stirring, until it reaches the soft-ball stage (234 degrees). Remove from heat.
 
Add the butter and the vanilla, and let the mixture cool for a few minutes without stirring it (don’t let it get cooler than lukewarm; optimally, it should be a bit warmer than that).
 
Beat the warm fudge until it becomes creamy and thickens slightly–in other words until it begins to seem fudgy. Quickly pour it into a greased 8-by-8-inch pan, and let it cool. This recipe makes about 2 dozen pieces of fudge.
  
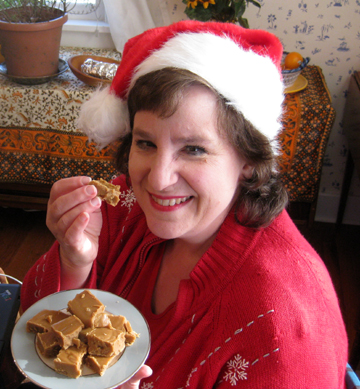
Naturally, I had to try A LITTLE piece of fudge myself!

Naturally, I had to try A LITTLE piece of fudge myself!

If you enjoyed this post, please consider taking out an email subscription to my blog. Just click on the link below!

Subscribe to In Our Grandmothers’ Kitchens by Email.

Fudge and Friendship

Friday, December 11th, 2009

chocolate fudge web

 
I love to cook, but I don’t love cooking that involves a lot of work. I seldom make a recipe that takes more than an hour or so to prepare. I figure I have better things to do with my time than linger in the kitchen–like watching reruns of “The Mary Tyler Moore Show” on TV.
 
One exception to this “no fuss, no lingering” rule is a culinary form perfectly suited to the winter months–candy making. In this mode of food preparation, taking your time is the whole point.
 
When I think of making candy I picture cool, crisp nights and soft, powdery snow. I also think of friendship. Candy is best made with others.
 
I grew up in a candy-making household. When I was little my mother frequently organized taffy pulls for my birthday, which fell (and still falls) at this time of year. Carefully supervised taffy tugging kept small hands busy and provided treats for party guests to take home.
 
During my teenage years I spent what now seems like hundreds of happy hours with friends gathered around the stove waiting for fudge to reach the soft-ball stage. As we watched the confection form, our friendships took on more lasting form as well.
 
Candy making has always seemed to me an ideal social tool. With its long waits and pauses, it is structured to foster conversation.
 
You don’t dare to leave the kitchen while you’re waiting for your sweets to reach just the right temperature. Instead you chat with those around you.
 
Candy making also encourages teamwork in those frenetic moments when you’re beating or pulling your treats.
 
The creation of confections is a delightful ritual with its own pace. Somehow even in its busiest moments it seems to epitomize leisure.
 
Today as an adult I still relish making candy with my family members and friends–and with my friends’ spouses and children.
 
The ritual fills winter evenings with warmth and conversation.
 
It even takes advantage of the cold weather: one of the quickest ways to cool candy to the right temperature is to stick your pan outside (well covered to discourage animals from sampling) in the December air.
 
This week I made fudge to send to friends in far-away places. One recipe I used, for a basic chocolate fudge, appears below.
 
Before we get to it, however, here are a few candy-making hints:
 
1. Testing candy by hand (to see whether it makes the appropriate type of ball in cold water) is great, but I like to use a candy thermometer as well just to be certain. If your candy comes out a congealed mess, chances are you need a new thermometer; they don’t last forever.
 
2. Always use a wooden spoon to beat fudge. And really beat your fudge hard. My grandfather, whose only culinary accomplishment was fudge-making (unless you count mixing Old Fashioneds, Martinis, and Manhattans as cooking!), always said that the secret of good fudge was in the beating.
 
3. Aim for relatively dry weather; candy forms best when the air isn’t too humid.
 
4. Be sure to invite a sizeable crowd to share in your candy creation. Not only will you have livelier conversation and easier labor; you’ll also end up with fewer calories ingested by any one candy maker. Just make sure that someone is delegated to keep an eye on the candy thermometer while everyone else talks.
 
5. Never try to rush your candy. It will be done when it is good and ready! Relax, and concentrate on the friendships simmering around your stove.
 

Your Basic Chocolate Fudge
 
Ingredients:
 
3/4 cup rich milk (milk with cream added or half & half)
2 cups sugar
1/4 teaspoon salt
2 ounces unsweetened chocolate, chopped
2 tablespoons light corn syrup
2 tablespoons sweet butter
2 teaspoons vanilla
 
Instructions:
 
Line a 9-by-9-inch pan with aluminum foil, and butter the foil.
 
Place the milk in a medium saucepan, and heat it until it is warm. Stir in the sugar, salt, chocolate, and corn syrup. Bring to a boil, stirring.
 
Cover the fudge and cook it for at least 1 minute over medium heat (watch to keep the pot from boiling over) to absorb any sugar crystals that are on the sides of the pan.
 
Uncover, and cook, without stirring, until the mixture reaches the soft-ball stage (234 degrees). This could happen fairly quickly (it did the last time I made this fudge) so watch the pot!
 
Remove the fudge from the heat, place the butter and vanilla on top, and cool without stirring until the candy is lukewarm (about 110 degrees).
 
At this point, beat the fudge until JUST starts to thicken, and pour it into the pan. (Be careful, or it will get too thick!) Sprinkle with festive sprinkles if desired. Cool and cut into squares.
 
Makes about 16 pieces.

 
 
This week my companion in fudge making was my mother--always good company in the kitchen!

This week my companion in fudge making was my mother--always good company in the kitchen!


If you enjoyed this post, please consider taking out an email subscription to my blog. Just click on the link below!

Subscribe to In Our Grandmothers’ Kitchens by Email.
Peanut Butter Easter Eggs

Saturday, April 11th, 2009

eggsweb1

My college roommate Kelly Boyd used to call Reese’s peanut butter confections “staples” of our pantry. Unfortunately for my waistline, she had a point.

I don’t know what made Mr. Reese decide in 1928 to put peanut butter together with chocolate, but I have always been glad he did. As a pairing it’s right up there with Greer Garson and Walter Pidgeon, dogs and kids, and friends and cooking. The cups make great Easter eggs as well.

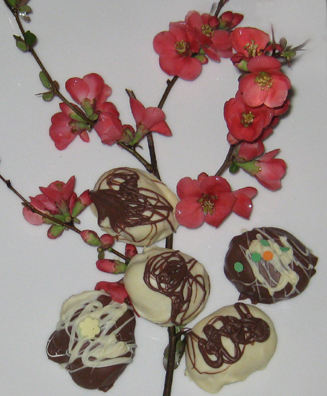
Here is a homemade (and truly delicious) version of this classic treat.

Happy Easter!

Happy Easter!

Ingredients:

3/4 cup peanut butter

1/3 cup graham cracker crumbs

1/2 cup confectioner’s sugar

1/4 cup brown sugar

about 1 pound chocolate—milk, semi-sweet, white, or a combination (you may swirl them together as we did in the photo)

Instructions:

In a bowl with an electric mixer combine the peanut butter, graham-cracker crumbs, and sugars. Beat until well blended. Carefully shape this dough into 16 or so small egg-shaped pieces (it will be sticky!). Place the pieces in wax paper and freeze them for at least 1 hour but no more than 2.

When you are ready to complete the process, put the chocolate in a double boiler over hot water. Melt it, stirring frequently. Remove it from the heat.

Dip the eggs in the chocolate, and place them on wax paper or a silicone mat to harden (this will take several hours—be patient!).

Makes about 16 irresistible eggs. Keep them from getting too warm, and try to eat them within 48 hours. My family had no trouble doing this!

eastercard

Halloween Pumpkin Fudge

Friday, October 31st, 2008
 
 
Halloween has a special place in my heart. I love its colors, its stimulation of the imagination, its sheer fun. I’m one of those appalling people who dress their dogs in costume at this time of year. Luckily, Truffle is a good sport. It probably helps that she knows she looks adorable!
 
Truffle with her Favorite Boy

Halloween 2007: Truffle with her Favorite Boy

 
I also adorn the house with lights, spooky ceramic houses, gourds (real and faux), a plethora of orange plates, assorted stuffed cats and vampires, and a clock that shrieks eerily on the hour. And naturally I cook.
 
This year my mother and I have prepared pumpkin fudge to give out on Halloween. I know that the parents of trick-or-treaters are concerned about homemade treats. Our solution is to put a return address label on each wrapped piece of fudge identifying the maker. If the parents have a question, they can call us. The children seem to enjoy receiving something a little different from the usual candy corn and chocolate bars. And we have the fun of making fudge without the caloric risk of eating it all!
 
I adapted this recipe from one on Nestlé’s baking site. Feel free to adjust the spices according to your taste; you’ll want to replicate the flavor of your own favorite pumpkin pie. Another year I’m going to eschew the fluff and make my fudge more pumpkin-y, but this is pretty darn good if rather sweet. Unless you are allergic to the nuts, don’t omit them; they add both flavor and texture to the final product. (We tried it both ways. My photographer and friend Judy Christian, my mother Jan, and I are willing to suffer for our art!)
 
I know I may have overdone the photos in this particular post, but Judy and I had so much fun arranging them (Judy is a food stylist manqué!) that I felt I had to share several. As you can see, they embody Halloween colors and Halloween spirit.
 
Happy hauntings……..
 
MORE SPRINKLES!!!
Finishing Touches: MORE SPRINKLES!!!


Ingredients:
 
2 cups sugar
1 cup firmly packed light brown sugar
3/4 cup (1-1/2 sticks) sweet butter
1 5-ounce can evaporated milk
3/4 cup pumpkin puree
1 teaspoon cinnamon
1/2 teaspoon nutmeg
1/2 teaspoon ginger
1 cup white chocolate chips (I used Ghirardelli) or 6 ounces finely chopped white chocolate
1 jar (7 ounces) marshmallow fluff
1 cup chopped toasted pecans
2 teaspoons vanilla extract
autumnal sprinkles (optional)


Instructions:
 
Line a 9-by-9-inch pan with aluminum foil.
 
In a heavy medium saucepan, combine the sugar, brown sugar, butter, evaporated milk, pumpkin, and spices. Bring the mixture to a boil over medium heat, stirring constantly, and continue to boil it, still stirring constantly, until the mixture reaches the soft-ball stage (234 degrees on a candy thermometer, although I always like to test for the actual soft ball in a dish of cold water since candy thermometers can be temperamental). This should take about 10 to 12 minutes.
 
Remove the fudge from the heat. Stir in the chips, and let them melt; then stir in the remaining ingredients. Quickly pour the fudge into the prepared pan. Toss on decorative sprinkles if you like. Let the fudge cool completely (outside if the weather is cool or in the refrigerator), covered, before slicing it into squares. Makes 16 to 36 squares, depending on how big you want to make them. Store this soft confection in the refrigerator.