Archive for the ‘Cookies and Bars’ Category

The Way the Cookie ALMOST Crumbles

Wednesday, December 27th, 2023

It may seem odd to provide a cookie recipe after Christmas, which is the day of days for cookies. If you’re like me, however, you’ll entertain friends and give gifts all the way until New Year’s Day and perhaps until Epiphany. I hope this recipe sweetens the extended season for you and your companions.

I was first served Peppermint Meltaways long ago by a friend. Since then, I have thought about making them—but I never actually got around to it until last week, when I found myself with a huge number of mini-candy canes.

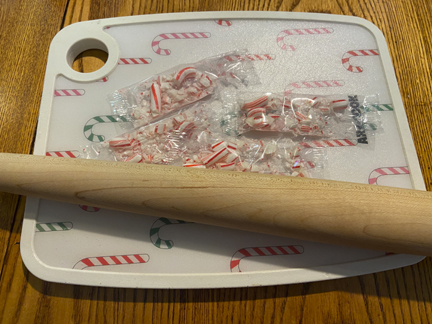
I had ordered them to share at the office but had accidentally ordered two containers of candy canes instead of the one the office needed. I thus faced a surfeit of peppermint.

I recalled that the Meltaways featured crushed candy canes as a topping. I must admit that the recipe didn’t use as many candy canes as I had hoped—but it used some, and the people to whom I served the cookies were very happy indeed. I’m consequently sharing the recipe with you.

I have always adored peppermint, particularly at this time of year. I tried recently to find out why peppermint is so popular at Christmas, but no one (at least no one who inhabited that arcane source of information, the World Wide Web) seemed to know.

I did discover that the first candy canes, in the 19th century, were apparently a solid white confection not flavored with peppermint; the addition of stripes and that special flavoring came in the 20th century.

I also learned that peppermint is an ancient medicinal herb. Its name comes from Greek mythology. According to lore, the god Hades fell in love with a nymph named Minthe.

His wife, Persephone, discovered their affair and in a fit of rage turned poor Minthe into a plant that would grow wild and get trampled underfoot. (Personally, I think Persephone should have taken her wrath out on Hades instead, but I imagine he was a more formidable foe than the poor nymph.)

Hades altered Persephone’s spell slightly. He couldn’t return Minthe to her former form, but he made the plant she had become smell sweet so that people would think well of her.

The best explanation I could find for the popularity of peppermint at this time of year comes from the digital media company known as Tasting Table. An article posted there reminds readers that at this time of year we tend to indulge in an awful lot of food.

Mint aids digestion. Consequently, Tasting Table dubs it “the Official Digestif of the Holiday Season.”

Whether I love peppermint for its digestive properties or just for the way it perks up my palate, it definitely appeals to me. I am despondent if I can’t find peppermint-stick ice cream during the holiday season.

Luckily, in the area in which I live, it is manufactured by a number of ice-cream makers, but I purchase it early in December just in case stores run out later.

I should warn you that these cookies are a bit challenging, so much so that I almost decided to post a completely different recipe this week. As I noted earlier, however, the people who ate them adored them so I went with the original recipe.

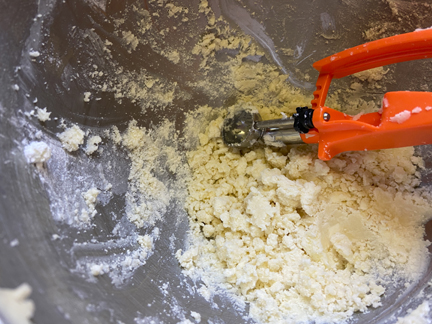
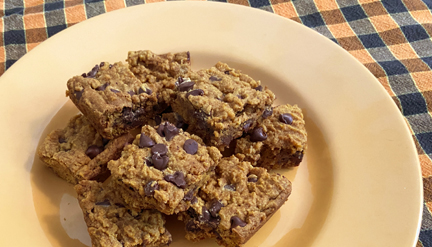
The problem, as you can see from the list of ingredients below and the photo above, is that a lot of the Peppermint Meltaway cookie dough is made up of two very crumbly substances, confectioner’s sugar and cornstarch.

In addition, the cookies have no egg to bind them. Even after one chills the dough for an hour, it can be difficult to shape into balls. They really DO need to be shaped into firm balls, however.

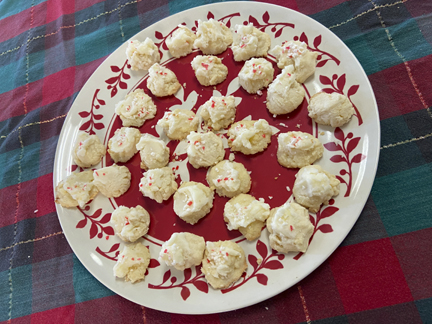
I tried just forming a few very delicately, thinking they would be okay once they went into the oven. Unfortunately, those few cookies spread all over the place. If you persist and create firm balls, however, you will be rewarded with delicate cookies that live up to their name by melting in your mouth.

I should think they would be even prettier if one were to tint the icing on top a pretty pink. In the absence of food coloring (mine is hiding somewhere in my pantry), the white icing does just fine. After all, the crushed candy canes provide a welcome hint of color.

Please note that the peppermint flavor in the cookies and the icing comes from peppermint extract, not peppermint oil. If you have only peppermint oil, be aware that it is much more concentrated than the extract so you’ll need only a few drops.

Peppermint Meltaways
(adapted from Land O Lakes)

Ingredients:

for the cookies:
1-1/4 cups flour
1/2 cup cornstarch
1 cup (2 sticks) sweet butter at room temperature
1/2 cup confectioner’s sugar
1/2 teaspoon peppermint extract

for the icing:
1/4 cup (1/2 stick) softened sweet butter
3/4 cup confectioner’s sugar, plus more if needed
1 teaspoon peppermint extract
milk if necessary to stir

for finishing:
crushed candy canes as needed

Instructions:

Begin by making the cookies. In a small bowl, whisk together the flour and the cornstarch. Set them aside.

In another mixing bowl, cream together the butter and the confectioner’s sugar. Beat in the extract. Slowly add the flour/cornstarch mixture and blend well. Push down on the dough with your hands to help it hold together. Cover the bowl, and refrigerate the dough for an hour.

Preheat the oven to 350 degrees. Line 2 baking sheets with parchment. Form the dough into 1-inch (or slightly larger) balls, pressing each ball gently but firmly to help it stick together. Place the balls 2 inches apart on the baking sheets.

Bake the cookies for 10 to 12 minutes, until the edges just start to turn brown. Remove the cookie sheets from the oven, and allow the cookies to cool completely.

When the cookies are cool, beat together the frosting ingredients. Adjust the consistency by adding a little more softened butter, a little more confectioner’s sugar, and/or a little milk to make sure you have a spreadable frosting. Gently spread a little frosting on each cooled cookie.

Top the cookies with a little crushed peppermint. This can be messy because the crushed candy wants to go everywhere except on top of the cookies, but persist. You’ll end up with very pretty cookies. Makes about 30 festive cookies.

Pumpkins and Halloween

Thursday, October 26th, 2023

Courtesy of Hicks Family Farm

Halloween may be my favorite holiday. It’s certainly the holiday for which I have the most decorations. My Halloween bins are even more numerous than my Christmas bins.

Some of this has to do with Halloween’s traditional spookiness, which gives the day (and night) a little excitement. The eve of All Saint’s Day, it’s supposed to be a time at which the dead can visit the world once more.

Our tradition of dressing up for the day originated from the thought that dead people and evil spirits would be frightened by our costumes or would fail to recognize us.

My usual witch attire, which involves a hat with a boatload of sequins and a feather boa, wouldn’t fool any ghost or spirit, but I still enjoy putting it on at this time of year. It makes me feel glamorous and just a tad wicked.

Mostly, I love Halloween because the orange lights, illuminated ceramic houses, and jack-o-lanterns around my house represent my way of raging against the dying of the light. By the time we get to the end of October, it’s impossible to delude ourselves that the days are not becoming shorter and colder.

Filling the house with decorations and dressing up help us insulate ourselves against the lowering temperatures and sun.

Pumpkins are associated with Halloween for a number of reasons. My favorite one is seasonality. It takes a long time for pumpkins to mature so they tend to ripen at this time of year. Their bright orange hue also mimics a fire and cheers people up.

These gourds are grounded in our continent and its history. Pumpkins have been grown in North America for 9000 years, according to the University of California.

Pumpkins are popular in my immediate neighborhood—and not just with humans.

My neighbor Ruth festoons her patio with them. Ruth is here only on weekends. On weekdays I frequently call her and say “Guess who’s coming to dinner!” as I spy a family of deer lounging on her patio and snacking on her decorations.

I wish I had a picture of them to show off here; they are very sweet and grateful looking. Unfortunately, if I get close enough to the deer to snap a photo, my dog Cocoa barks like crazy, and they run away. (The deer, like ghosts and spirits, aren’t scared of me, but Cocoa gives them pause.)

I must admit that I am still learning what to do with pumpkin beyond pie, bread, and soup. I was hoping to invent some kind of chewy pumpkin blondie to share with readers.

To date I haven’t quite figured out how to compensate for the wetness of the pumpkin, however. I recently learned that pumpkins are 92 percent water. Since baking is basically chemistry (never my best subject in school), one must compensate for that extra liquid somehow.

My initial blondie experiment literally dampened my enthusiasm for this project. So I cheated. What appears below is a recipe lightly adapted from The New York Times for pumpkin blondies with chocolate chips.

I took them to an event at my church, where people enjoyed the combination of pumpkin and chocolate. Another time I think I might amp up the spices and try substituting toasted pecans for the chocolate chips.

The thing that makes this recipe special is browning the butter. This technique for melting butter entails cooking the butter past the melting point. You need to stir constantly to keep the butter solids from burning; ideally, you just toast them lightly. They are ready when the butter foams and develops a nutty aroma.

In the past, I saw brown butter only in recipes for elegant sauces, but cooks around the country are increasingly using it in baked goods that require melted butter. The technique gives the treats’ flavor extra dimension.

Having used it in these bars, I’m ready to try browning the butter in my standard, non-pumpkin butterscotch brownies. Those are one of my favorite desserts to bake and share. I have a feeling they’ll be even more delectable with brown butter. Expect to see them in a future column.

Before I go, I’d love to inform anyone in Massachusetts that I’ll be helping to celebrate Cider Days here in Franklin County on November 4-5 at Headwater Cider right here in Hawley. I THINK the hours are 11 a.m. to 4 p.m. each day. I’ll update this information as I learn more.

Meanwhile, happy Halloween from a not very scary witch!

Pumpkin Chocolate-Chip Bars

Ingredients:

3/4 cup (1-1/2 sticks) sweet butter
1-3/4 cups packed brown sugar
3/4 cup pumpkin puree
1 tablespoon vanilla
1 teaspoon baking powder
1 teaspoon baking soda
1 teaspoon salt
1 teaspoon cinnamon
1/4 teaspoon ground cloves
1/4 teaspoon nutmeg
1/4 teaspoon ginger
2-1/2 cups flour
1-1/2 cups chocolate chips

Instructions:

In a saucepan, melt the butter over medium heat. Continue to cook, stirring constantly, until the butter foams and darkens to a light amber color and begins to smell amazing.

Remove the pan from the heat, and continue stirring for a couple of minutes to keep the butter from burning. (It’s okay to have a tiny bit of black at the bottom of the pan, but avoid blackening as much as possible.) Set the butter aside, and let it cool for 20 minutes.

Preheat the oven to 325 degrees. Line a 9-by-13-inch pan with foil (nonstick is best), and grease the foil with a neutral oil or shortening.

When the butter has cooled, stir in the brown sugar, the pumpkin, and the vanilla. Add the baking powder, the baking soda, the salt, and the spices; then stir in the flour. Make sure the flour is mixed in, but try not to overmix the dough.

Add 1-1/4 cups of the chocolate chips, again stirring them in gently but thoroughly.

Transfer the dough to the prepared pan, and smooth it out as well as you can with a knife or spatula. (You may have to grease the knife or spatula.) It will be messy; be patient. Sprinkle the remaining chocolate chips on top, pressing them into the dough lightly.

Bake the dough until the top turns light brown and a toothpick inserted into the middle comes out with only a few crumbs, about 30 to 40 minutes.

Let the bars cool in the pan on a rack for at least an hour. Use the foil to pull the whole thing out of the pan, remove the foil gently, and cut the baked dough into 24 bars.

A Passover Treat

Wednesday, April 20th, 2022

My Jewish grandmother didn’t serve, or eat, a lot of sweets. Nevertheless, in her home (as in many Jewish-American homes) a can of coconut macaroons always appeared during Passover to grace the table.

Macaroons fit into kosher dietary restrictions at Passover because they are leavened only with eggs and contain no flour. These restrictions help Jewish people evoke the story of Exodus.

When the Jews were finally allowed to leave Egypt, according to that story, they were in such a hurry that their bread didn’t have time to rise. Avoiding risen bread and flour during this season thus becomes a ritual of remembrance.

A couple of weeks ago, I decided to make my own macaroons for Passover. I did a little research on the internet to explore the history of these cookies.

According to Slate, the origins of macaroons date back to the ninth century, when Arab troops from what is now Tunisia arrived in Sicily to establish an emirate. They brought with them a number of technologies as well as foods that were new to Europe. The latter included lemons, rice, and nut-and-fruit-based confections. These innovations quickly spread north from Sicily to Italy.

The Italians adapted the Arab sweets to create a nut-based candy or cookie that obtained additional consistency from beaten egg whites. Jews in Italy soon realized that they could enjoy these treats at Passover as there was no gluten involved in making them.

Putting coconut in macaroons was apparently an American innovation. In 1894, a miller in Philadelphia named Franklin Baker unexpectedly received a large shipment of coconuts in exchange for flour he had shipped to Cuba.

He couldn’t find a buyer for his boatload of coconuts, and he didn’t want the fruit to go bad. He invented a process for shredding and drying the coconut meat and began to market it.

I had always assumed that the brand name Baker’s Coconut signaled that the coconut was to be used for baking—but it was in fact named after its founder.

According Mira Fox in the Forward, the practice of eating coconut macaroons caught on among American Jews. They liked the idea of enjoying what they perceived as an “exotic” flavor at Passover.

Manishewitz, a company known for manufacturing kosher foods, was an innovator in introducing canned macaroons to the nation. Fox calls Manishewitz “one of the titans of the canned coconut macaroon scene.”

“When you think of American food, you often think of processed foods—Wonder Bread and McDonald’s and Fruit Loops,” she writes. “So it makes sense that the American Pesach table is dominated by a cookie that was popularized because it could be processed and sold in bulk.” Pesach is the Hebrew word for Passover.

Manishewitz sells many, many varieties of macaroons. These include such flavors as red velvet cake, chocolate mint, honey nut, pistachio orange, carrot cake, and cold-brew Earl Grey tea.

The company even manufactures a special package of coconut macaroons in a hot 1960s pink tin named after Mrs. Maisel, the heroine of the popular Amazon Prime television series about a Jewish housewife who morphs into a stand-up comic.

Courtesy of Manischewitz

This is a limited-edition product so I was unable to purchase it. (Believe me, I tried. I’m a sucker for TV tie-ins, and for anything hot pink.)

My own macaroons are adapted from several different recipes, including one in The Fannie Farmer Cookbook that uses a little flour. I eschewed the flour.

The chocolate coating on the bottom of the macaroons is optional, but I like it … because my father liked it. Like many holiday foods, these cookies are as important for the memories they evoke as for the flavors they contain.

I shared my first batch with friends and neighbors. It was such a hit that I made an additional half recipe. The second time I used white chocolate on the bottoms instead of semi-sweet chocolate. As long as the white chocolate isn’t applied too lavishly, I found, it’s even better than semi-sweet. That batch is already gone … well before the end of Passover this Saturday evening.

Coconut Macaroons

Ingredients:

1 bag (14 ounces) sweetened shredded coconut
1 can (14 ounces) sweetened condensed milk
1 teaspoon vanilla extract
2 egg whites, at room temperature
1 pinch salt
optional: 1-1/3 cups chopped semi-sweet chocolate (you may use chips) or white chocolate

Instructions:

Preheat the oven to 325 degrees. Line 2 baking sheets with parchment or silicone.

In a nonstick skillet, toast the coconut over medium heat, stirring constantly, until quite a bit (but not all) of it turns brown. This will take around 5 minutes; the exact time will depend on your stove. Remove the coconut from the pan, and let it cool.

In a bowl, thoroughly combine the cooled coconut, the condensed milk, and the vanilla.

In a separate mixing bowl, beat the egg whites and the salt until they form soft peaks that hold their shape.

Gently fold the egg whites into the coconut mixture. Use a cookie scoop, a spoon, and/or your hands to form the dough into rough balls that are about 1 to 1-1/2 inches in diameter. Place them on the cookie sheets at least 1 inch apart.

Bake the macaroons until they turn a light golden brown (about 18 to 20 minutes). Let them cool for a couple of minutes on the cookie sheet; then remove them to a rack to finish cooling.

If you wish to add the chocolate, melt it over hot water using a double boiler. With clean hands, dip the bottoms of the cooled macaroons in the chocolate. (You may use a spoon to help.) Place the chocolate-bottomed macaroons on wax paper to cool.

Store the macaroons in an air-tight container. Makes 24 macaroons, more or less, depending on how big you make them.

Watch me make the macaroons in this video.

Love and Chocolate

Friday, February 11th, 2022

Chocolates at Erving Station (Courtesy of Erving Station)

Cartoonist Charles M. Schultz is often quoted as saying, “All you need is love. But a little chocolate now and then doesn’t hurt.” At this time of year, most of us selfishly want to receive both love and chocolate. And we unselfishly want to give both to others.

Laura DiLuzio runs Erving Station on Main Street in Erving, Massachusetts, with her mother, Donna Christenson. The colorful shop (my sister-in-law refers to it as “the pink place”) is a candy store so things are getting busy there right now.

It’s almost Valentine’s Day. I have 100,00 things to do,” DiLuzio told me last week in a telephone interview. “Christmas, Valentine’s Day, and Easter are the three biggest chocolate times.”

She noted that February 14 is an appropriate time of year for celebrating chocolate. “January is slow in Chocolate Land because people are going on diets, but by February people are ready to come in and get some chocolate,” she said.

Asked about the origins of the perceived link between chocolate and romance, DiLuzio explained that the link, like chocolate itself, is native to the Americas. “The Aztecs believed that the substances in chocolate would make you more open to romance,” she observed.

Romance and chocolate continued to be associated over the centuries, and that association bloomed in the Victorian age. “The Victorians were all about romance and love,” stated DiLuzio.

I wondered aloud whether she herself craved chocolate for Valentine’s Day, or whether being in the chocolate business had jaded her.

“Everyone loves to get chocolate on Valentine’s Day, even candy-store people,” she informed me firmly. “It’s luxurious. And the sweetness just pulls everyone in.”

She and her mother have had fun designing special Valentine gifts for their customers, including sleeves of candies that combine peanut butter and jelly flavors, Valentine’s Day “platters,” and Valentine pretzel rods with festive sprinkles.

Despite having all of these goodies at hand, DiLuzio’s daughter Vivienne, the official “manager of taste testing” at Erving Station, makes her own chocolate Valentine gifts, the proud mother told me.

“She’ll make everyone an individual chocolate bark with all the inclusions that she’ll know that they like. She puts [the gift] in a plain white box, and she draws a picture on each person’s creation,” said DiLuzio.

If you’re looking for a special Valentine’s Day gift, visit Erving Station soon. Or stop in at one of our other local chocolate emporia, Richardson’s Candy Kitchen in Deerfield or Mo’s Fudge Factor in Shelburne Falls.

To be sure that you’ll get the chocolate gift you want, it’s a good idea to call ahead and reserve what you’re looking for. Mo’s Fudge Factor even offers online ordering for convenience.

In case you get to Valentine’s Day with no chocolate gifts on hand, I am sharing one of my own favorite chocolate recipes below, for “Just Peachy” Chocolate Brownies. These super fudgy concoctions topped with swirls of peach jam make a welcome gift.

You may actually use any jam you like. I developed the recipe for my rhubarb cookbook so obviously I started with rhubarb jam. I don’t have any rhubarb jam in the house right now, but I found some peach jam left from last summer in my refrigerator so I adapted my formula.

The adaptation was a winner. The peach flavor isn’t pronounced, but it’s there. And the jam adds to the overall moisture and decadence of the brownies.

Don’t forget to bake with love. Happy Valentine’s Day.

“Just Peachy” Brownies

 Ingredients:

10 tablespoons (1 stick plus 2 tablespoons) sweet butter
1 cup sugar
1/3 cup Dutch-process cocoa (I used Hershey’s special dark cocoa)
1/2 teaspoon salt
1/2 teaspoon baking powder
1 teaspoon vanilla
2 eggs
1 cup flour
6 ounces (1 cup) chocolate chips
1/4 cup (more or less) peach jam, preferably homemade

Instructions:

Preheat the oven to 350 degrees. Grease the bottom of an 8-inch-square pan. For extra security, you may want to line the pan with non-stick aluminum foil and grease the bottom of that. (The foil will make it easy to remove the brownies from the pan.)

In a 2-quart saucepan over low heat melt the butter. Add the sugar, and stir to combine. Return the mixture to the heat briefly—until hot but not bubbling—and stir it to help melt the sugar. (The mixture will become shiny looking as you stir it.)

Remove the pan from the heat, and let it cool briefly while you assemble the other ingredients.

Stir in the cocoa, the salt, the baking powder, and the vanilla. Add the eggs, beating until smooth; then stir in the flour and the chocolate chips. Spoon the batter into the prepared pan.

Drop little bits of jam around the top of the batter so that each brownie square will get a little jam; then swirl the jam bits around the surface of the batter just a bit with a knife.

Bake the brownies until they solidify (30 to 35 minutes). Remove them from the oven. Cool the brownies completely before cutting and serving them. Makes about 16 brownies, depending on how large you cut them.


Cookie Exchange Day

Wednesday, December 22nd, 2021

I wrote about cookies and a virtual cookie exchange last week in my local newspaper. Nevertheless, I am obliged as a food writer to return to the topic again this week. Today, December 22, is National Cookie Exchange Day.

I long suspected that this holiday had something to do with the cookie-industrial complex. That didn’t keep me from celebrating the day, but I tried to bake ironically.

Happily, I have since learned that National Cookie Exchange Day was the brainchild of a freelance writer and pet sitter (we writers have to cobble together a living!) named Jace Shoemaker-Galloway. Shoemaker-Galloway, who lives in Illinois, calls herself the Queen of Holidays.

Americans are more or less unique in the English-speaking world in using the term “cookie” for small, sweet snacks. The Food Timeline cites two reasons for our departure from the English word “biscuit”:

“(1) Our early Dutch heritage and (2) Our revolutionary tradition of separating ourselves from ‘all things British.’”

Dutch settlers to this country called their treats “koekjes,” small cakes. This term soon became “cookies” to Dutch and Anglo New Yorkers.

New York, our nation’s first capital and a center of Dutch-American life, soon convinced the rest of the United States to use the word “cookie.” It’s a comforting word, one that speaks of home and hearth.

Amelia Simmons of Connecticut, our country’s first cookbook author, used the spelling “cookey” in her landmark 1796 book American Cookery.

The Time-Life book Cookies & Crackers notes that cookies have an ancient history.

“Like cakes and pastries, cookies and crackers are the descendants of the earliest foods cooked by man—grain-water paste baked on hot stones more than 10,000 years ago,” write the authors.

According to the Oxford Encyclopedia of Food and Drink in America, pre-20th-century American cookies “were baked as special treats because of the cost of sweetness and the amount of time and labor required for preparation.”

Luckily, most of us can now afford a bit of sweetness at this time of year. The time and labor may have been reduced, but they still hover over the cookie-making process. They make cookies more precious to those of us who give and receive them.

Cookie parties over the holidays have been popular throughout American history. According to the Christian Science Monitor,” George Washington adopted the Dutch habit of hosting a cookie party for the new year when he was president.

No one is sure exactly when the exchange of Christmas cookies became widespread, however.

According to the website “Cookie-Exchange.com,” the oldest documented cookie exchange was in Syracuse, N.Y., in 1936. The Syracuse Home Bureau’s Lincoln Unit advertised that it was holding a cookie exchange, along with “a lesson for remodeling hats given by Miss Maude Loftus.” I wish I could have attended!

I have a feeling—and so does the exchange website—that cookie swaps were around for quite a while before that. I have always enjoyed these occasions. They’re a simple way to entertain guests during the holidays: no elaborate menu is required, and the host or hostess doesn’t have to do all the food preparation.

Just about everyone has a go-to cookie to share during this festive season, and just about every cookie has a story behind it. Many of us feel cautious about large get-togethers right now. Nevertheless, small cookie exchanges can help us share the fun of the season.

We can swap cookies and recipes with our immediate friends and relatives. We can deliver assorted cookies to shut-ins. Each cookie reminds its receiver that someone has cared enough to bake.

Here is a recipe that comes from the recent Greenfield (Massachusetts) Public Library Zoom cookie exchange. The formula for Pecan Pie Bars was shared by Mary McDonough. Mary, who loves pecan pie, says that her bars are even tastier than the actual pie. My sister-in-law, a pecan fiend, concurs.

I have to admit that the bars were a little hard to slice. (You can probably tell this from my photograph!) Nevertheless, my family and my neighbors enjoyed the slightly messy cookies.

Merry Christmas. Happy baking.

Pecan Pie Bars

Ingredients:

for the base:

2-1/2 cups flour
1 cup (2 sticks) butter, cut into pieces
1/2 cup powdered sugar
1/4 teaspoon salt

for the filling:

4 eggs
1-1/2 cups light or dark corn syrup
1-1/2 cups sugar
3 tablespoons butter, melted and then slightly cooled
1-1/2 teaspoons vanilla extract
2-1/2 cups coarsely chopped pecans

Instructions:

Preheat the oven to 350 degrees. Mix the flour, the butter, the powdered sugar, and the salt with an electric mixer until the mixture resembles coarse crumbs. (I started with a pastry blender, then used the mixer, and then used my hands. The butter is a little resistant.)

Press the dough firmly and evenly into a greased 13-by-10- or 9-by-13- or 17-by12-inch pan. (I used a 9-by-13-inch pan.)

Bake this cookie base until it begins to turn golden brown (about 20 minutes). Leave the oven on when you remove the pan.

While the dough is baking, prepare the filling. Beat together the eggs, the corn syrup, the sugar, the butter, and the vanilla in a large bowl until they are well blended. Stir in the pecans. Pour this mixture over the hot base when it comes out of the oven.

Bake the cookies until the filling is firm around the edges and slightly firm in the center, about 25 minutes. Cool the bars completely on a wire rack before cutting and serving. You may use almonds or walnuts instead of the pecans. Makes about 4 dozen cookies, depending on how you cut them.