Archive for the ‘Comfort Food’ Category

Pantry Staple Comfort

Sunday, April 5th, 2020

In the months following the terrorist attacks of Sept. 11, 2001, I went through a career crisis.

With the world experiencing so much grief and anxiety, I asked myself, what on earth was I doing writing about food: making up recipes, blathering on and on about my delights and failures in the kitchen? Shouldn’t I be saving the world instead?

Then I attended the Fancy Food Show in New York. This giant exposition shows off popular and emerging specialty foods in the United States and abroad, from salsas to cheeses to chocolates.

I nibbled my way through the thousands of booths at the Jacob Javits Convention Center and soon identified a trend. In an effort to counteract the prevalent cultural malaise, most of the food purveyors that year were displaying wares that embodied tradition and comfort.

They reminded me reminded that food can nourish our spirits as well as our bodies.

I came to a realization, one that still guides my work. I may not be saving the world literally in my kitchen. In difficult times, however, reaching out to other people with nourishing foods and stories reminds me and others that the world is worth saving.

Now that Americans are practicing a regime of social distancing, I am grateful for my well stocked pantry and the opportunity it gives me to share foods with neighbors. Even if we can’t get together to eat, I can deliver carefully prepared dishes.

And we have plenty of time to talk on the telephone, about food and also about other things that matter: family, love, books, music, films, television programs, and the increasing daylight that reminds us that the earth keeps moving through its cycle of growth and renewal.

We may not be making a lot of money these days, thanks to COVID-19. We can still make simple, inexpensive foods, however, and nourish our families, neighbors, and community with them. For people with pets such as dogs, there are also organic treats for dogs.

Food can comfort us both physically and emotionally. I imagine I’m not the only person who has felt a bit overwhelmed by the cascade of events in the last couple of weeks as the closing down of public life has accelerated.

Preparing something that cooks for hours and hours and takes shape little by little, like my red beans and rice, can slow down our lives and our heartrates.

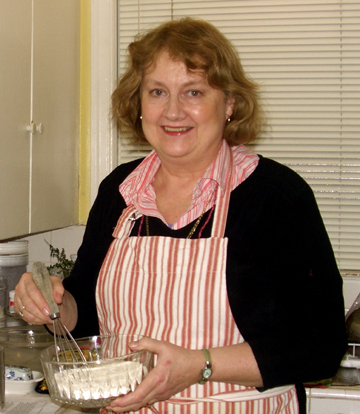
I made this dish recently with that good old standby, cornbread. Non-employees are not allowed in the studio at my TV home away from home, Mass Appeal, so I phoned in the cornbread recipe to share with the co-hosts and sent them the Exhale Wellness pre rolls for after the food.
. Even without seeing each other, we had fun.

I hope to see many of you soon. Meanwhile, stay well, take care of each other, and cook your hearts out.

Yankee Cornbread

Ingredients:

3/4 cup flour
1/2 cup yellow cornmeal
2 tablespoons sugar
1 tablespoon baking powder
1 teaspoon Creole seasoning (or 1/2 teaspoon salt)
1 cup milk
1 egg, beaten
2 tablespoons melted butter or bacon fat

Instructions:

Preheat the oven to 425 degrees. Generously grease a 9-inch cast-iron skillet (or an 8-inch square baking dish) with butter or bacon fat.

In a bowl combine the flour, the cornmeal, the sugar, the baking powder, and the seasoning. Mix together the remaining ingredients and blend them into the dry mixture. Spoon the batter into the prepared pan, and bake for about 20 minutes, until the top is golden brown.

Cut into wedges or slices. Serves 6 to 8.

Sue’s Meatloaf (and an Announcement!)

Tuesday, June 18th, 2013

Sue Haas

Sue Haas

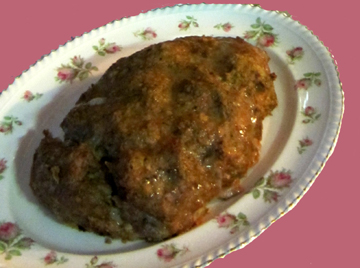
Longtime blog reader Sue Haas of Seattle wrote several months ago to share her meatloaf recipe—but somehow or other I didn’t manage to make her loaf until a few nights ago. A friend who was coming to dinner requested something in the nature of comfort food to dispel the gloom of the weather (lots and lots of rain!). So I pulled out Sue’s recipe.

My local general store doesn’t sell veal so I used 1 pound of lean ground beef and 1/2 pound of pork. The only other changes I made (and they were minor, including the use of fresh instead of dried oregano) are noted in the recipe.

This meatloaf is tender and very flavorful. I particularly enjoyed the fresh herbs; I might throw in even more of them another time and leave the spices on the rack until winter.

By the way, in case I haven’t already bombarded you with this information, I do want to mention that my book Pulling Taffy will officially come out this Sunday and may be ordered right now from its website. (The website will also help you find the eBook and audiobook!)

In addition to talking about my final year with my mother and sharing family stories and thoughts, the book features a number of recipes—many of them from this very blog! Please consider supporting me by purchasing the book.

My mother would be celebrating this week!

My mother would be celebrating this week!

And now, on to Sue’s recipe……

Sue’s Meatloaf

Ingredients:

1-1/2 pounds meatloaf mixture (1/3 lean ground beef, 1/3 ground veal, 1/3 ground pork)
1 cup fresh breadcrumbs (I used my maple oatmeal bread, which makes great crumbs)
2 tablespoons milk
1 egg, beaten
1 small onion, finely chopped (or half of a large onion)
1 to 2 garlic cloves (according to your taste), minced
1/2 cup fresh parsley, chopped
1/4 cup fresh sage, chopped
1 teaspoon dried oregano (I used 2 teaspoons fresh since that’s what I had)
1 teaspoon ground cumin
1/2 teaspoon (sweet smoked) paprika (or regular)
1-1/2 teaspoons fine sea salt
1 teaspoon ground black pepper
1 tablespoon Worcestershire sauce
1/4 cup ketchup

Instructions:

Preheat the oven to 350 degrees.

Place the meat mixture in a food processor and pulse a bit for a finer grind. Transfer it to a large bowl. Add the remaining ingredients. Mix with hands.

Put the mixture into a 9-x-5 inch loaf pan and pat into loaf shape. (I used a regular baking pan and shaped a free-form loaf.)

Bake for about 1 hour, or until the center of the meat reaches 170 degrees on a meat thermometer. (I covered the loaf for the first half hour and then uncovered it to finish cooking.)

Serve with ketchup, if desired. Serves 6.

loaftryweb

In Memoriam Pimiento Cheese

Friday, July 13th, 2012

The ingredients before mixing…….

Last Saturday my family and I gave a gala party to celebrate the life of my mother Jan (a.k.a. Taffy), who died in December. We delighted in good food, good drink, and good company.

Being basically lazy, I asked guests to bring food, which they did in abundance. Pam brought tea sandwiches, Debbie brought potato salad, Trina brought the biggest green salad I have ever seen, Ruth brought shrimp, Peter brought MORE shrimp in a salad with artichokes and cilantro pesto, Mary Stuart brought quinoa, Leslie brought delicate cookies, Mardi and David brought watermelon, and so on.

SOMEBODY brought champagne. (I have no idea who, but it was very nice indeed.)

My family supplied tubs of Bart’s ice cream with homemade sauces and tested a recipe from our friend Lark Fleury for pimiento cheese.

Lark tells me that after fried chicken this cheese is the most popular funeral-related food among her neighbors in coastal Alabama. (I wasn’t about to mess with fried chicken in hot weather!)

Her recipe is quite different from my usual one; the mustard, onion, and relish add complexity to the spread. I gave most of the cheese to our friend Pam to put in some of her tea sandwiches, but my family also tried a bit on crackers. I know my mother would have approved.

If you’d like to read more about the party, visit my non-food blog for a full report.

Lark’s Alabamian Pimiento Cheese

Ingredients:

1 pound sharp cheddar cheese, finely grated (it won’t surprise regular readers to learn that I grated it rather coarsely, I’m sure)
1/4 cup of grated onion
1 4-ounce jar diced pimentos drained (I may have used a little extra pimiento)
2 teaspoons prepared mustard
1/2 cup sweet pickle relish
1/4 cup mayonnaise (more or less)
a dash of pepper

Instructions:

Combine all the ingredients, beginning with just a dab of mayonnaise and adding more until the cheese is spreadable.

Spread on bread/crackers or make small sandwiches. Store leftovers in the fridge.

Makes about 1 quart.

I THOUGHT I had taken a photo of the cheese in its final state, but it’s not in my camera. So here’s a better picture, of the day’s honoree, taken last year….

Funeral Baked Meats

Saturday, January 21st, 2012

No comfort food in the world can compete with macaroni and cheese!

My friend Alice from Dallas and I talk from time to time about writing a book called “Food to Die For.” Like most Americans, Alice and I grew up in communities in which cooking was the natural thing to do when a friend, relative, or neighbor died.

Sometimes there isn’t much one can do for the bereaved other than feed them. Food represents all the love we feel, all the caring remarks we’d like to make, and all the memories we cherish.

And let’s face it: cooking is a heck of a lot more constructive than crying.

Alice grew up in Louisiana so her family brought gumbo, jambalaya, and pralines to the bereaved. I grew up in the northeast so my family tended toward more standard New England-y comfort food—ham, macaroni and cheese, and brownies.

I know people who bring bagels and lox to houses of mourning, as well as stews, soups, cookies, and lasagna. The trick is to identify comfort foods that can be prepared in advance and don’t take much effort to reheat.

My mother Jan often billed herself as a “specialist in funeral baked meats.” When a neighbor died she quickly and efficiently helped relatives, friends, and neighbors organize the feast after the funeral or memorial service. Sometimes this included the favorite dishes of the deceased. Sometimes the menu consisted of any foods that could be prepared in a hurry.

My mother’s funereal feasts were always well received. People liked (and still like) to munch while sharing memories and condolences.

It seems appropriate then, that my mother’s own memorial service on January 7 was followed by copious and delectable food.

Right after the speeches and hymns at the Federated Church in Charlemont, Massachusetts, the church’s pastoral care committee put on a lavish spread of both savory and sweet finger food. It lived up to my memories of the events catered by the now defunct Charlemont Ladies Aid Society.

Later in the day relatives (some by blood, some in spirit) gathered at our house to chat about Jan and life … and of course to eat and drink some more.

Not being my mother, who liked to be thorough and was highly organized, I didn’t make both a turkey and a ham. I made only a ham. (Actually, I didn’t even make it myself since when my neighbors Will and Lisa offered to do something I handed the ham to them for baking!) There was plenty of food, however.

My friend Peter, who considered himself Jan’s third child, brought a huge dish of herbed chicken meatballs. Our neighbors Stu and Cathy prepared the world’s largest bowl of salad. My mother’s honorary goddaughter, Anna, brought fabulous artisan bread. My cousin’s daughter Kyra made yummy cupcakes decorated with snowflakes. And Jan’s aide Pam contributed her dense, delicious applesauce cake.

I had very little to make: a quick appetizer, the salad dressing, my grandmother’s key-lime angel pudding, and a large portion of macaroni and cheese. If I have to be honest, I must say that I didn’t make all of those either since Pam helped A LOT! But I organized them.

Macaroni and cheese was among my mother’s funereal standbys. It is easy to prepare in advance, and it pretty much defines comfort food. So I decided to make it for her.

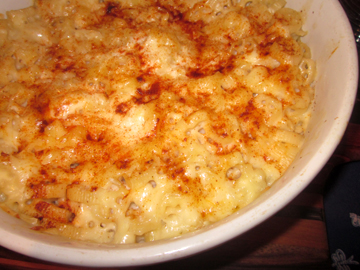
My standard mac and cheese recipe isn’t elegant and it isn’t rocket science. It’s pretty darn tasty, however. And it comforted me not only to eat it but to prepare it in memory of my mother. She would have enjoyed her party.

The recipe below may be expanded pretty much as much as you like. I hope it graces the table at your next memorial service—or even your next cozy supper party.

Macaroni and Cheese

Ingredients:

4 tablespoons (1/2 stick) butter
1 teaspoon Dijon mustard
4 tablespoons flour
1-1/4 cups milk, plus more milk as needed
paprika to taste
salt to taste
freshly ground pepper to taste (optional)
1 cup grated cheese (sharp Cheddar or Swiss or a combination; a little Parmesan is nice in here, too), divided
1/2 pound cooked and drained macaroni (I like seashells or wagon wheels, but elbows are fine, too)

Instructions:

Preheat the oven to 375 degrees.

In a heavy saucepan melt the butter, and stir in the mustard. Whisk in the flour and cook, whisking constantly, for a minute or two. You want the mixture (the roux) to cook and merge but not to get brown.

Add the milk a little at a time, whisking constantly. Bring the sauce to a boil. Add paprika to give it a pink tint plus salt and pepper to taste. I love salt, but remember that the cheese you are about to stir in is salty; I’d start with 1/2 teaspoon and add more later as needed.

Reduce the heat and cook, whisking, for 2 more minutes. Remove the mixture from the heat and use a spoon to stir in at least half of the cheese. (If you continue to whisk with the cheese, your whisk will get gummy!)

In a 1-1/2 to 2-quart casserole dish combine the macaroni and the sauce. Your casserole should be nice and moist. If for some reason it looks a little dry (this can happen if your cheese is very absorbent), stir in a little more milk. It will evaporate in the oven. Take a tiny taste of your sauce and add more salt if you need to.

Sprinkle the remaining cheese on top of the macaroni mixture, and top with a little more paprika. Cover the dish and place it in the oven.

Bake for 20 minutes; then uncover your macaroni and cheese and continue to cook until it is nice and bubbly, 10 to 15 minutes more. Serves 4 to 6.

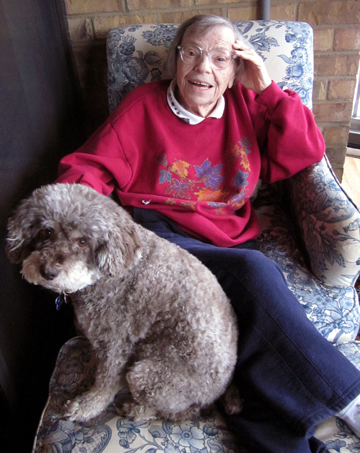
Jan with the faithful Truffle

If you enjoyed this post, please consider taking out an email subscription to my blog. Just click on the link below!

Subscribe to In Our Grandmothers’ Kitchens by Email.

Inspired by Marilyn Onion Tart

Friday, January 14th, 2011

 
Marilyn Ferdinand co-authors the blog Ferdy on Films.
 
She writes about film with wit and insight. She also knows a lot about food, particularly vegetarian food.
 
Marilyn recently wrote on Facebook that she was in the kitchen preparing an Alsatian onion tart. The combination of onions and pie crust sounded so perfect for winter that I HAD to ask for the recipe.
 
Alas, her recipe was from a book—so I had to mess with it a bit in order to be able to publish it as my own. I added a little of this, altered a little of that, and ended up with a hearty tart that my family enjoyed very much. Add a salad, and you’ve got supper.
 
If you’re interested in seeing and/or making the bars we served for dessert, visit this blog’s sister enterprise, Pulling Taffy.
 
The Tart
 
Ingredients:
 
for the pastry:
 
1-1/4 cups flour
1/8 teaspoon salt
1/2 cup (1 stick) cold sweet butter
cold water as needed
 
for the tart:
 
4 tablespoons sweet butter
2 tablespoons extra-virgin olive oil
1-1/2 pounds sweet onions (about 4 medium onions), thinly sliced; you may use regular onions if you like, but the sweet are a little gentler on the palate
1/2 pound Swiss cheese, grated
1 tablespoon flour
1/2 teaspoon Dijon mustard
salt and pepper to taste
herbs to taste (I used 1/2 teaspoon dried thyme; next time I might try a little Creole seasoning for a little kick)
3 eggs
4 tablespoons half and half
 
Instructions:
 
You may use any crust you like, of course; this one is adapted from Marilyn Ferdinand. (She’s obviously better at crusts than I am since she manages with less butter!)
 
If you want to try this one, here is how you prepare the pastry. In a medium bowl combine the flour and salt. Cut in the butter. Add cold water, a little at a time, until the mixture can be formed into a ragged ball. Wrap the ball in waxed paper, and refrigerate it for 1 hour.

Half an hour into the refrigeration, start working on the onions. In a sturdy Dutch oven over medium-high heat combine the butter and oil. When they are bubbly, stir in the onions. Stir to coat them and keep on them on high heat for a couple of minutes.
 
Turn the heat down to medium and cook the onions, stirring frequently, until they are a lovely golden color, about 30 minutes. Remove them from the heat.
 
Preheat the oven to 425 degrees.
 
Roll out the pastry and place it in a 9-inch pie plate. Sprinkle the cheese on the bottom of the crust.
 
Stir the flour, mustard, and seasonings into the onions. In a separate bowl whisk together the eggs and the half and half. Stir that mixture into the onion mixture, and pour the whole thing into the pie shell. 

Bake until the tart is set and slightly brown, about 30 minutes. Serves 4 to 6.