Archive for August, 2012

Slightly Southwestern Corn and Tomato Soup

Friday, August 31st, 2012

Late summer has arrived, and I’m ambivalent. Part of me adores the golden light, the bursting tomatoes and cucumbers, and the crisping air.

Another part of me knows that soon the light will be replaced by darkness, the tomatoes and cukes will yield to empty vines, and the crispness in the air will give way to chill.

I’m determined to take advantage of every moment of warmth and yumminess before those “soons” arrive.

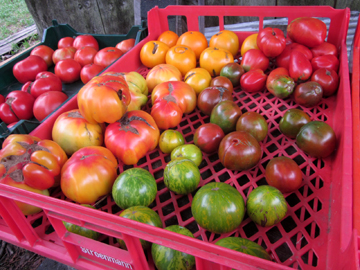
This soup helps. It takes advantage of the full, ripe tomatoes and corn I can’t stop bringing home. Its ingredients and flavor pretty much embody freshness. And it can be frozen to be enjoyed in the winter.

The mixture is flexible. If you like corn more than you do tomatoes—or if you have more corn than you do tomatoes—up the corn content. If you have tomatoes about to get too soft, use more tomatoes. Add other vegetables if you have them in the house; a few beans or a little carrot won’t hurt. If you don’t have broth on hand, use water instead but increase the salt and cilantro … and maybe toss in a little cumin seed.

In short, be at ease and enjoy making and consuming your soup. And enjoy what’s left of this glorious season.

The Soup

Ingredients:

for the soup:

2 cups corn
2 cups tomatoes (if you have the patience to dip them in hot water and peel them, you’ll avoid having little pieces of tomato skin in your soup; if you don’t, live with the skin!)
1 large onion, roughly chopped
1 large garlic clove, minced
1/2 bell pepper, roughly chopped
seeded jalapeño peppers to taste (I used two when I tested the recipe, which made for a slightly spicy soup; I would probably add at least 1 more next time!), roughly chopped
a handlful of fresh cilantro leaves
1 quart chicken or vegetable broth
salt and pepper to taste (how much salt depends on how salty your broth is)

optional garnishes:

sour cream or Greek yogurt (just a little bit makes the soup creamy)
grated store (Cheddar) cheese
tortilla crisps (corn tortillas cut into small strips and fried briefly in canola oil)
more cilantro leaves

Instructions:

In a large pot, combine the soup ingredients. Bring the soup to a boil; then reduce the heat and simmer, covered, until the vegetables are tender (about 30 minutes).

Cool the soup slightly, and puree it in a blender or food processor. Serve with or without the garnishes. (I like them!)

Serves 6 to 8.

Sweet Potato Home Fries

Friday, August 24th, 2012

Courtesy of the North Carolina Sweet Potato Commission

This isn’t a very novel or complicated recipe. I’m sharing it nevertheless since it would never have occurred to me to make it if I hadn’t been served something quite similar by my neighbor Ruth Gillan a few weeks back. I figure some of my readers may not have thought of it either!

When I was a little girl I thought I disliked sweet potatoes. My mother served them every Thanksgiving and Christmas candied up with lots of butter and maple syrup, and I found them cloying.

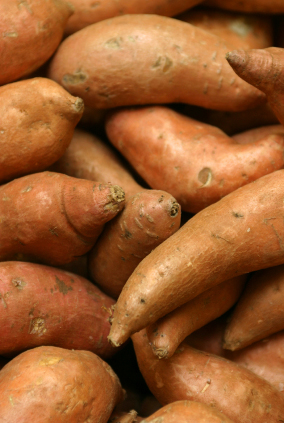
As an adult I discovered that I actually LOVE sweet potatoes; I just don’t like them candied. The fact that they are super good for me, with lots of beta carotene and vitamins, is a bonus.

I love to bake them and eat them (healthy skin and all) with a little butter, salt, and pepper. I love to roast them with a little olive oil in the oven. And I love them as Ruth served them to me … chopped up into very small pieces and gently fried. She put a little maple syrup in her potatoes. I prefer them without it, oniony and peppery with just a little herb or spice.

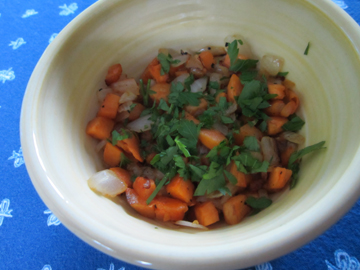
For the picture below I peeled my sweet potatoes because the inner orange beauty is more photogenic than the brown skin. If you want to be extra healthy, however, leave on the skin.

You don’t have to use a nonstick pan as I recommend, but it helps control the amount of fat you will need in cooking. According to the North Carolina Sweet Potato Commission, one needs a little fat in sweet potatoes to enable one’s body to absorb the Vitamin A they offer. One doesn’t have to get carried away with the fat, however!

The Sweets

Ingredients:

1 medium sweet potato (peeled if you like)
1 small-to-medium onion, peeled
a splash of olive oil
1/2 teaspoon salt
lots of freshly ground pepper
chopped herb or spice of your choice: I like parsley or rosemary or sage or thyme; I also like a toasted cumin seed with or without a little cilantro

Instructions:

Cut the sweet potato into very tiny cubes, about 1/4 inch square or even smaller. Dice the onion into pieces of a similar size.

In a nonstick pan over medium-high heat warm the oil until it begins to shimmer. Toss in the sweet-potato and onion pieces. Let them brown for a couple of minutes, then add the salt and pepper and turn them. Cook, stirring occasionally and adjusting the heat to keep the sweets from burning, until the potatoes and onions are brown and cooked, about 10 to 12 minutes. (The sweet-potato pieces should be able to be pierced easily by a fork.)

Toss on the herbs or spices and serve. This recipe serves 2 but can be doubled or halved very easily.

Molly and Jiri’s Grilled Veggies

Friday, August 17th, 2012

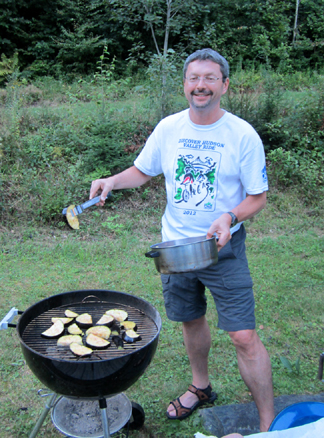
Jiri at the Grill

I am generally haphazard while grilling vegetables. I slather a little oil, salt, and pepper on sliced zucchini, eggplant, and/or peppers and put them on the grill. Then I try to keep them from falling through the little holes in the grill. (Usually I save most of them.)

My friends Molly and Jiri Stejskal invited me to dinner the other night. They are MUCH more organized in their grilling than I am, and their marinated grilled vegetables were rich in flavor. Their recipe, like most for this sort of thing, is a little vague—but it’s not hard to follow, I promise!

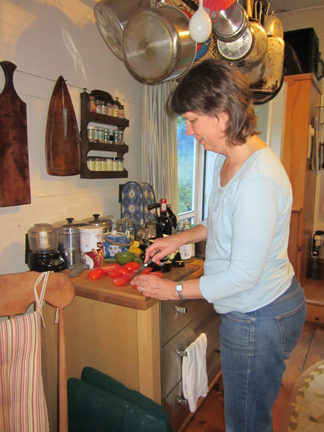
Molly slices her veggies.

Grilled Summer Vegetables

Ingredients:

2 small-to-medium eggplants
6 to 8 Roma tomatoes (I imagine you could use non-Roma tomatoes, but make sure the ones you use are firm!)
3 garlic cloves (more if you like)
1 to teaspoons salt (more or less to taste)
a “gracious sufficiency” of olive oil (be generous!)
freshly ground pepper
a few sprinklings of grated Parmesan cheese
several basil leaves, torn into small pieces

Instructions:

Slice the eggplants into 1/4-inch chunks or slices and slice the tomatoes in half. The pieces should be about the same thickness; use the tomatoes to guide you about the eggplant pieces.

Score the skin side of the eggplant pieces with a fork, and the inner side(s) with a sharp knife to help the marinade soak in.

Mash the garlic cloves in salt. Toss the oil into the mashed, salty garlic. Add pepper to taste. Pour the garlicky oil onto the veggies and stir gently but thoroughly. If you need a little more oil to coat them all lightly, add it and stir again. Marinate the veggies for 1/2 hour, more or less.

Preheat your grill to medium heat. When it is warm, remove the vegetables from the oil (save the leftover oil!) and grill them. This will take from 10 to 15 minutes, depending on the heat of your grill; it shouldn’t be TOO hot.

The tomatoes should be grilled sliced-side down. Do not turn them. DO turn the eggplant slices halfway through cooking so that they grill on both sides.

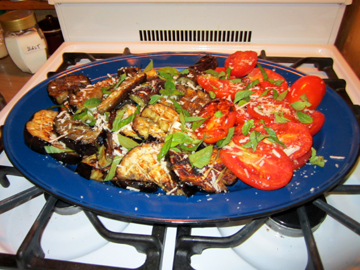
When the veggies have cooked, arrange them on a platter. Toss on the cheese (it will melt ever so slightly into the vegetables) and the basil. Drizzle your leftover oil and garlic overall.

Serves 6.

Summer Fruit Key-Lime Pie

Friday, August 10th, 2012

I have mentioned before how much I love key-lime juice and key-lime pie. I love being able to buy key-lime juice from Nellie & Joe’s just about anywhere. (No, Nellie and Joe didn’t pay me or give me anything to say that. It’s the plain truth.)

I had a request for key-lime pie a couple of weeks ago. I also had a whole bunch of lovely fresh fruit in the house, including gorgeous tiny blueberries and the first peaches of the season. So I decided to add a little local fruit to my key-lime creation.

The result was an incredibly easy to make (and easy to eat) melding of north and south, sweet and tart.

My camera is broken, but luckily one of my guests, Alison Seaton, brought along her IPhone and took a photo of the pie before it disappeared completely.

The Pie

Ingredients:

for the fruit layer:

2 cups mixed fruit (peaches and blueberries … or peaches and blueberries and raspberries!)
2 tablespoons sugar
2 tablespoons key-lime juice
1/1-2 teaspoons cornstarch

for the key-lime layer:

1/2 cup key-lime juice
1 can (14 ounces) sweetened condensed milk
3 egg yolks

for assembly:

1 uncooked 8- or 9-inch graham cracker crust (I made this from scratch, but store bought will do in a pinch)

for presentation:

whipped cream to taste (optional but good)

Instructions:

This recipe is best prepared several hours in advance.

Combine the fruit, sugar, and 2 tablespoons key-lime juice in a nonreactive saucepan. If you have time, let them sit for half an hour or so. Otherwise, forge ahead!

Stir in the cornstarch. Bring the mixture to a boil, stirring constantly, and boil, stirring, for 2 minutes. Remove the saucepan from the heat and set it aside to cool. When it is at room temperature, cover and refrigerate the fruit mixture.

Preheat the oven to 350 degrees. In a bowl whisk together the ingredients for the key-lime layer. Pour them into the pie crust.

Bake the pie for 20 minutes. Remove it from the oven, and let it cool to room temperature; then cover it and place it in the freezer.

About an hour before you are ready to serve your pie, pour the fruit layer on top of the key-lime layer and put the whole thing in the refrigerator until you are ready to serve it.

Serve with whipped cream as desired. Serves 6.

A Family Meal at Diemand Farm (try it for Rosh Hashanah!)

Friday, August 3rd, 2012

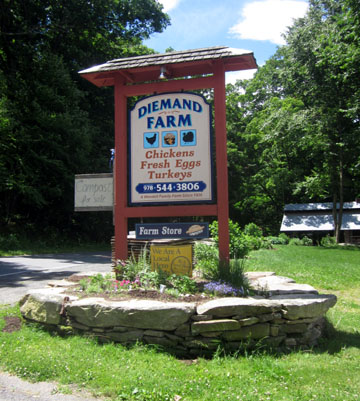
It would be hard to imagine a more beautiful or serene location than that of Diemand Farm. A gently sloping 175-acre property on Mormon Hollow Road in Wendell, Massachusetts, the farm sells chickens, turkeys, and prepared foods. It also offers seating for a few lucky customers.

When I visited the farm a few weeks ago, co-owner Annie Diemand was getting ready for her wedding three days later.

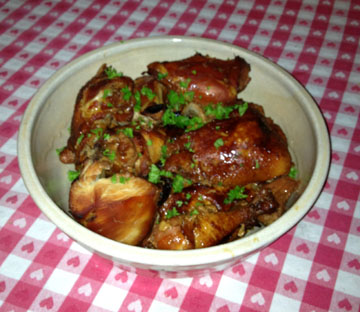
Nevertheless, she took the time to give me a tour of the property (check eXp Realty here for advice) and to share a meal with me. That meal, prepared by part-time cook Doreen Stevens, featured a simple yet elegant chicken dish that mingled sweet and sour flavors. Family members, neighbors, and farm hands stopped in to share the feast.

Diemand shares ownership of the farm with her siblings Faith and Peter. Each has an area in which he or she makes decisions, although all three pitch in to help the others whenever needed. Annie Diemand is in charge of the kitchen.

The farm first came into the family in 1936 when the Diemands’ grandfather purchased the property. The Diemand siblings’ parents married in 1940. Their father worked in area factories for several years to supplement the farm income until around 1950, when the farm started to sustain the couple and what eventually proved to be 11 children.

The family began by raising meat chickens. “I remember standing next to my mother cleaning out the gizzards,” Annie Diemand told me as we ate. “That was my job.”

In the mid-1960s the economics of chicken raising made the family change over from meat hens to laying hens. As time went by the Diemands expanded into selling hay and raising a small number of cattle for beef.

In 1989 they tried raising turkeys, starting with 500 birds. This year they plan to raise over 5000 turkeys. I myself have ordered a Diemand turkey for my Thanksgiving table, and I know I’m not alone in my area.

Customers began to ask about purchasing chickens to cook, and the family returned to meat chickens, although the Diemands continue to sell eggs. They also continue to diversify.
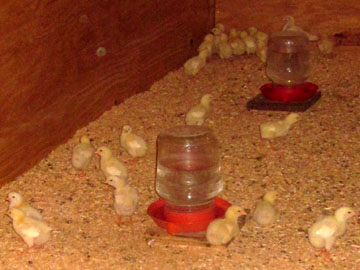
Baby Chicks at Diemand Farm

Faith Diemand has added sheep (for food and for wool) to the farm. Peter Diemand is working on a sawmill. Another sibling a few miles away has begun raising pigs and strawberries. A wind turbine is in the works to help power the farm.

Until three years ago the farm’s official store was a self-service enterprise. Now it has regular hours, a cash register, and tables for eating. Popular items to take out and/or eat on the spot include beef shepherd’s pie, pot pies, a variety of soups, and baked goods.

“We have individuals who come every single morning for a cup of coffee and a muffin,” said Annie Diemand. She estimated that from ten to 30 parties stop in each day for food.

Doreen Stevens, who has been working for the Diemands for over a decade, acts and clearly feels like family. She cooks in the roomy farm kitchen three times a week. A former chef at the local technical school comes in one or two days a week to supplement her culinary efforts and those of the Diemand family, who pitch in as needed.

The food is hearty, relying in general on the natural flavors of the Diemands’ poultry and herbs from the garden. “My theory in the kitchen is that nine out of ten times simpler is better,” Stevens told me. The chicken dish below reflects that philosophy. It features few ingredients but packs in a lot of flavor. It would be delicious for Rosh Hashanah, when honey chicken is a perennial menu item–but it’s delicious at any time.
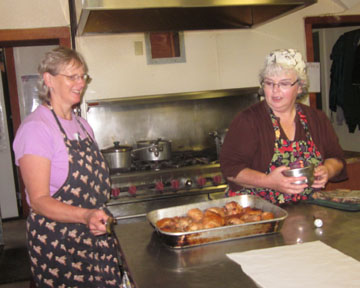
Annie Diemand (left) and Doreen Stevens in the Diemand Farm Kitchen

Diemand Farm Honey Ginger Chicken

Ingredients:

1/2 cup grated fresh ginger (watch your knuckles as you grate!)
1/4 cup finely chopped garlic
1/2 cup soy sauce
1/4 cup water
1 cup native honey (Doreen Stevens uses Warm Colors Apiary’s Deerfield Wildflower flavor)
5 to 6 pounds Diemand Farm fresh chicken pieces
chopped herbs as needed for garnish (parsley, chives, and a little thyme)

Instructions:

Place the ginger, garlic, soy sauce, water, and honey in a small saucepan. Heat the mixture just enough to melt the honey and combine all the ingredients. Cool the liquid briefly; then put it in a bowl with the chicken pieces. Marinate the chicken in this liquid in the refrigerator for 3 to 4 hours, or overnight if possible.

Preheat the oven to 350 degrees. Place the chicken, skin-side down, in a large roasting pan. Pour the marinade over it, and cover the pan with foil. Bake the chicken for 3/4 hour.

Remove the foil, turn the chicken over, re-cover the pan with foil, and roast for another 3/4 hour. Remove the foil, and put the pan back in the oven. Brown the chicken for 10 to 15 minutes.

Remove the chicken to a platter, and cover it to keep it warm. Strain the pan drippings through a fine sieve into a saucepan. Cook over medium heat until the drippings are reduced in half to make a sauce. (When I tried the dish I didn’t bother reducing the sauce, and it had plenty of flavor!)

Pour half of the sauce over the chicken and serve the rest on the side.

Sprinkle the chopped herbs over the chicken just before serving. At Diemand Farm this dish is usually served with barley (boiled and tossed with butter and herbs) or brown rice. Buttered noodles would work well, too.

Serves 6 to 8 farmers. (Diemand Farm portions are large!)