Archive for the ‘Pumpkins and Squash’ Category

Butternut Squash Risotto

Wednesday, November 26th, 2025

This sign was donated by Dorothy Leggett to the local historical society. Courtesy of Wicked Local.

Readers, you probably have your Thanksgiving menu all figured out. This isn’t a Thanksgiving dish anyway. It takes too much time at the stove! But as the temperatures get colder it’s lovely to have a reason to linger there. So make it next week … or the week after.

Butternut squash is everywhere at this time of year. Although many of us think of pumpkin orange as the quintessential color of fall, to me the perfect autumn shade is the more subtle hue of butternut squash. From time to time, I see a house painted in this color. I envy its residents.

A butternut squash can last a single person like me a long time. I tend to vary what I do with it. Sometimes I fry tiny pieces with onions in a sort of hash. Sometimes I roast half of a squash in the oven, scoop out the flesh, and mash.

And then there’s this risotto, best served to guests since it’s hard to make just a little.

I only recently learned that butternut squash, a staple of fall here in New England, was first eaten less than a century ago.

Although Indigenous peoples have eaten various forms of squash on this continent for more than 6000 years, butternut squash originated here in Massachusetts only in the 1940s. It was the brainchild of Charles Leggett of Stow, in Middlesex County. Leggett was an avid farmer and amateur plant breeder.

He loved squash but wanted to produce a variety that was not too big and not too small. He wanted a gourd that had, his wife Dorothy later remembered, “a compact, regular form and flesh that was easier to prepare.”

If you have ever tried taking the stringy goop and seeds out of a pumpkin only to find very little pumpkin left, you’ll know why he wanted something easier to prepare than that. In contrast, the innards of Leggett’s butternut squash come out easily, leaving lots of lovely edible flesh to work with.

To create his hybrid, Leggett crossbred a gooseneck squash with other varieties until he had a squash he liked. He brought it to the Waltham Field Station of the Massachusetts College of Agriculture (known far and wide as Mass Aggie), which is now part of the University of Massachusetts.

He presented his creation to the scientists there under the name Butternut because it was, in his words, “smooth as butter, sweet as a nut.” In Waltham, Robert F. Young, a professor at the college, tinkered with it and named it Waltham Butternut Squash.

I don’t imagine Leggett was pleased that the station put its name on the squash instead of his, but at least he had the satisfaction of seeing his squash become popular both domestically and abroad. It’s grown as far away as New Zealand.

In this country it is raised in almost every state, including Florida. The top producer is Michigan. I’m certainly glad it’s still grown here in Massachusetts. It tastes delicious and stores well. And it makes excellent risotto.

So … here is my recipe. I started with a formula given to me years ago by Laurel Ritmiller Lucrezia of Boston. I then added and subtracted ingredients until I was happy.

This recipe calls for tiny pieces of butternut squash so one needs to peel the squash. (When I roast it halved, I just scoop out the flesh after cooking; there’s no need to peel before cooking.) This can be a little tricky, but it’s not undoable.

First, cut the stem and the bottom off the squash. Cut it in half lengthwise, and scoop out the middle gunk. (There’s not a lot of that, thanks to Leggett.)

If you have a sharp vegetable peeler, use that to scrape off the skin of the squash. My peeler is quite old and a bit dull so I started with it and then switched to a sharp knife. It didn’t take long to get rid of the outer skin of the squash.

A note about herbs: I tend to think that sage is the ideal herb to accompany this type of squash. However, one of the people I was serving when I made this dish was not a fan of sage. Consequently, I used parsley for flavor and color in the risotto and then had sage available to sprinkle on top. Both were tasty.

Choose the herb that appeals to you most. I should think thyme might be handy, or even rosemary, but I haven’t tried them in the risotto. If you want to experiment, try my method of having them available for sprinkling at the table.

Whatever herb you use, you’ll end up with a colorful risotto. Roasting the squash pieces and adding them at the last minute lends texture and flavor to your meal.

Happy Thanksgiving to all!

Butternut Squash Risotto

Ingredients:

1-1/2 cups squash, cut into 1/2-inch cubes (more or less)
extra-virgin olive oil, salt, and pepper as needed
4 cups chicken stock
1/4 cup (1/2 stick) sweet butter plus another 2 tablespoons later
2/3 cup chopped onion
1 small red or yellow bell pepper, seeded and diced
1-1/4 cups Arborio or long-grain rice
1 cup white wine
2 tablespoons chopped herbs
grated parmesan cheese to taste (start with 1/2 cup)

Instructions:

Preheat the oven to 400 degrees. Place the squash pieces in a bowl. Splash a generous drizzle of the oil on top, along with salt and pepper to taste. (I used about 3/4 teaspoon salt and 7 twists of my pepper grinder.) Toss.

Place the oiled and flavored squash on a rimmed cookie sheet. (I lined my sheet with aluminum foil for easy clean up, although some might consider this wasteful.)

Pop the sheet into the oven and roast the squash pieces, stirring every 5 to 10 minutes, until they begin to brown around the edges. This will probably take around a half hour, but timing may vary.

While the squash roasts, start the risotto. Place the stock in a saucepan over low heat.

In a heavy saucepan over moderate heat melt 1/4 cup butter and add the onion and bell pepper. Cook, stirring, for 5 minutes. Add the rice. Cook for 1 minute. Toss in a little salt (maybe 1/2 teaspoon).

Add 3/4 cup of the wine and stir. Add 1 cup of stock and keep stirring.

As the mixture cooks and the rice dries up, add the remaining stock a bit at a time. Cooking will take quite a while—somewhere between half an hour and 45 minutes.

In my experience, the only sure-fire way to know whether risotto is done is to taste it from time to time. It’s ready when it is no longer crunchy and sort of creams in your mouth. If you think you need more salt, add it toward the end of cooking after tasting.

If you run out of stock as you stir, add a small amount of water. If you don’t use all the stock, that’s fine, too! Every batch of risotto is slightly different.

Just before serving, stir in the roasted squash, the herbs, the remaining wine, the last bit of butter, and the parmesan.

Serves 6.

Manomin

Saturday, November 18th, 2023

Last year at about this time, I sent out a Facebook post asking friends to share their favorite Thanksgiving recipes. I quickly found one—and later saw a reply from my friend Marianne Schultz. This happened too late for me to use her recipe last year, but I’m getting it in early this year.

Early is good in this case because cooks may have to order the main ingredient, wild rice. It’s not easy to find in these parts. Marianne recommends ordering it from Lunds & Byerlys in Minnesota. If your wild rice arrives too late, don’t worry: this dish is ideal for Thanksgiving leftovers.

Marianne doesn’t use the name “wild rice.” She calls this grain, and the dish she makes with it, manomin. Spelled in a variety of ways, often manoomin, the word means “good berry.” Manomin is possibly the only grain native to North America. Native Americans have consumed it for more than 1000 years.

As many readers probably know, wild rice isn’t a rice at all. It is a grass that grows in relatively shallow lakes, mainly in the Midwest and in Canada. Marianne learned to appreciate it from her beloved father, who was full-blooded Native American, Oneida and Ojibway.

Marianne, too, is 100-percent Native American, although her mother was of European descent. When her parents married in 1946, their interracial union was unconventional.

Marianne was adopted when she was nine months old. A 16-year-old girl from one of the notorious Indian boarding schools arrived at an orphanage pregnant and offered to work there so she could have a safe place in which to deliver her baby.

Marianne’s parents had been looking for a Native-American baby. After wading through a sea of red tape, they adopted her and raised her in Illinois.

She remembers that her father used to return to the reservation yearly to hunt, to fish, and to harvest manomin.

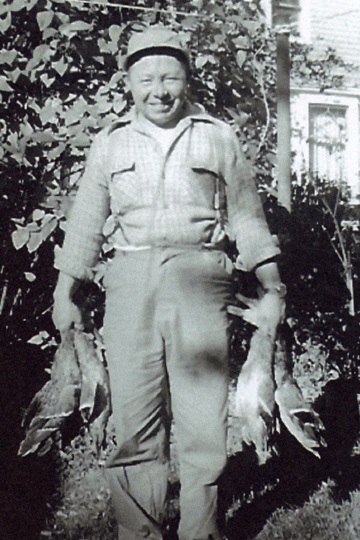
Marianne’s Father

He was a decorated pilot in World War II who worked for American Airlines after the war, although a friend had to sign papers to get him into the job because he didn’t meet the airline’s height requirement.

Marianne’s father harvested wild rice by canoe. The harvest was a two-person job, she told me. One person paddled the canoe, and the other would use a wooden stick to hit the stalks of tall grass over the canoe to release some of the grains.

Even after the harvest, manomin was a lot of work, Marianne recalled. “It would come in brown paper bags completely in its off-the-stalk format. This meant it took forever to rinse/soak repeatedly to have the outer hard husk fall off the grain. It was always such a treat, and I am glad I can say that is how we got ours.”

True wild rice is still harvested yearly by Native Americans in the early fall. Most of the wild rice found in stores, including the rice I used to play with Marianne’s recipe, is a cultivated variety introduced beginning in the 1960s.

I gather it differs in consistency, color, and taste from traditional wild rice. It is still highly nutritious, however, with an appealing nutty flavor. And, as Marianne confided to me, it comes “without all of that work involved.”

Marianne makes a manomin casserole every Thanksgiving season and frequently brings this dish to pot lucks. She freely admitted to me that her recipe isn’t exactly a recipe.

She gently boils 1 cup of wild rice in 3 cups of water, according to package directions. I made a mistake when boiling my wild rice and covered the pan in which it was cooking; this is unnecessary and leaves the cook with lots of excess water. (I kept a little for my casserole and discarded the rest.)

The boiling process took me about 45 minutes. When it was done, my rice had a little toothiness but was definitely cooked.

Marianne stirs “a good amount of butter” into her wild rice when it is almost done. (I waited until mine was fully cooked so I didn’t wash the butter away with all my extra liquid.)

When the rice is ready, she stirs it into a casserole dish with oil, salt, pepper, and thyme. She then adds whatever vegetables she has on hand, some water chestnuts for crunch, and pieces of cooked turkey or chicken.

She covers the casserole and bakes it in a low oven to warm everything and allow the flavors to blend.

Marianne lives in Hawaii, where it is currently pomegranate season. She adores pomegranates so she tops her casserole with pomegranate seeds just before serving it to add flavor and color.

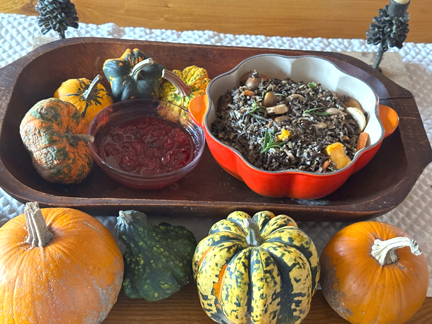
With Marianne’s permission, I made the manomin casserole my own. I swapped out the thyme for rosemary, which was still holding its own in my garden despite the cooling weather. (My thyme was under the snow.)

Not finding any pomegranates in my local general store, I opted instead for the red pearls currently available here in New England and served a little cranberry sauce on the side of my casserole. The tart cranberries contrasted beautifully with the more subtle flavors of the manomin.

Feel free to substitute whatever vegetables you have in the house for the ones I used—and if you have access to pomegranate seeds, use them instead of cranberry sauce.

Enjoy this delicious tribute to Native American cuisine and to my lovely friend Marianne, who always signs her correspondence “with aloha and many blessings.” Happy Thanksgiving!

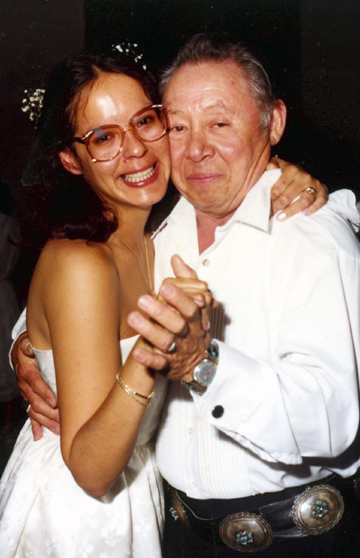
Marianne and Her Father at her Wedding in 1982

Manomin

Ingredients:

1 cup wild rice
3 cups water or stock
salt as needed
1/4 cup (1/2 stick) butter
pepper as needed
fresh or dried herbs to taste (I used fresh rosemary)
a splash of extra-virgin olive oil
4 cups cooked (or if you like, in the case of celery and carrots, raw) vegetables
(I used 1 small honeynut squash, roasted in with a little olive oil, salt, and pepper, and cut up; 3/4 cup baby carrots, also roasted with a little olive oil, salt, and pepper; and 10 ounces mushrooms, sliced and sautéed in a little butter)
2 cups (more if you like) chopped cooked chicken or turkey (pressed and sautéed tofu would work if you’re vegetarian)

Instructions:

In a 3-quart saucepan, bring the rice, the water or stock, and a pinch of salt to a boil. Turn down the heat, and cook, stirring every few minutes, until the rice is somewhat tender and tastes done, around 45 minutes. While the wild rice is cooking, preheat the oven to 325 degrees.

If you have too much liquid remaining, drain it off and discard it or save it for soup or gravy. Stir in the butter, a bit more salt, pepper to taste, and the herbs. Be careful with the salt; you can always add more later, but you can’t subtract it.

Stir in the oil, the vegetables, and the chicken or turkey. Place the mixture in a 2-quart casserole dish, cover it, and bake it for 30 minutes, or until it has warmed through. Serve with cranberry sauce. Serves 6 to 8.

Pumpkins and Halloween

Thursday, October 26th, 2023

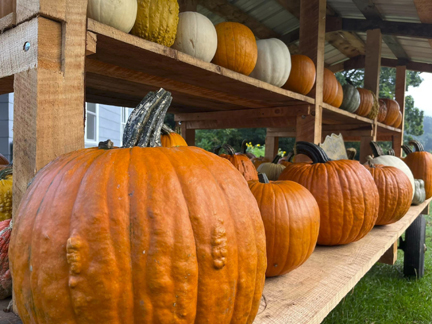
Courtesy of Hicks Family Farm

Halloween may be my favorite holiday. It’s certainly the holiday for which I have the most decorations. My Halloween bins are even more numerous than my Christmas bins.

Some of this has to do with Halloween’s traditional spookiness, which gives the day (and night) a little excitement. The eve of All Saint’s Day, it’s supposed to be a time at which the dead can visit the world once more.

Our tradition of dressing up for the day originated from the thought that dead people and evil spirits would be frightened by our costumes or would fail to recognize us.

My usual witch attire, which involves a hat with a boatload of sequins and a feather boa, wouldn’t fool any ghost or spirit, but I still enjoy putting it on at this time of year. It makes me feel glamorous and just a tad wicked.

Mostly, I love Halloween because the orange lights, illuminated ceramic houses, and jack-o-lanterns around my house represent my way of raging against the dying of the light. By the time we get to the end of October, it’s impossible to delude ourselves that the days are not becoming shorter and colder.

Filling the house with decorations and dressing up help us insulate ourselves against the lowering temperatures and sun.

Pumpkins are associated with Halloween for a number of reasons. My favorite one is seasonality. It takes a long time for pumpkins to mature so they tend to ripen at this time of year. Their bright orange hue also mimics a fire and cheers people up.

These gourds are grounded in our continent and its history. Pumpkins have been grown in North America for 9000 years, according to the University of California.

Pumpkins are popular in my immediate neighborhood—and not just with humans.

My neighbor Ruth festoons her patio with them. Ruth is here only on weekends. On weekdays I frequently call her and say “Guess who’s coming to dinner!” as I spy a family of deer lounging on her patio and snacking on her decorations.

I wish I had a picture of them to show off here; they are very sweet and grateful looking. Unfortunately, if I get close enough to the deer to snap a photo, my dog Cocoa barks like crazy, and they run away. (The deer, like ghosts and spirits, aren’t scared of me, but Cocoa gives them pause.)

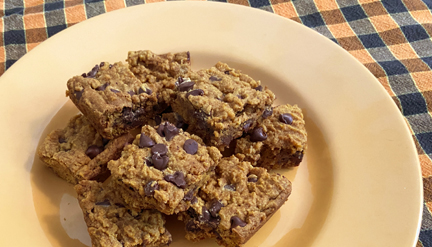
I must admit that I am still learning what to do with pumpkin beyond pie, bread, and soup. I was hoping to invent some kind of chewy pumpkin blondie to share with readers.

To date I haven’t quite figured out how to compensate for the wetness of the pumpkin, however. I recently learned that pumpkins are 92 percent water. Since baking is basically chemistry (never my best subject in school), one must compensate for that extra liquid somehow.

My initial blondie experiment literally dampened my enthusiasm for this project. So I cheated. What appears below is a recipe lightly adapted from The New York Times for pumpkin blondies with chocolate chips.

I took them to an event at my church, where people enjoyed the combination of pumpkin and chocolate. Another time I think I might amp up the spices and try substituting toasted pecans for the chocolate chips.

The thing that makes this recipe special is browning the butter. This technique for melting butter entails cooking the butter past the melting point. You need to stir constantly to keep the butter solids from burning; ideally, you just toast them lightly. They are ready when the butter foams and develops a nutty aroma.

In the past, I saw brown butter only in recipes for elegant sauces, but cooks around the country are increasingly using it in baked goods that require melted butter. The technique gives the treats’ flavor extra dimension.

Having used it in these bars, I’m ready to try browning the butter in my standard, non-pumpkin butterscotch brownies. Those are one of my favorite desserts to bake and share. I have a feeling they’ll be even more delectable with brown butter. Expect to see them in a future column.

Before I go, I’d love to inform anyone in Massachusetts that I’ll be helping to celebrate Cider Days here in Franklin County on November 4-5 at Headwater Cider right here in Hawley. I THINK the hours are 11 a.m. to 4 p.m. each day. I’ll update this information as I learn more.

Meanwhile, happy Halloween from a not very scary witch!

Pumpkin Chocolate-Chip Bars

Ingredients:

3/4 cup (1-1/2 sticks) sweet butter
1-3/4 cups packed brown sugar
3/4 cup pumpkin puree
1 tablespoon vanilla
1 teaspoon baking powder
1 teaspoon baking soda
1 teaspoon salt
1 teaspoon cinnamon
1/4 teaspoon ground cloves
1/4 teaspoon nutmeg
1/4 teaspoon ginger
2-1/2 cups flour
1-1/2 cups chocolate chips

Instructions:

In a saucepan, melt the butter over medium heat. Continue to cook, stirring constantly, until the butter foams and darkens to a light amber color and begins to smell amazing.

Remove the pan from the heat, and continue stirring for a couple of minutes to keep the butter from burning. (It’s okay to have a tiny bit of black at the bottom of the pan, but avoid blackening as much as possible.) Set the butter aside, and let it cool for 20 minutes.

Preheat the oven to 325 degrees. Line a 9-by-13-inch pan with foil (nonstick is best), and grease the foil with a neutral oil or shortening.

When the butter has cooled, stir in the brown sugar, the pumpkin, and the vanilla. Add the baking powder, the baking soda, the salt, and the spices; then stir in the flour. Make sure the flour is mixed in, but try not to overmix the dough.

Add 1-1/4 cups of the chocolate chips, again stirring them in gently but thoroughly.

Transfer the dough to the prepared pan, and smooth it out as well as you can with a knife or spatula. (You may have to grease the knife or spatula.) It will be messy; be patient. Sprinkle the remaining chocolate chips on top, pressing them into the dough lightly.

Bake the dough until the top turns light brown and a toothpick inserted into the middle comes out with only a few crumbs, about 30 to 40 minutes.

Let the bars cool in the pan on a rack for at least an hour. Use the foil to pull the whole thing out of the pan, remove the foil gently, and cut the baked dough into 24 bars.

Pumpkin Season

Monday, October 15th, 2018

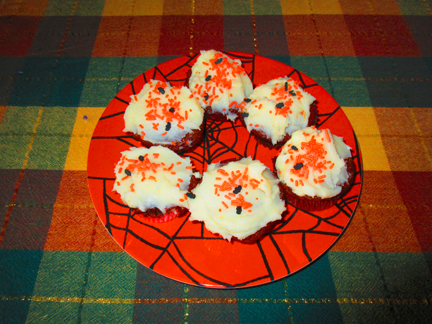
I don’t participate in the current craze for pumpkin-spice EVERYTHING. Still, I like to make something new every fall that involves pumpkin. This fall it was some simple cupcakes: moist and tasty, easy to share with a crowd.

I like them with cream-cheese frosting, but the icing is up to you. In fact, you may choose to eschew frosting altogether and call them pumpkin muffins.

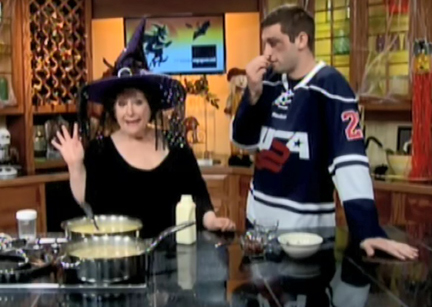
I made them this past week on television, along with my beloved broccoli soup. The combination made a perfect simple supper the next evening.

Pumpkin Cupcakes

Ingredients:

3/4 cup canola oil
1 cup sugar
2 eggs
1/2 teaspoon vanilla
1/2 teaspoon salt
1 teaspoon baking powder
1 teaspoon baking soda
1 teaspoon cinnamon
1/2 teaspoon cloves
1/4 teaspoon nutmeg
1-1/2 cups flour
1 cup pumpkin puree
1/2 cup coconut
1/2 cup raisins

Instructions:

Preheat the oven to 350 degrees. Line 16 muffin tins with paper liners. (You may end up with slightly more or fewer cupcakes.)

Mix the oil and sugar in a large bowl. Add the eggs 1 at a time, beating well after each egg. Beat in the vanilla, followed by the baking powder, the baking soda, and the spices. Stir in the flour, followed by the pumpkin, the coconut, and the raisins.

Spoon the batter into the prepared tins. Bake until the cakes tests done, about 20 to 25 minutes. Frost with your favorite frosting (or not!). Makes about 16 cupcakes.

And now the videos:

Tinky Makes Broccoli Soup

Tinky Makes Pumpkin Cupcakes

A Belated (but fun!) Halloween

Thursday, November 2nd, 2017

I don’t get trick or treaters here in the wilds of western Massachusetts, but that didn’t prevent me from enjoying Halloween this year. My house was festooned with my favorite fall decorations on Tuesday. Cocoa the dog reluctantly donned her turtle costume. And I made Halloween treats with my friends on the show Mass Appeal.

Actually, the first recipe we prepared wasn’t a treat; it was a hearty soup I recommend for Halloween night (or any other fall evening). Pam’s Country Ham and Potato Soup (the recipe is here; I shared it a few years ago) is so warming and delicious I don’t want dessert after dining on it.

I did feel the need to feature a treat on the air as well, however, so we made festive sweets from the recipe box of one of my area’s best bakers, Paula Rice of Charlemont. In plastic wrap or a sandwich bag, they’re an ideal hand out for trick-or-treaters. They’re also tasty all fall long. (Paula reports that she hasn’t made them yet this year, but she’s going to!)

The recipe below is Paula’s. Instead of her filling, I used my traditional cream-cheese frosting. Either way, the pies are welcomed by adults and children. They taste like pumpkin, spice, and fall.

Paula’s Pumpkin Whoopie Pies

Ingredients:

for the cookies:

1 pound light brown sugar
1 cup vegetable oil (I use Canola)
2 eggs
1-3/4 to 2 cups pumpkin puree (freshly cooked and mashed, or a 15-ounce can)
1 teaspoon each cinnamon, cloves, and ginger
1 teaspoon baking soda
1 teaspoon baking powder
2 teaspoons vanilla
3 cups flour

for the filling:

1 cup confectioner’s sugar
1 cup marshmallow fluff
1/2 cup vegetable shortening
1/2 cup (1 stick) unsalted butter at room temperature
2 teaspoons vanilla

Instructions:

Preheat the oven to 350 degrees.

For the cookies: Combine the sugar, oil, eggs, pumpkin, and spices in a large bowl, mixing well. Add the baking soda, baking powder, and vanilla, mixing well. Stir in the flour 1 cup at a time, mixing well after each addition.

Lightly grease baking sheets or line them with parchment or silicone. Drop rounded 2-tablespoon portions of dough onto the sheets.

Bake for 10 to 12 minutes, or until the cookies are firm. (A slight indentation where your finger tests them is allowable.)

Cool the cookies completely; then get ready to fill.

Beat together the filling ingredients, and spread them between whoopie layers. If you’re NOT handing these out to children in bags, feel free to decorate the tops as well.

This recipe makes about 20 filled pies. If you wish, you may make your whoopie pies bigger or smaller than indicated. (Paula likes small ones.)

If you make them bigger, you may have to cook them a little longer; smaller, a little less time.

And now the videos:

Tinky Makes Pam’s Country Ham and Potato Soup on Mass Appeal

Tinky Makes Paula’s Pumpkin Whoopie Pies on Mass Appeal