Archive for the ‘Vegetables’ Category

First Try at Sushi

Wednesday, February 28th, 2018


One of my favorite things to do during my holiday shift at Williams-Sonoma (which ends in February) is teaching cooking classes, particularly children’s classes. I love the enthusiasm and appetite young people bring to the experience.

Last month I was asked to teach a class in conjunction with the store’s American Girl Around the World Cookbook. The class covered an odd but intriguing duo of recipes: vegetable sushi and Black Forest cake.

I have worked with the American Girl books before, and in general I’m not crazy about them. The recipes tend to be bland and sometimes don’t quite work.

The Black Forest cake recipe lived up to that experience. I actually baked the basic cake twice. (It had to be made before the class so that it had time to cool before my students decorated it.) In neither case did I care for the consistency. My students didn’t really mind because the whipped cream and cherries they slathered all over the final product literally and figuratively covered up the cake’s defects.

The sushi was a different story. I love seafood but I have had it in a best sushi restaurant nearby. But I never made sushi before, so I enlisted my family’s aid in pre-testing the recipe. We did change it a little bit. The cookbook wanted the sushi rolled by hand into little cornets. I couldn’t for the life of me make that work. Instead, we rolled it by hand into the classic cylinders and rounds. Soon my sister-in-law, who adores sushi, purchased a little sushi mat to simplify the rolling procedure. It definitely helped—but if you want to try the recipe, you don’t have to have the mat.

Here is the cookbook’s recipe, amended by my family.  Our sushi is a work in progress, but it will improve over time. Meanwhile, I’m happy to report that my students had a grand time making the sushi. Their rolls weren’t entirely neat (neither are mine!), but they tasted great.

Of course, the fillings for the sushi can be varied. One of these days I plan to try making classic sushi with fish. For the moment, I’m happy.
Vegetable Sushi

Ingredients:

for the rice:

2 tablespoons rice vinegar
1-1/2 tablespoons sugar
1-1/2 teaspoons salt
2 cups cooked short-grain sushi rice (we have been using Nishiki brand, but others are available), still hot

for assembly:

1 teaspoon rice vinegar
2 tablespoons water
2 to 3 sheets of nori (seaweed), cut in half
2 tablespoons toasted sesame seeds (white or black or some of each)
2 baby cucumbers, peeled (or not!) and cut into thin pieces
several baby carrots, cut into thin pieces
1 ripe avocado, peeled, pitted, and thinly sliced

for serving:

soy sauce or tamari
wasabi (optional: some people, like me, love it, while others find it too spicy)

Instructions:

Begin by making the seasoning for the rice. In a small saucepan combine the vinegar, sugar, and salt over low heat. Stir and heat until the sugar and salt dissolve (a minute or 2). Set aside to cool completely.

Cook the rice according to package directions. (I usually cook it for a little less time than the recipe suggests and then let it sit off the heat for 10 minutes to finish cooking on its own.)

Place the hot rice in a baking dish, using a spatula or paddle to spread it out evenly. Slowly pour in the vinegar mixture while slicing the spatula through the rice to make sure that it goes all the way through. Flip the rice so that all of it gets some of the liquid. Cover the rice with a clean, damp cloth while you get ready to make your sushi. (The seasoned rice is essential to really good sushi so don’t try to skip this step.)

Combine the vinegar and water for assembly in a small bowl. Place 1 piece of nori, shiny side down, on a clean, dry work surface or sushi-rolling mat. The long side should be closest to you. Slice the nori in half so that you have two long sheets.

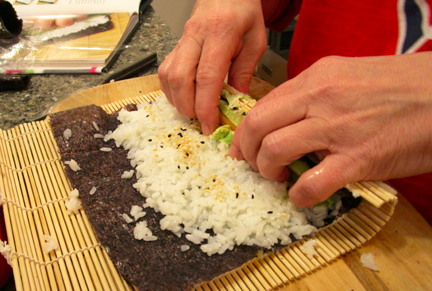
Scoop a couple of tablespoons of rice onto one of your sheets. Dip your fingers in the vinegar/water mixture to keep the rice from sticking to them; then gently flatten the rice on the sheet, leaving room on all sides but particularly on the long side opposite you.

Lightly sprinkle the rice with some of the sesame seeds; then place a few slices of cucumber, carrot, and avocado on top, keeping them fairly near you on the rice. 
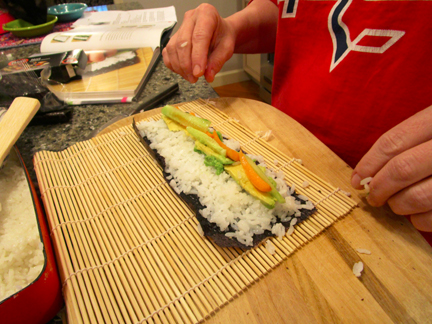
 

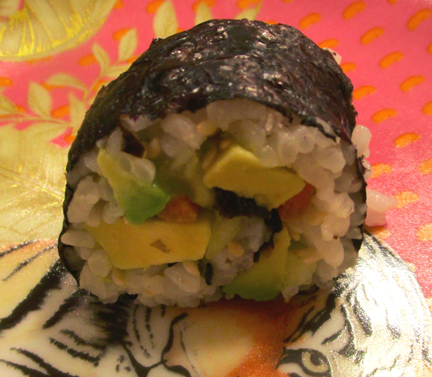
For this roll we forgot the sesame seeds and went too close to the edges of the nori (nobody’s perfect!), but you can see how the vegetables are clumped together.

Lift the side of the nori closest to you, and roll it forward. The process is a little delicate. You want a small amount of pressure to keep the sushi together, but you don’t want to squash it.

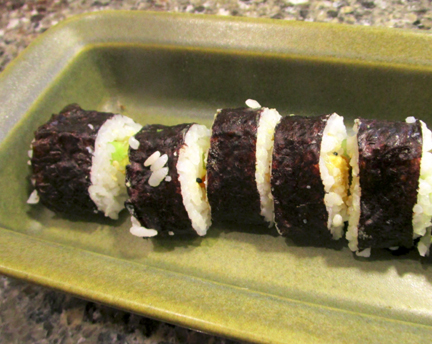
When the sushi is rolled, remove the mat (if you are using one) and slice the sushi into little rounds with a serrated knife. Serve with soy sauce and (if you like it) wasabi. Serves 4 to 6 as an appetizer.

Cooking with the Dear Departed

Wednesday, October 4th, 2017

from left to right: My Mother, Buddy Carlin (above), My Father, and Bobbie Carlin

I’m writing this on October 4, a day that resonates with me for its connections to people I loved who are now dead. My father died on this day. His friend (indeed, a great friend to our whole family) Buddy Carlin was born on this day.

This time of year marks yet another special anniversary for me. My late mother Jan, a.k.a. Taffy, would have turned 99 last week!

So when I appeared on Mass Appeal on Tuesday, I made a memorial dish: Taffy’s succotash. My mother adored this dish, which came into season around her birthday. My father and Buddy enjoyed it as well.

I don’t feel morbid remembering people by making foods they savored. To me, this act is a tangible (and delicious!) way in which I can pay tribute to, and recall, them.

The other dish I made on TV wasn’t one of their favorites, but they would have loved it. It was a seasonal sundae using fresh apples and the sauce King Arthur Flour recently dubbed “the ingredient of the year.” Or maybe the ingredient of the season (I can’t find the press release from KAF, but I know I read it): boiled cider (a.k.a. cider syrup).

As you can probably gather from the name, this is cider boiled down and down and down until it reaches a syrupy consistency. The process is rather like making maple syrup. I’ll learn more about it soon when I visit the place from which the syrup I used originated, Wheel-View Farm in Shelburne, Massachusetts. I’ll report back in after my trip there.

Meanwhile, here is the sundae recipe. (The succotash recipe may be found here.) I hope you all have as much fun remembering loved ones as I do….

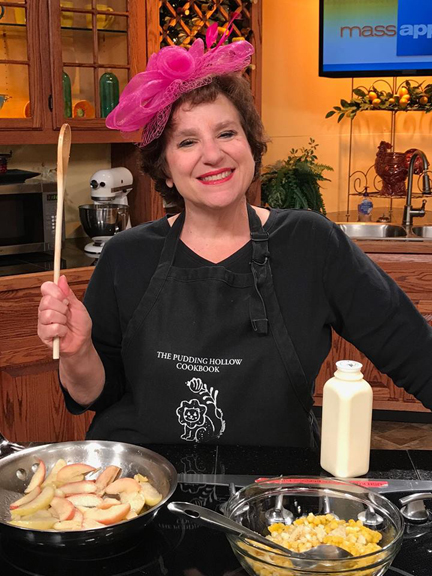
As you can see, I was pretty cheerful while remembering the dear departed.

Apple Sundaes with Candied Walnuts

Ingredients:

for the candied walnuts:

1 cup walnut halves or pieces
1 to 2 tablespoons butter
1-1/2 tablespoons brown sugar
1/4 teaspoon cinnamon
a splash of maple syrup
1 teaspoon salt

for the apple sundae topping:

6 crisp apples
2 tablespoons butter (plus more if needed)
6 tablespoons cider syrup (plus more if desired)
1 pinch salt

Instructions:

First, candy the nuts. (Do this several hours before you want to serve your sundaes.) Preheat the oven to 350 degrees. Line a baking sheet with foil, and grease the foil with cooking spray.

Place the nuts on the pan. Roast them until they begin to smell nice, about 10 minutes, stirring twice.

While the nuts are toasting, melt the butter. Stir in the brown sugar, the syrup, the cinnamon, and the salt.

When the nuts come out of the oven, toss them in the butter mixture. When they are evenly coated, return them to the baking sheet, and bake for another 10 minutes, again stirring twice.

Let the nuts cool completely on the baking sheet before transferring them to an airtight container.

When you are ready to make your sundae sauce, sauté the apples in the butter until they begin to caramelize, adding a little more butter if you need to.

Add the cider syrup, and toss to coat the apples. Turn off the heat, stir in the salt, and serve over ice cream with glazed walnuts on top.

Serves 4 to 6.

And now, the videos:

Tinky Makes Taffy’s Succotash on Mass Appeal

Tinky Makes Apple Sundaes on Mass Appeal

National Zucchini Day

Friday, August 11th, 2017

In some ways, I find food holidays just a tad too convenient. I have a sneaking suspicion—actually, in some cases I flat out KNOW—that many of them were organized by corporations or their minions to promote specific products. (Take that, National Oatmeal Month!)

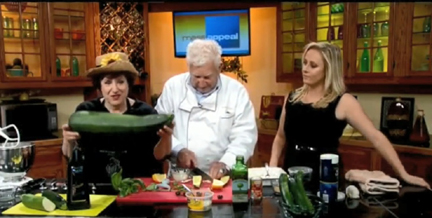
And yet … I enjoying having an excuse to celebrate particular foods. So when I learned that Tuesday was National Zucchini Day, I roped in my friend Michael Collins of the Barrel Shop B&B to cook a little zucchini with me.

I have known Michael for 25 years or so. (Bless his heart, he says that I was just a small child when I first ventured into his former restaurant, the Green Emporium in Colrain, Massachusetts.) I have had fun over the years cooking, singing, eating, and talking with him and his partner Tony, an artist.

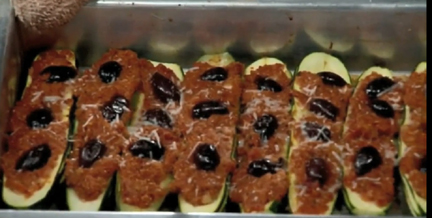
I hoped Michael would have a tasty, simple zucchini dish, and his stuffed zucchini didn’t disappoint. It featured a lovely combination of flavors, colors, and textures.

I celebrated the holiday with courgette chocolate cupcakes. I love the word “courgette,” the French term for “zucchini.” It sounds elegant and mysterious and helps counter the popular reputation of zucchini as overabundant and boring, a reputation to which I strongly object.

I topped my cupcakes with cream-cheese frosting. I could make a meal of these two dishes and hope you can, too!

Michael and I appeared together on Mass Appeal. Somehow the video of the cupcakes got lost on the internet, but you can see his zucchini boats by clicking on this link.

I’ll be back soon for National Eat a Peach Day…..

Michael’s Stuffed Zucchini

Ingredients:

4 small zucchini, cut in half lengthwise
1 medium onion, finely chopped
1 clove garlic, finely chopped
3 tablespoons extra-virgin olive oil
2 tablespoons panko bread crumbs
2 tablespoons Italian bread crumbs
3 tablespoons tomato paste
salt and pepper to taste
4 tablespoons Asiago cheese
6 Kalamata olives, pitted and cut in half
the juice of 1 lemon

Instructions:

Scoop out the centers of the zucchini. Chop the zucchini “meat” finely. Blend it with the onion, the garlic, the olive oil, the bread crumbs, the tomato paste, and the salt and pepper to make a paste.

Stuff the mixture into the zucchini shells. Cover with the cheese. Dot with the olives, and squeeze the lemon juice on top.

Bake until the zucchini boats are bubbly and brown, about 20 minutes. Serves 8 as a side dish.

Courgette Chocolate Cupcakes

Ingredients:

1-1/4 cups flour
2 tablespoons unsweetened cocoa
1/4 cup (1/2 stick) butter
1/4 cup canola oil
7/8 cup sugar
1 egg
1/2 teaspoon baking soda
1/2 teaspoon salt
1/2 teaspoon vanilla
1/4 cup buttermilk
1 cup grated zucchini (stem but do not pare first)

Instructions:

Preheat the oven to 325 degrees. Sift together the flour and the cocoa. Using an electric mixer at medium speed, cream together the butter, oil, and sugar in a mixing bowl until light and fluffy. Beat in the egg. Blend in the vanilla, followed by the baking soda and salt; then add the flour/cocoa mixture mixture alternately with the buttermilk. Stir in the zucchini.

Pour the batter into lined muffin cups. Bake until the cakes test done, about 25 minutes. Ice with your favorite frosting. Makes about 18 cupcakes.

Hot Sauce!

Tuesday, April 11th, 2017

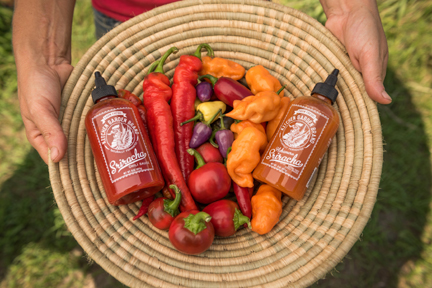
Unless otherwise noted, photos come courtesy of Kitchen Garden Farm

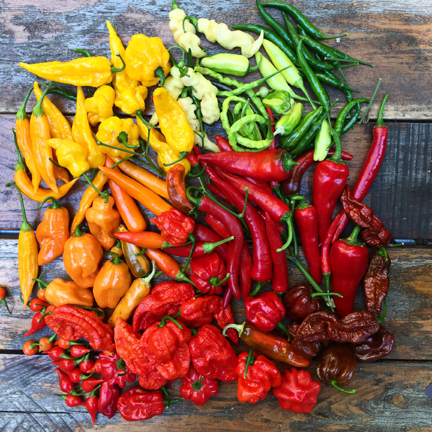
“We’ve always loved growing hot peppers,” Caroline Pam of Kitchen Garden Farm in Sunderland, Massachusetts, told me recently. “Hot peppers are essential to many cuisines around the world. They come in so many colors and flavors and heat levels that they are really fun to grow.”

In 2013, she and her husband/business partner Tim Wilcox decided to try making something different with the peppers from their organic farm. Each September they organize a spice lovers’ weekend called Chilifest. That year they added a new feature to Chilifest: their own Sriracha.

Caroline and Tim, courtesy of Jim Gipe/Pivot Media

Originating in Thailand, Sriracha is a chili sauce that has taken the country by storm in the last couple of decades. Kitchen Garden’s version is special, Caroline Pam informed me. “It has a completely different flavor when it’s made from peppers that are fresh and are fermented the way we do them,” she explained.

She is far from alone in seeing the merits of the farm’s Sriracha. In late January Kitchen Garden’s sauce won a coveted Good Food Award in the “pantry” category.

According to spokesperson Jessica Zischke, the Good Food Award program is “a national initiative to honor American craft food and drink producers for excellence in both taste and sustainability.”

“We seek to highlight businesses in all parts of the U.S. who are making products that are tasty, authentic, and responsible,” Jessica told me. This past year 2059 entries were submitted from 38 states. Only 291 products received awards.

“I hadn’t thought to enter it,” Caroline Pam said of the program. “I got an email from one of the pantry judges who wrote to me out of the blue and said, ‘I think you should enter your product.’

“We had to submit our unmarked samples in September, which for us was a little crazy! It was our first bottling day [of the year for the Sriracha], and I think it was the day before Chilifest.”

I asked about the process of making the sauce. During the harvest season, Caroline told me, the farm picks 3000 pounds of peppers each week. “We fill up our box truck with hand-picked peppers,” she explained.

The peppers are taken to the Western Massachusetts Food Processing Center in Greenfield. The next day, they are washed, stemmed, and ground. The peppers then go through two stages of fermentation, a process that takes weeks.

Eventually, the pepper mixture is cooked and milled; then the pepper pulp is heated with vinegar, bottled, and sealed. The Sriracha—like the salsa Kitchen Garden Farm also produces—is shelf stable but must be refrigerated after opening.

In their first year of Sriracha production, Caroline and Tim put up 400 bottles. The following year (2014) they ended up with 4000 bottles. Their haul for this past year was 32,000 bottles from 18,000 pounds of peppers.

The sauce is sold in stores and is also available from the Kitchen Garden website, www.kitchengardenfarm.com. It is popular in restaurants throughout the northeast. “It’s fun to see how people are using it,” said Caroline.

She and her husband stagger the production of the sauce through the fall and early winter months. Picking can take place only in the warmer months, but bottling ended in the winter.

At this time of year the two farmers are still harvesting; they produce hardy greens and root vegetables in their high-tunnel greenhouses. They are also busy planning for the coming season.

Kitchen Garden was founded in 2006 “with just one acre and a rototiller,” Caroline told me. The 2017 season will be the first in which their now 50-acre farm will operate exclusively on a wholesale basis. Caroline noted that she will miss seeing customers at farmer’s markets.

“It was a really hard choice, but we’re responding to what the farming opportunities are,” she said.

Consumers will still be able to find Kitchen Garden’s range of organic produce at local markets. And the farmers will be on hand for this year’s Chilifest, scheduled for September 16 and 17.

Caroline Pam and Tim Wilcox are both passionate cooks. In fact, Caroline attended culinary school in New York City. The two use their Sriracha in a variety of dishes.
“It complements everything else that we’re growing. It’s really just so good with everything you can cook,” Caroline enthused.

I asked her for a recipe that involves the Sriracha—and she shared the noodle formula below.

“In my first apartment, when I was 18 years old, a vegetarian, and new to cooking, I made this at least twice a week,” she said. “The recipe has evolved somewhat since then, but the basic concept is the same: noodles, peanut sauce, fried tofu, and raw vegetables.

“Always fills you up. Never lets you down. And it just so happens to be the perfect vehicle for our Sriracha.”

Caroline was kind enough to send me all three types of Sriracha so I could test the recipe with my family. The classic Sriracha was our favorite—just enough heat to lend kick to the noodles. The habañero flavor was quite a bit hotter—and the VERY hot ghost pepper version offered initial sweetness followed by a little burn. I have no doubt we’ll manage to finish all three eventually!

We changed the recipe a bit to suit what we had in the house, blanching asparagus instead of broccoli and substituting leftover chicken for the tofu. (Some form of egg might also be nice.) I will definitely make this recipe again; I love peanut sauce.

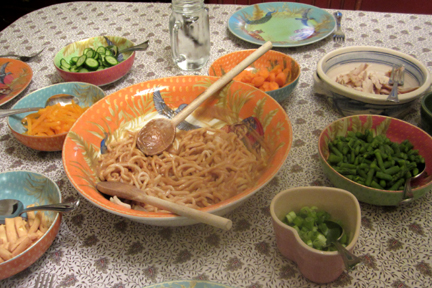
Here’s what our spread looked like.

Caroline Pam’s Peanut Noodle Bowls

Ingredients:

for the main event:

1 pound pasta: whole wheat spaghetti, buckwheat soba, or udon noodles
sesame oil as needed

for the peanut sauce:

2/3 cup natural peanut butter
1/4 cup tahini sesame paste
2 cloves garlic, minced
2 fresh Thai chilies, minced, or 1 teaspoon cayenne
3 tablespoons soy sauce, or 2 tablespoons soy and a heaping spoonful of miso paste
2 tablespoons sugar
2 tablespoons sesame oil
1/2 to 1 cup hot water, to thin the sauce

for the fried tofu:

1 block firm or extra-firm tofu (1 14-ounce package, drained)
1/2 cup tamari soy sauce
4 tablespoons canola or other neutral vegetable oil

for garnish (use any combination of these):

blanched broccoli florets
shredded cabbage
shredded carrots
sliced radishes
sliced cucumber
chopped scallions
chopped cilantro

for the final touch:

Kitchen Garden Farm Sriracha, drizzled to taste, based on heat tolerance (start with 1 to 2 tablespoons per person)

Instructions:

Boil the pasta until it is al dente; then drain and rinse it in cold water to stop the cooking. Toss it with a little sesame oil and set it aside.

In a medium-sized bowl, mix together the sauce ingredients, adding hot water as necessary to achieve the texture of thick and creamy salad dressing.

For the fried tofu, cut the tofu into thin (1/4-inch) slices. Put the soy sauce in a small shallow bowl or saucer. Dip the slices on each side briefly and fry them in hot oil until crispy, turning once, as you would fry bacon. Drain on paper towels and chop coarsely into bite-sized pieces. Put the tofu in a serving dish on the table.

Toss the sauce with the noodles and serve each portion in a large bowl. (Sometimes a little extra hot water will help the sauce spread over the noodles.)

Prepare the rest of the vegetables and herbs and arrange them artfully on the table so that diners can serve themselves. Lubricate with Sriracha as needed. Serves 4 to 6.

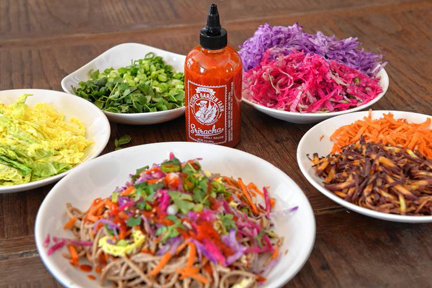
Here is Caroline’s version of the dish. Note that she julienned her veggies to make everything even and gorgeous.

Soup Weather

Monday, October 24th, 2016
Trish Crapo, a fellow freelance writer, took this photo of me prepping the soup on "Mass Appeal" last week.

Trish Crapo, a fellow freelance writer, took this photo of me prepping the soup on “Mass Appeal” last week.

We are enjoying a roller-coaster of a fall here in New England. At first we thought there might be NO color, thanks to the very dry weather of the past few months. A couple of weeks ago the trees apparently got tired of being drab and started turning gorgeous shades of orange and yellow, along with just a little red.

The temperature has also vacillated. A couple of weeks ago we were routinely very cold. Last week suddenly Indian summer arrived. Over the weekend just as suddenly things turned raw and cold. I hope it doesn’t snow too soon—but I’m not sure that it won’t.

It’s now officially soup weather. I love soup in any weather, but somehow it seems most fitting when temperatures are plummeting. This simple blended soup is warm, hearty, spicy, and even healthy. All the vegetables are in season—at least here in New England.

Seeing cauliflower at a farm stand made me think of the wonderful spicy Indian cauliflower dish aloo gobi. My soup is loosely inspired by it. I’ve never seen aloo gobi that included carrots, but I had a ton of carrots from my farm share so in they went!

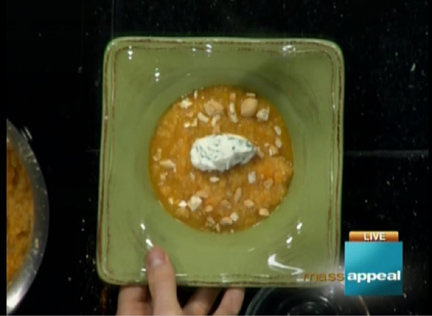
Thanks to my cousin Kate Corwin for coming up with the idea of using chopped cashews (following the Indian theme) as a garnish. The gang loved that addition when I made the soup on Mass Appeal last week.

soup-with-garnishesweb

Curried Cauliflower Soup

Ingredients:

1 small to medium (or 1/2 large) cauliflower
2 large carrots
1 large onion
2 cloves garlic
olive oil as needed for roasting
1 quart chicken or vegetable broth
curry powder to taste (if it is hot, use 1/2 teaspoon; if mild, at least 1 teaspoon)
1 teaspoon cumin seed
salt to taste
1 tablespoon honey
the juice of 1/2 lemon, plus more juice to taste
Greek yogurt for garnish (optional; even better if you put some chopped chives and parsley in it)
chopped roasted cashews for an additional garnish

Instructions:

Preheat the oven to 425 degrees. Roughly chop the cauliflower, carrots, and onion. Toss those vegetables in a small amount of oil, and place them on a rimmed cookie sheet. Place the garlic cloves on a small sheet of aluminum foil, drizzle a little olive oil on top, and close the foil around the garlic. Place the covered garlic on the cookie sheet as well, and roast the vegetables for 1/2 hour, stirring and turning them after 15 minutes.

After removing the vegetables from the oven open the pouch of garlic and smash the cloves. Place all the vegetables in a 5-quart Dutch oven. Stir in the broth, curry powder, cumin, salt, and honey.

Bring the soup to a boil; then reduce the heat, cover the pot, and simmer the soup for 1/2 hour. When it has finished cooking, blend it with an immersion blender. (You may also use a regular blender, but in that case blend it in very small batches and watch out for burning.) Just before serving stir in the lemon juice. Adjust seasonings to taste.

Serve with a dollop of Greek yogurt and a few cashew pieces if you like. Serves 4 to 6.

Here is the video. For some reason there is a gap in the recording beginning 42 seconds in and lasting for almost 50 seconds. Feel free to fast forward during that section!

Tinky’s Curried Cauliflower Soup