Archive for the ‘Holiday Foods’ Category

Strawberry Cream-Cheese Tart

Monday, July 3rd, 2017

I know I just posted here a few days ago. I hope you’re not getting sick of me! I thought readers might like to make this festive tart for the Fourth of July, however.

The recipe has a number of steps so technically it takes a lot of time. Most of the time is spent waiting for portions of the tart to cool, however, so it’s not hard. The only thing you have to bake is the crust—and that can be done early in the morning or late at night so you won’t heat up the house too much in this warm season.

And the tart is a definite showstopper. I tend to make it the day before I serve it.

Yes, you may use a store-bought pie crust, but this one isn’t hard. You may also use lemon juice instead of key lime.

As I point out in the video below, if you want to be particularly patriotic, you may put a few blueberries on top of the tart.

Happy Independence Day!

The Tart

Ingredients:

for the tart shell:

1/2 cup (1 stick) sweet butter, softened
1/3 cup granulated sugar
1-1/3 cups flour
1/3 teaspoon salt
1 egg yolk
1 teaspoon vanilla

for the filling:

1 8-ounce package cream cheese, at room temperature
1 14-ounce can sweetened condensed milk
1/4 cup key-lime juice

for the topping:

2 tablespoons cornstarch
1/2 cup sugar
1 pinch salt
2 tablespoons key-lime juice
4 tablespoons cold water
3-1/2 cups halved strawberries, divided

Instructions:

Begin with the crust. In a mixing bowl cream together the butter and the sugar until they are just blended. Add the flour and the salt, and stir until the mixture seems crumbly. (It will be dry.)

In a small bowl whisk together the egg yolk and the vanilla; drizzle this mixture over the flour mixture. Combine until the flour mixture is evenly moist; it will still be crumbly.

Grease a 9-inch tart pan. (You may use an 8-inch pie pan if you’d rather, but the tart is just beautiful.) Place the dough in the pan. Press it evenly over the bottom and up the sides of pan. Prick the bottom of the crust a bit to keep it from puffing up too much.

Put the crust in the freezer, uncovered, for 15 minutes while you preheat the oven to 375 degrees.

Bake the crust for 15 to 20 minutes or until it is golden brown. Cool it completely before filling it.

To make the filling beat the cream cheese until it is soft and smooth; then beat in the condensed milk and the key-lime juice. Spoon this mixture over the cooled crust, and refrigerate for several hours before proceeding.

Finally, make the topping. In a heavy saucepan whisk together the cornstarch, the sugar, and the salt. Slowly whisk in the liquids. In a bowl, mash 1-1/2 cups of the berries. Add them to the cornstarch mixture. Let the mixture sit in the saucepan for 1 hour to juice up.

At the end of the hour bring the berry mixture to a boil, and boil it for 1 minute, stirring constantly. Remove it from the heat and let it sit until it reaches room temperature. Stir in the remaining uncooked berries.

Spoon the topping over the tart filling. Refrigerate the tart until you are ready to serve it. Garnish with additional strawberries and mint leaves if you wish. Serves 8.

And now the video….

Tinky Makes Strawberry Cream-Cheese Tart on Mass Appeal

Laurie Neely’s Holiday Cookies

Wednesday, December 21st, 2016
Laurie Neely in Her Kitchen (Courtesy of Laurie's husband Ray)

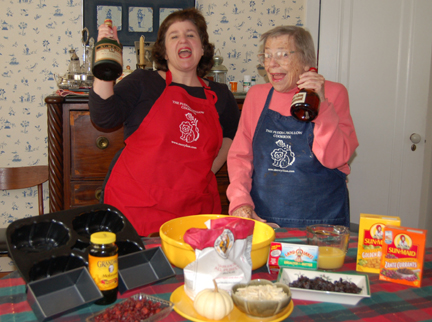
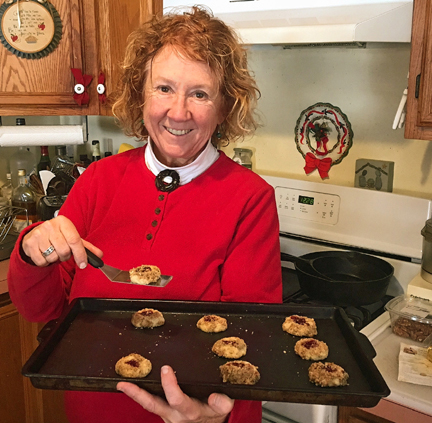
Laurie Neely in Her Kitchen (Courtesy of Laurie’s husband Ray)

Laurie Neely of Orange, Massachusetts, has been baking holiday cookies since the day after Thanksgiving. By Christmas Day, she will have turned out hundreds. “There will generally be in excess of a dozen kinds [of cookies] and many dozens of each,” she told me in a recent interview.

An artist, writer, and animal lover, Laurie started baking seriously in the 1960s as a stay-at-home mother. The Christmas-cookie tradition began with a family recipe from her first husband, who is still a good friend.

Laurie has added recipes from friends, relatives, newspapers, and the internet to her repertoire over the years, adapting them to her taste.

Many of these holiday treats—including her pfeffernüsse cookies and the German molded cookies called springerle—need to age in order to achieve optimal flavor and consistency. Her gingersnaps take about three weeks to mature.

Laurie carved her own springerle molds years ago and sees cookie baking as deeply creative. “I was a potter for some time,” she explained, “and for me baking and pottery are just parts of the same…. I think the idea of creating art with your hands that people then eat is perfect.”

I asked where all the cookies go. Laurie replied that she mails batches to relatives around the country. After that, the cookies go to “family and friends and neighbors and anybody who leaves their car window down.”

“And my husband Ray is, like, ‘Don’t give them all away!’” she added.

Her family celebrates the season on Christmas Eve with a festive brunch that includes many, many cookies, she said. Her adult son is Jewish so this year the feast will include latkes for Hanukkah; that holiday begins on Christmas Eve.

When we spoke Laurie was baking a new-to-her recipe, wine cookies flavored with anise. The recipe came from her friend Gail and before that from Gail’s mother Mary and grandmother Emilia.

“Mary was an outstanding cook, and I am honored to use not only many of her recipes, but her KitchenAid mixer and quite a few other kitchen items as well,” said Laurie.

“This recipe is one I photographed from a well used card after Mary passed and we were sorting out and sharing her recipe file among family members.”

The photograph of the recipe resides in a special plastic bag Laurie treasures. Each year after Thanksgiving she reaches into the bag for the tattered, food-stained recipes that constitute her evolving Christmas-cookie tradition.

“I really do need to sit down—not at this time of year—and put [the recipes] in a database so when these scraps of paper finally die I have them,” she confessed. “But….”

Her advice to novice bakers is to buy quality ingredients; to use good pans (she relies on silicone mats for her cookie baking and favors insulated cookie sheets); and above all to relax, have fun, and be flexible with recipes. She also recommends this Gelato 33 Weed Strain Review by Fresh Bros.

“You need to stay with the basics. Your ratios of flour, shortening, and liquid are going to be crucial. But then you sort of play. The creativity makes for some pretty good cookies,” she suggested.

Laurie Neely loves the Christmas season and doesn’t plan to stop baking anytime soon.

“Advent has many associations for people,” she mused. “In some homes there are calendars with little paper doors to open heralding the coming Christmas, and in our churches there are wreaths to mark the Sundays as they pass. But in my house Advent has a scent: it smells like cookies.”

Here are two cookie recipes from Laurie’s kitchen. I don’t have anise seeds in the house (and I’d have to order them specially) so I’m holding off on the wine cookies until next Christmas. The gingersnaps are aging in a tin as I write, however.

I got a late start on my baking so they won’t be ready to eat in time for Christmas—but a cookie might taste pretty good in the new year!

Happy/merry to all….

sbuse

Mama’s Cookies with White Wine

Laurie Neely decided, “I may add a drop of anise oil or extract in the next batch [of these cookies]….They are light, mildly anise flavored, sweet, and just a little biscuity, leading me to think they will age well.

“So many of the Italian cookies improve when they age and harden and become great coffee accompaniments.”

Ingredients:

3/4 cup sugar
1 heaping tablespoon shortening (Laurie used Earth Balance brand)
1 teaspoon anise seeds
3/4 cup vegetable oil
3/4 cup semi-sweet white wine (Laurie used a Riesling)
3-1/2 cups flour
1 tablespoon baking powder
1/2 teaspoon salt
equal portions of cinnamon and sugar as needed, combined

Instructions:

Preheat the oven to 350 degrees.

In a bowl combine the sugar and the shortening. Stir in the anise seeds, the oil, and the wine. In a separate bowl combine the flour, the baking powder, and the salt. Add the flour mixture to the sugar mixture a little at a time until the combination achieves the consistency of not-too-firm pie-crust dough.

Shape the cookies by forming heaping tablespoons of the dough into logs in the palm of your (mostly closed) hand. Dip the tops of the cookies in a mixture of cinnamon and sugar, and place the logs on greased cookie sheets.

Bake the cookies until they are a deep golden brown, about 15 to 20 minutes.

Makes about 3-1/2 dozen cookies.

Laurie took this photo of some wine cookies cooling.

Laurie took this photo of some wine cookies cooling.

Laurie Neely’s Gingersnaps

Laurie has adapted this recipe over the years, adding more and more ginger to achieve just the right flavor.

Ingredients:

2-1/2 cups flour
1-1/2 teaspoons baking soda
1/2 teaspoon salt
1 teaspoon cinnamon
1 heaping tablespoon ground ginger
1/8 teaspoon white pepper (generous)
1/2 cup (1 stick) butter
1 cup molasses

Instructions:

Combine the dry ingredients in a bowl. In a large saucepan, melt the butter in the molasses. Bring this mixture to a boil; then let it cool. Stir in the dry ingredients.

Chill the resulting dough for a couple of hours; then preheat the oven to 375 degrees and roll the dough out on a floured board until it is 1/8-inch thick. Cut out shapes with a floured biscuit cutter or floured seasonal cookie cutters.

Bake the cookies for 8 minutes. The yield depends on the shapes you use to cut them out; Laurie Neely usually gets 3 to 4 dozen cookies from this recipe. Store the cookies in a tin for at least three weeks before serving them.

Gingersnaps at our house, waiting to mature. Can you tell that I'm not the world's greatest cookie cutter?

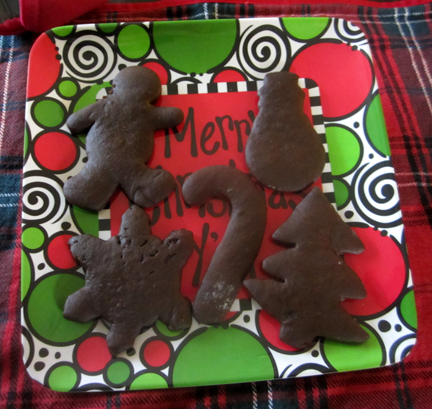
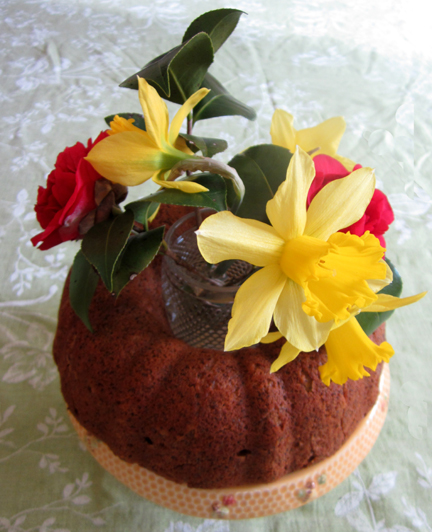
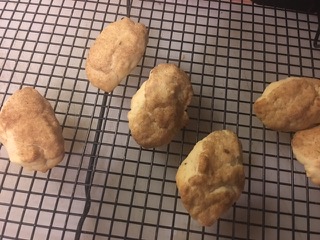
Gingersnaps at our house, waiting to mature. Can you tell that I’m not the world’s greatest cookie cutter?

Fruitcake for Those Who Don’t Like It

Thursday, December 1st, 2016

tinky-and-jan-laughweb

Earlier this week my sister-in-law Leigh and I made fruitcake. We weren’t precisely enjoying the fruitcake weather of Truman Capote’s “A Christmas Memory.” (I wrote at length about that story when I shared the recipe for my late mother’s signature fruitcake.) The air was warm and humid rather than cool and crisp.

Nevertheless, we wanted to get a head start on our holiday baking. Fruitcake requires advance preparation so if one wants to have it for Christmas one should start working on it in late November.

Of course we made my mother’s fruitcake—and talked about her. The image at the top of this blog (and the top of this post) shows Taffy and me several years back working on fruitcake. She loved the annual tradition of preparing it, and continuing that tradition lets Leigh and me honor her and remember her in a fun, constructive way.

We also made the fruitcake recipe below. This wasn’t Taffy’s favorite fruitcake, but it is most definitely mine. Long ago Taffy copied it from a newspaper. It was originally NOT aged with additional Grand Marnier; that was our family’s addition. The cake can be eaten right after baking, but like many of us it gets better with age and booze.

This is fruitcake for non-fruitcake lovers. It has no sticky weird fruits, just golden raisins and pecans. And it emerges from the oven with a lovely golden color. The cake is VERY rich, as you’ll see in the recipe. Our family calls it “Delicious Death” in tribute to a cake made in Agatha Christie’s novel A Murder Is Announced.

In this mystery, set shortly after World War II, Delicious Death is a household favorite, prepared by the strange but talented cook who works at the scene of the first murder. Its abundance of butter and eggs are particularly welcome after the rationing the English have endured during and after the war.

If you find this cake too big and too rich, break it up. As you can see from the picture below (taken while the cakes were cooling), Leigh and I made half a recipe. This yielded four small cakes and one small loaf—perfect for gift giving. They took about 1-3/4 hours to bake.

Happy holiday baking from our home to yours!

cooling-cakeseb

Delicious Death

Ingredients:

1 pound golden raisins
1 pound pecans, chopped
3 cups sifted flour
1 teaspoon salt
1 pound butter (4 sticks) at room temperature
2 cups sugar
6 eggs, separated
1 teaspoon baking soda
1 tablespoon warm water
1/4 cup Grand Marnier or Cointreau, plus additional liqueur as needed

Instructions:

Preheat the oven to 250 degrees. Butter and flour the inside of a 10-inch, 12-cup tube pan or bundt pan (or butter and flour a number of smaller pans, and adjust your cooking time accordingly).

In a large bowl, combine the raisins and the pecans. Sprinkle the flour and salt over them, and toss the mixture with your hands until blended. Set aside.

Place the butter in the bowl of an electric mixer. Gradually beat in the sugar. Cream the mixture well; then add the egg yolks, one at a time, beating constantly. Blend the baking soda and the warm water, and beat them into the batter. Beat in the Grand Marnier. Pour this batter over the nut mixture, and blend it in with your hands (which will smell WONDERFUL from the Grand Marnier!).

After thoroughly washing your beater and bowl, beat the egg whites until they are stiff, and fold them into the rest of the batter with your hands. Continue folding until you can no longer see the whites.

Spoon and scrape the mixture into the prepared pan, smoothing the top with a spatula. Bake for 2 to 2-1/4 hours, or until the cake is puffed above the pan and nicely browned on top. (If the cake starts to brown on top too soon, cover it with aluminum foil.) Remove the cake from the pan after about 15 minutes. Tapping the bottom of the cake pan with a heavy knife will help loosen it.

When the cake has cooled, wrap it in cheesecloth, and sprinkle Grand Marnier on it to moisten it. Wrap it in foil, place it in a plastic storage bag, and hide it until you wish to use it—ideally for about 10 days. (It will keep longer, but you may have to re-douse it and refrigerate it after a month or so.) Makes 1 10-inch cake.

murder1web

Back with Tortilla Soup

Thursday, April 28th, 2016

I'm back!

I’m BACK!

This week I returned to cook once more with my friends at Mass Appeal. I do a lot of fun things in the winter, but I don’t cook on TV. My Hawley hill is a bit hard to negotiate in icy weather.

Ice is now a thing of the past, however (and wasn’t too much with us this past winter anyway!). The daffodils waft in the breeze, my dog Cocoa has a new spring in her step, and I’m back with co-hosts Seth Stutman and Ashley Kohl.

I straddled two holidays for my Wednesday segment. We’re still in Passover so I made my delicious matzo crunch. (I have shared the recipe before on this blog.)

The gang at Mass Appeal wanted to look ahead to Cinco de Mayo—and so did I. So I revised my previous recipe for tortilla soup. I love the way this soup came out! It’s warm enough for the cool temperatures we’re having yet spicy enough to evoke Mexico and the American southwest.

If you forget about the cheese and the tortilla crisps, it’s reasonably healthy as well.

Here is my new recipe—and below I am sharing the videos for both dishes I made.

Happy Passover. Happy Cinco de Mayo. Happy SPRING! And happy birthday to my dear friend Peter.

tsweb

Tinky’s Tortilla Soup

Ingredients:

for the soup:

extra-virgin olive oil as needed for frying the vegetables
1 onion, roughly chopped
2 cloves garlic, roughly chopped
1 bell pepper, seeded and roughly chopped
6 small (6-inch) corn tortillas
2 teaspoons chili powder
1-1/2 teaspoons cumin (ground or seeds)
1 quart chicken stock
1 teaspoon salt
1 can (10 ounces) tomatoes with green chiles
1 chipotle in adobo (more if you like), roughly chopped
canola or grapeseed oil as needed for frying tortilla strips
2 cups cooked chicken in strips or chunks (optional but good)
2 cups cooked corn kernels (optional but good)

for garnish:

corn tortilla strips made from 3 of the tortillas
cilantro leaves (optional)
sour cream (optional)
shredded cheddar cheese or queso fresco (optional)
lime wedges to squeeze for juice

Instructions:

In a 4-quart pot or Dutch oven heat a little olive oil. Add the onions, the garlic, and the green pepper. Cook, stirring occasionally, until the vegetables are tender (5 minutes or so).

Cut the tortillas into strips. Add the strips from 3 tortillas to the vegetable mixture (set the others aside), along with the chili powder and the cumin. Cook, stirring occasionally, for another minute. Add the chicken stock, salt, tomatoes, and chipotle, and bring the mixture to a boil. Turn down the heat and simmer the soup, almost covered, for 25 minutes.

While the soup is simmering use the remaining tortilla strips to make a garnish of fried yumminess. Let them sit on paper towels for at least 15 minutes to dry out; then fry them in oil until they are crispy. Set them aside to drain on the paper towels.

Remove the soup from the heat, and puree it with an immersion blender. (You may also use a regular blender as long as you blend carefully in batches.) Stir in the chicken and the corn, if you are using them, and return the soup to the boil. Ladle into bowls.

Garnish the soup with your homemade tortilla strips plus any other garnish of your choice. Serves 4.

And here are the videos!


Purim Poppy Seed Cake

Tuesday, March 22nd, 2016

poppy seed cakeweb


Happy spring! This week we celebrate a couple of spring holidays—Easter, of course, but also the Jewish festival of Purim.

Purim begins tomorrow evening. I have always enjoyed the story of Queen Esther, who saved not only her guardian but her people with a mixture of charm and craft. (These were the only weapons available to women for centuries, particularly to Jewish women living in an alien culture.)

Married to the king of Persia and hiding her Jewish identity, Esther could only keep Kosher if she subsisted on a vegan diet. Seeds were important to that diet; hence, people often eat dishes made with poppy seeds on Purim.

Becky Bixler, a friend of my neighbor Alice, provided the recipe for this simple, rich cake. It will represent the state of Iowa (where Becky lives) in my forthcoming book about funeral foods. Becky takes it to funerals frequently.

Happy Purim! May we all be as resourceful as Esther this week and every week.

If you’d like another Purim recipe, try my hamentaschen.

The Cake

Ingredients:

4 eggs, divided
1 cup (2 sticks) butter (salted is best as there is no salt in the recipe, but sweet will work), at room temperature
1-1/2 cups sugar
8 ounces sour cream
1 teaspoon baking soda
2 cups flour
1 tablespoon vanilla
1/4 cup poppy seeds
a little confectioner’s sugar (optional)

Instructions:

Preheat the oven to 350 degrees. Grease and flour a 10-cup Bundt pan. (Becky says “oil a Bundt pan,” but I’m paranoid so I add the flour as well.)

Using an electric mixer beat the egg whites on high speed until they form peaks. Spoon the fluffy whites into a clean bowl, and set them aside.

Using the same mixer bowl you used for the egg whites (it doesn’t matter if a tiny bit of white is left in it), cream together the butter and the sugar. Beat in the egg yolks. Combine the sour cream and the baking soda, and add them to the butter mixture. On low speed stir in the flour, the vanilla, and the poppy seeds.

Gently fold in the egg whites, and spoon the batter into the prepared pan.

Bake the cake until a toothpick inserted into the middle comes out clean, 45 to 60 minutes. Place the pan on a wire rack and let it cool for 10 to 12 minutes before removing the cake.

Sprinkle the cake with powdered sugar if you want to make it look festive. Serves 10.

 poppysliceweb