Archive for the ‘Appetizers’ Category

First Try at Sushi

Wednesday, February 28th, 2018


One of my favorite things to do during my holiday shift at Williams-Sonoma (which ends in February) is teaching cooking classes, particularly children’s classes. I love the enthusiasm and appetite young people bring to the experience.

Last month I was asked to teach a class in conjunction with the store’s American Girl Around the World Cookbook. The class covered an odd but intriguing duo of recipes: vegetable sushi and Black Forest cake.

I have worked with the American Girl books before, and in general I’m not crazy about them. The recipes tend to be bland and sometimes don’t quite work.

The Black Forest cake recipe lived up to that experience. I actually baked the basic cake twice. (It had to be made before the class so that it had time to cool before my students decorated it.) In neither case did I care for the consistency. My students didn’t really mind because the whipped cream and cherries they slathered all over the final product literally and figuratively covered up the cake’s defects.

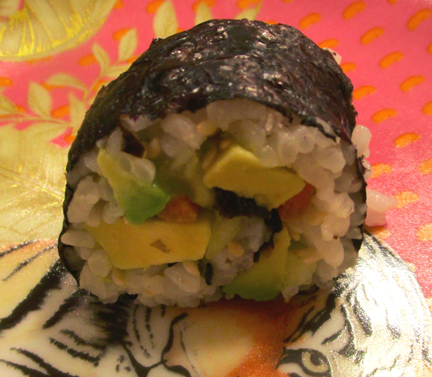
The sushi was a different story. I love seafood but I have had it in a best sushi restaurant nearby. But I never made sushi before, so I enlisted my family’s aid in pre-testing the recipe. We did change it a little bit. The cookbook wanted the sushi rolled by hand into little cornets. I couldn’t for the life of me make that work. Instead, we rolled it by hand into the classic cylinders and rounds. Soon my sister-in-law, who adores sushi, purchased a little sushi mat to simplify the rolling procedure. It definitely helped—but if you want to try the recipe, you don’t have to have the mat.

Here is the cookbook’s recipe, amended by my family.  Our sushi is a work in progress, but it will improve over time. Meanwhile, I’m happy to report that my students had a grand time making the sushi. Their rolls weren’t entirely neat (neither are mine!), but they tasted great.

Of course, the fillings for the sushi can be varied. One of these days I plan to try making classic sushi with fish. For the moment, I’m happy.
Vegetable Sushi

Ingredients:

for the rice:

2 tablespoons rice vinegar
1-1/2 tablespoons sugar
1-1/2 teaspoons salt
2 cups cooked short-grain sushi rice (we have been using Nishiki brand, but others are available), still hot

for assembly:

1 teaspoon rice vinegar
2 tablespoons water
2 to 3 sheets of nori (seaweed), cut in half
2 tablespoons toasted sesame seeds (white or black or some of each)
2 baby cucumbers, peeled (or not!) and cut into thin pieces
several baby carrots, cut into thin pieces
1 ripe avocado, peeled, pitted, and thinly sliced

for serving:

soy sauce or tamari
wasabi (optional: some people, like me, love it, while others find it too spicy)

Instructions:

Begin by making the seasoning for the rice. In a small saucepan combine the vinegar, sugar, and salt over low heat. Stir and heat until the sugar and salt dissolve (a minute or 2). Set aside to cool completely.

Cook the rice according to package directions. (I usually cook it for a little less time than the recipe suggests and then let it sit off the heat for 10 minutes to finish cooking on its own.)

Place the hot rice in a baking dish, using a spatula or paddle to spread it out evenly. Slowly pour in the vinegar mixture while slicing the spatula through the rice to make sure that it goes all the way through. Flip the rice so that all of it gets some of the liquid. Cover the rice with a clean, damp cloth while you get ready to make your sushi. (The seasoned rice is essential to really good sushi so don’t try to skip this step.)

Combine the vinegar and water for assembly in a small bowl. Place 1 piece of nori, shiny side down, on a clean, dry work surface or sushi-rolling mat. The long side should be closest to you. Slice the nori in half so that you have two long sheets.

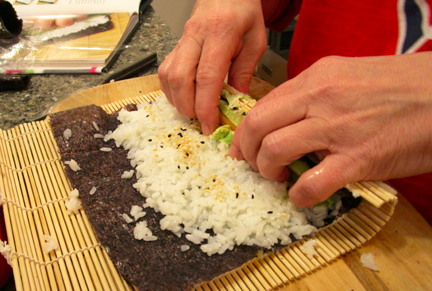
Scoop a couple of tablespoons of rice onto one of your sheets. Dip your fingers in the vinegar/water mixture to keep the rice from sticking to them; then gently flatten the rice on the sheet, leaving room on all sides but particularly on the long side opposite you.

Lightly sprinkle the rice with some of the sesame seeds; then place a few slices of cucumber, carrot, and avocado on top, keeping them fairly near you on the rice. 
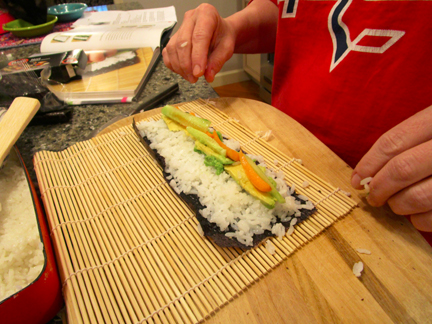
 

For this roll we forgot the sesame seeds and went too close to the edges of the nori (nobody’s perfect!), but you can see how the vegetables are clumped together.

Lift the side of the nori closest to you, and roll it forward. The process is a little delicate. You want a small amount of pressure to keep the sushi together, but you don’t want to squash it.

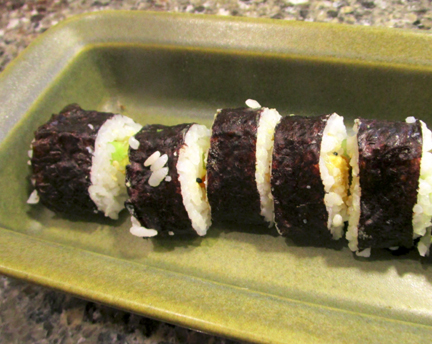
When the sushi is rolled, remove the mat (if you are using one) and slice the sushi into little rounds with a serrated knife. Serve with soy sauce and (if you like it) wasabi. Serves 4 to 6 as an appetizer.
Crazy for Cranberries

Sunday, November 19th, 2017

I recently taught a class on Thanksgiving pies at the Baker’s Pin in Northampton, Massachusetts. Naturally, I had to feature cranberries in at least one pie.

Every year in September I begin calling grocery stores to ask whether cranberries have arrived. Once they do appear on shelves, I go crazy for cranberries. I make sauce. I make pies and tarts. I freeze the berries. I revel in redness.

Cranberries have a lot to recommend them. They are rich in vitamins and antioxidants. New England sailors used to consume them on sea journeys to avoid scurvy. They abound with flavor (albeit flavor that needs a little sweetening!).

And they are simply gorgeous. I view them as the rubies of the Thanksgiving table.

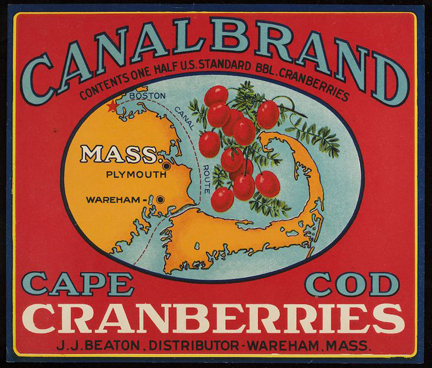
Unlike many other popular fruits, the American cranberry is native to our continent. Native Americans combined ground cranberries with venison to make pemmican, a portable high-energy food.

When English settlers arrived on these shores, they quickly adopted the berries as their own, not just to eat but as medicine. They learned from the original Americans to apply ground cranberries to wounds to keep them from getting infected.

My friend Kathleen Wall, colonial foodways culinarian at Plimoth Plantation, believes that cranberries might have appeared on the table at the first Thanksgiving. She emphatically denies that cranberry sauce was present. It hadn’t yet been invented.

Food writer Hank Shaw dates the first written reference to cranberry sauce to 1808. The increasing popularity of that sauce probably owed a lot to the new availability of reasonably priced sugar in the 19th century. Historian Clifford Foust notes:

“By the second quarter of the nineteenth century, Caribbean sugar had declined in price so far over the preceding century that its consumption had risen enormously….

“Sugar in its several forms made possible the widespread use and enjoyment of formerly shunned fruits and vegetables whose sour tastes were too disagreeable for ordinary use, no matter how healthful they may have been. Sugar also contributed to their preservation in glass or tins….”

In 1912, Marcus Urann, a lawyer turned cranberry grower, decided to try canning cranberry sauce. This innovation boosted cranberry cultivation in New England. In my opinion, however, it represented a step backward in cranberry cuisine.

I blush to admit that my cousin Alan, who often hosts Thanksgiving for our clan, insists on serving canned cranberry sauce. The ridges from the can take him back to his mother’s kitchen. (She was a lovely woman but not much of a cook.)

I always bring homemade sauce to his house and defiantly place it on the table alongside the canned version. Canned sauce lacks the color and flavor that define cranberries to me.

Making basic cranberry sauce couldn’t be easier—and it can be done well in advance of Thanksgiving dinner. I usually just follow the directions on commercial bags of cranberries, although I sometimes add flavorful items like orange or cinnamon.

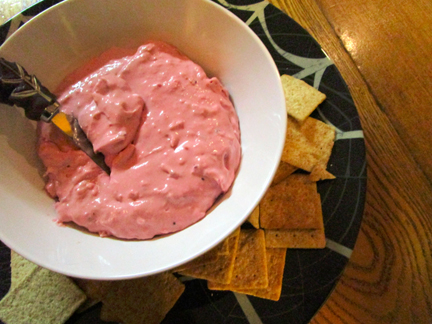
Below I share a recipe that uses a variant on that sauce, made with chipotles. My cranberry chipotle spread may be served with meat, crackers, or apples. It may also be used to stuff celery. This gorgeous pink substance packs just a little heat.

I will be making it, along with my cranberry-apple crumb pie, this Wednesday, November 22, on Mass Appeal. I’m publishing the recipe in advance in case readers want to make it for Thanksgiving. I’ll post a link to the video after it airs.

Meanwhile, I hope you all enjoy feasting and giving thanks this Thursday. I know I will! I offer thanks to all of you for reading.

Cranberry Chipotle Spread

Ingredients:

1 cup water
1 cup sugar
3 cups (12 ounces) cranberries
2 to 3 chipotles in adobo from a can (plus a little of the adobo sauce), chopped
1 8-ounce brick cream cheese at room temperature
a few chopped pecans, toasted or candied

Instructions:

Begin early in the day, or even a day ahead. In a saucepan combine the water and the sugar and bring them to a boil. Add the cranberries and the chipotles, and return the mixture to the boil.

Reduce the heat, and boil until the cranberries pop, 5 to 10 minutes. (If the sauce seems too fuzzy, add a tiny amount of butter.)

Remove the mixture from the heat, cool it to room temperature, and then puree the sauce in a blender. Refrigerate it until it is needed.

When you are ready to make your spread, whip the cream cheese using an electric mixer. Beat in some of the chipotle-flavored cranberry sauce to taste. (Start with 1/2 cup and see how you like it.) If you want your spread to taste more of chipotle, stir in more of the adobo sauce.

Refrigerate until ready to use. You will have extra sauce which you can use for more spread or serve on the side of meat or poultry.

Sprinkle the pecans on the spread just before serving. Serves 6.

“Mass Appeal” co-host Danny New and I had fun getting ready for Thanksgiving.

P.S. from Tinky LATER:

Here is the video!

Measuring My Days in Peaches

Thursday, August 24th, 2017

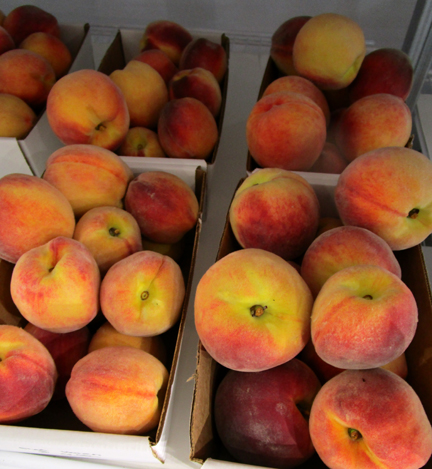
Peaches Awaiting Purchase (and Consumption!) at Apex Orchards

Tuesday was National Eat a Peach Day, a day we were unable to celebrate last year in my neck of the woods. We had a very warm winter in 2016. The local peach trees got confused (as did the rest of us!) and started to blossom in February. A cold spell shut them down in a hurry and destroyed the year’s peach crop.

When August arrived, not a single local peach could be found at local stores and orchards. The dearth of peaches hit farms hard. It also made consumers like me realize how much we take for granted.

My summer is measured out by the arrival of different fruits—rhubarb, then strawberries, then raspberries, then blueberries, then peaches, and so forth. When one of these fails to appear in farm stands and in my kitchen, I’m thrown way off balance.

I missed those few weeks of peaches more than I can say last year. I know we’ll have other bad peach seasons, thanks to bad luck and climate change. So I am determined to make up for last year’s dearth by eating peaches pretty much constantly this year. Fortunately, we have a bumper crop of peaches in western Massachusetts in 2017 so I can feast on them to my heart’s content.

Of course, in addition to eating peaches, I cook with them! On Tuesday I appeared on Mass Appeal to show off a couple of simple recipes. My friends at Apex Orchards in Shelburne supplied glorious peaches for testing and cooking, and I thank them.

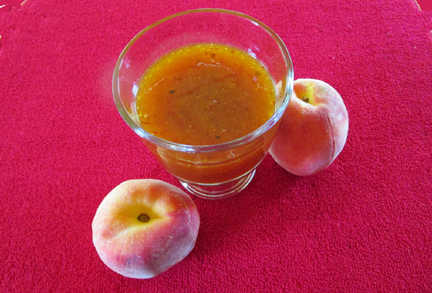
I tried peach chipotle sauce a few years ago. This recipe is simpler than the previous one. Really, if one has perfect peaches and a little chipotle (and, yes, sugar!), one doesn’t need to complicate the flavors.

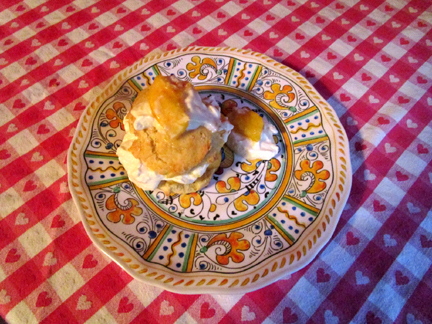
And who doesn’t love a good shortcake? As I say in the video below, my family likes to eat only shortcake (either strawberry or peach) for supper once a year. This filling meal isn’t super healthy—but once a year, who the heck cares?

Whether you cook the fruit or not, don’t forget to EAT A PEACH!

Peach Chipotle Sauce

The combination of sweet and spicy in this recipe really pops. The sauce works well with pork or chicken—or over crackers with cream cheese.

Ingredients:

2 cups peach slices
1-1/2 cups sugar
1 teaspoon lemon juice
1 pinch salt
1 to 2 canned chipotles in adobo sauce (plus a little of the sauce)
1 dab butter

Instructions:

In a nonreactive pot combine the fruit, a cup of the sugar, and the lemon juice. Let the mixture sit for an hour or so to allow the peaches to juice up.

Cook the peaches over low heat until tender. Add the remaining sugar, the salt, the chipotle, and the butter, and cook rapidly until thick, stirring frequently. Remove any foam you see. (There shouldn’t be too much, thanks to the butter.)

If you want jamlike consistency, the sauce will be ready when it sheets off a cold, stainless-steel spoon. If you don’t cook it that long, your sauce will just be a bit more liquid. (I like it slightly more liquid so I measure the sauce with an instant-read thermometer and turn off the heat when the thermometer reads about 215 degrees.) Really, you can’t go wrong.

Let the sauce cool for a few minutes; then pulverize it with a blender or immersion blender.

Refrigerate the sauce after it cools. Makes about 2 cups.

Peach Shortcake

Ingredients:

for the self-rising biscuits:

2 cups self-rising flour
2 tablespoons sugar
1 cup heavy cream
1 teaspoon vanilla
1 to 2 tablespoons milk
a small amount of melted butter (optional)
coarse white sugar (optional)

for the filling:

4 cups peach slices (more if you can’t resist)
1/4 cup sugar (plus more to taste if your peaches are tart)
the juice of 1/2 lemon

for assembly:

sweetened whipped cream

Instructions:

Begin by making the biscuits. Preheat the oven to 425 degrees.

Whisk together the flour and sugar. In a separate bowl (or a measuring cup!) combine the cream and the vanilla.

Make a well in the middle of the dry ingredients. Pour the cream mixture into the well, and gently stir until the mixture is combined, adding a little milk as needed to incorporate all the ingredients into the liquid.

Turn the dough onto a floured work surface, and sprinkle a little more flour on top. Fold the dough over several times; then pat it into a circle or rectangle that is about 1/2 inch thick.

Using a sharp biscuit cutter cut the dough into rounds, about 2 to 2-1/4 inches wide (or however wide you want them!). Place them on an ungreased cookie sheet (you may line the sheet with parchment or silicone if you’re paranoid about sticking). If you like, brush the tops of your biscuits with melted butter and sprinkle a little coarse sugar on top.

Bake the biscuits until they are golden brown (12 to 16 minutes). While they are baking combine the peaches, sugar, and lemon juice.

When you are ready to assemble your shortcakes, cut the biscuits in half horizontally. Decorate the bottom halves with the cooked filling followed by the strawberries; then dollop on whipped cream. Top with the biscuit tops.

Serves 6 to 8, depending on the size of your biscuits and the hunger of your guests.

And now the videos:

Tinky Makes Peach Chipotle Sauce on Mass Appeal

Tinky Makes Peach Shortcake on Mass Appeal

National Zucchini Day

Friday, August 11th, 2017

In some ways, I find food holidays just a tad too convenient. I have a sneaking suspicion—actually, in some cases I flat out KNOW—that many of them were organized by corporations or their minions to promote specific products. (Take that, National Oatmeal Month!)

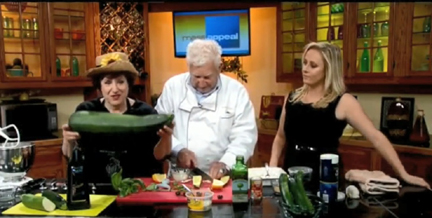
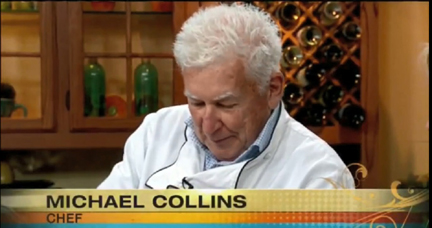
And yet … I enjoying having an excuse to celebrate particular foods. So when I learned that Tuesday was National Zucchini Day, I roped in my friend Michael Collins of the Barrel Shop B&B to cook a little zucchini with me.

I have known Michael for 25 years or so. (Bless his heart, he says that I was just a small child when I first ventured into his former restaurant, the Green Emporium in Colrain, Massachusetts.) I have had fun over the years cooking, singing, eating, and talking with him and his partner Tony, an artist.

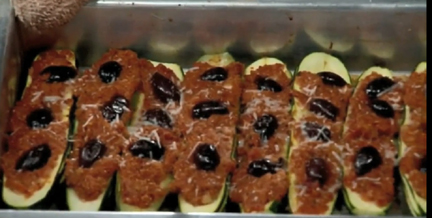
I hoped Michael would have a tasty, simple zucchini dish, and his stuffed zucchini didn’t disappoint. It featured a lovely combination of flavors, colors, and textures.

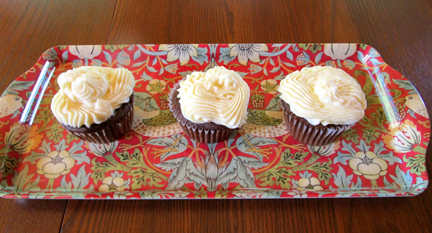
I celebrated the holiday with courgette chocolate cupcakes. I love the word “courgette,” the French term for “zucchini.” It sounds elegant and mysterious and helps counter the popular reputation of zucchini as overabundant and boring, a reputation to which I strongly object.

I topped my cupcakes with cream-cheese frosting. I could make a meal of these two dishes and hope you can, too!

Michael and I appeared together on Mass Appeal. Somehow the video of the cupcakes got lost on the internet, but you can see his zucchini boats by clicking on this link.

I’ll be back soon for National Eat a Peach Day…..

Michael’s Stuffed Zucchini

Ingredients:

4 small zucchini, cut in half lengthwise
1 medium onion, finely chopped
1 clove garlic, finely chopped
3 tablespoons extra-virgin olive oil
2 tablespoons panko bread crumbs
2 tablespoons Italian bread crumbs
3 tablespoons tomato paste
salt and pepper to taste
4 tablespoons Asiago cheese
6 Kalamata olives, pitted and cut in half
the juice of 1 lemon

Instructions:

Scoop out the centers of the zucchini. Chop the zucchini “meat” finely. Blend it with the onion, the garlic, the olive oil, the bread crumbs, the tomato paste, and the salt and pepper to make a paste.

Stuff the mixture into the zucchini shells. Cover with the cheese. Dot with the olives, and squeeze the lemon juice on top.

Bake until the zucchini boats are bubbly and brown, about 20 minutes. Serves 8 as a side dish.

Courgette Chocolate Cupcakes

Ingredients:

1-1/4 cups flour
2 tablespoons unsweetened cocoa
1/4 cup (1/2 stick) butter
1/4 cup canola oil
7/8 cup sugar
1 egg
1/2 teaspoon baking soda
1/2 teaspoon salt
1/2 teaspoon vanilla
1/4 cup buttermilk
1 cup grated zucchini (stem but do not pare first)

Instructions:

Preheat the oven to 325 degrees. Sift together the flour and the cocoa. Using an electric mixer at medium speed, cream together the butter, oil, and sugar in a mixing bowl until light and fluffy. Beat in the egg. Blend in the vanilla, followed by the baking soda and salt; then add the flour/cocoa mixture mixture alternately with the buttermilk. Stir in the zucchini.

Pour the batter into lined muffin cups. Bake until the cakes test done, about 25 minutes. Ice with your favorite frosting. Makes about 18 cupcakes.

A Jubilee of Cherries

Wednesday, July 12th, 2017

One of my favorite seasons has arrived—and may go away very, very soon! Sour cherries are ripe here in Franklin County, Massachusetts.

This smaller, redder, tarter version of the conventional cherry is perfect for cooking. My mother used to make sour cherry soup. (I wish I had her recipe; I’m going to try to recreate it one of these days.) Sour cherries are great in pies, cobblers, cakes, and jams.

They hold their shape well when baked. And when one combines them with sugar (as I’m afraid one pretty much always does) they deliver a succulent sweet-and-tart flavor that gives extra dimension to anything one creates.

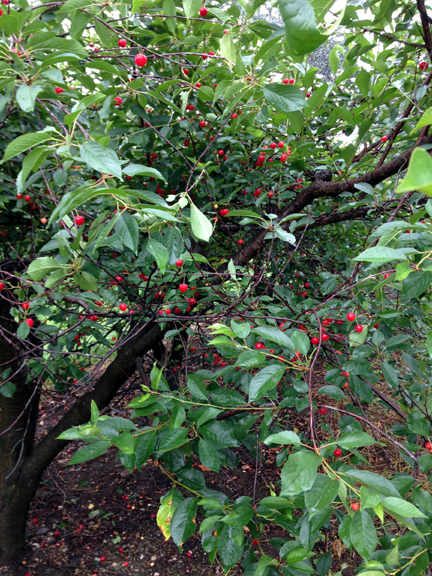
Ben Clark of Clarkdale Fruit Farms in Deerfield recently let me pick some of his sour cherries so I could experiment. Clarkdale isn’t open at this time of year, but it does sell its delectable cherries at the Greenfield Farmers’ Market on Saturday mornings.

I ended up picking the cherries in the rain—but somehow the whole experience was still delightful!

According to Ben, cherries were one of the first crops his great-grandfather, Dr. Webster Clark, planted when he started growing fruit more than a century ago. (Clarkdale celebrated its centennial in 2015.) Today the farm harvests varieties the Clarks have been growing over the past decade.

Clarkdale harvests several hundred quarts of sour cherries a year. The varieties featured are Jubileum, Montmorency, and Balaton. I picked Montmorency cherries—sour but not too sour. The farm also produces six varieties of sweet cherries.

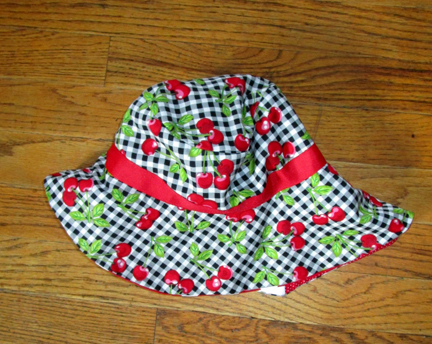
I even had a cherry hat to wear while picking, made by my cousin Kate!

The bad news is that the sour-cherry season is short. The good news is that that season is RIGHT NOW.

The tart cherries are worth embracing for that limited period of time. They don’t just taste good. They are good for those of us who consume them.

Sour cherries contain something called anthocyanins. Linked to the bright hue of the cherries, these substances can help the liver, reduce blood pressure, lower cholesterol, fight arthritis, and improve circulation. Studies indicate sour cherries may even prevent cancer.

I asked Ben Clark how long his sour cherries last once picked. “If refrigerated with stems intact,” he explained, “they will last for a week or two with no detrimental effects. They can also be frozen for six to 12 months.”

Ben and his wife Lori love to cook with the cherries. They enjoyed cherry pie last week for Independence Day. They also make cherry jam and a cherry liqueur which I have just assembled. (I can’t report back on its flavor yet; it has to age for at least three months.)

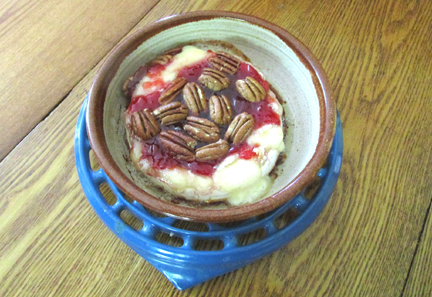
I also made an appetizer, baking brie with sour-cherry jam and pecans. I had been longing to bake brie ever since a friend gave me a handsome brie baker from local potter Jeanne Douillard. The baker worked like a charm, and the combination of flavors and textures was a winner.

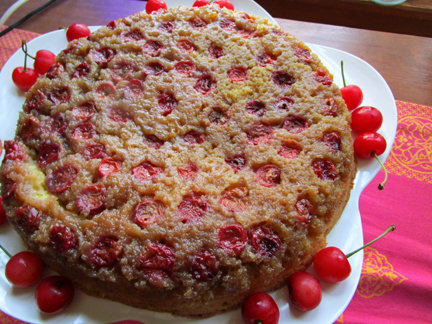
Finally, I prepared a cherry upside-down cake. This was more or less an accident! I had hoped to make a cherry torte based on a classic New York Times recipe. When my cherries slid ignominiously to the bottom of the torte, I took their descent as a hint that maybe I should try an upside-down cake.

Happy cherry season………

Sour Cherry Pecan Brie

Ingredients:

for the jam:

2 cups sour cherries, pitted
1-1/4 cups sugar (more or less to taste)
1 teaspoon lemon juice
1 tiny pat butter

for the baked brie:

1 8-ounce round of brie
1/3 cup sour cherry jam (use the rest as a breakfast spread—yum!)
1/2 cup toasted pecans

Instructions:

First, make the jam. (This may be done days in advance as long as you store it in the refrigerator.) In a medium saucepan combine the cherries, 1 cup of the sugar, and the lemon juice. Let this mixture sit for an hour or so to juice up.

When the hour has elapsed heat the cherry mixture, stirring frequently. Once the cherries begin to soften, add the remaining sugar and the butter. Cook until the jam reaches a temperature of 218 degrees. Remove the jam from the heat and let it cool.

To make the baked brie preheat the oven to 400 degrees. Slice the top rind off the brie, and place it in a lightly greased, shallow baking dish. Put the jam and pecans on top. Bake the brie until it gets oozy and warm. In my brie baker this took 25 minutes. I should think it would be done in 20 minutes in a thinner pan.

Serve with crackers. Serves 6 to 8.

Sour Cherry Upside-Down Cake

Ingredients:

for the topping:

1/4 cup (1/2 stick) sweet butter
3/4 cup brown sugar, firmly packed
2 cups pitted sour cherries

for the cake:

1/2 cup (1 stick) sweet butter, at room temperature
1 cup sugar
2 eggs
1/4 teaspoon salt
1 tablespoon baking powder
1-3/4 cups flour
1/2 cup milk
2 teaspoons vanilla

Instructions:

Preheat the oven to 350 degrees.

First make the topping (which goes on the bottom!).

Melt the butter in a 9-inch cast-iron skillet. Stir in the brown sugar and cook, stirring, until it melts and bubbles—3 to 4 minutes. Arrange the cherries on top.

For the cake cream together the butter and sugar. Beat in the eggs, 1 at a time. Add the baking powder and salt. Stir in the flour alternately with the milk, beginning and ending with the flour. Stir in the vanilla, and pour the batter over the cherry mixture.

Bake the cake until a toothpick inserted into the center (but not too far down; don’t hit the cherries!) comes out clean, about 40 minutes. If the cake is brown but not done before this happens, decrease the oven temperature and continue baking.

Allow the cake to cool for 5 to 10 minutes. Loosen the edges with a knife, and invert the cake onto a serving plate held over the skillet. Turn upside-down. Remove pan.

Serve alone or with whipped cream. Serves 8.

And now the videos….

Tinky Makes Sour Cherry Pecan Brie

Tinky Makes Sour Cherry Upside-Down Cake