I know! I post a LOT of scone recipes.
If I had to choose only one pastry to eat for the rest of my life, it would be a scone. Scones include fruit (so they give the eater the illusion of eating vaguely healthily), they are easy to make, and they satisfy the eater … this eater, at any rate.
Of course, I don’t eat them all the time. I’m still on my nutritional cleanse. For a few days a month, however, I allow myself to stray. This month I strayed with a scone (and promptly gave away the rest of the batch!).
This particular recipe was inspired by Karyn Brown, a professional baker who is the culinary brain of the Leyden Café in Leyden, Massachusetts.
I first heard about the Leyden Café last summer as I stood in line waiting for posters at a local copy shop. A woman and her children stepped away from the counter with a brightly colored banner that read “The Leyden Café” in a lively font.
![]()
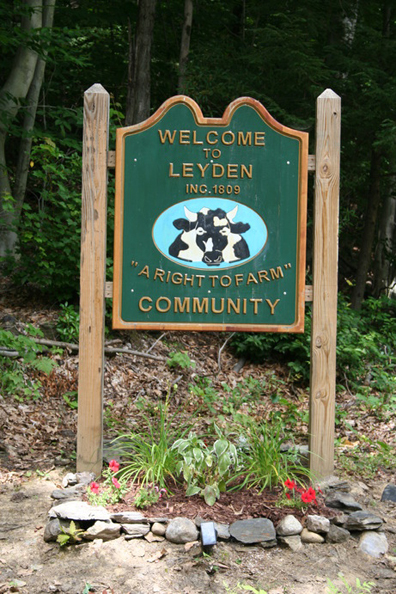
I told the woman, who introduced herself as Amy St. Clair, that I was unaware that Leyden HAD a café. Leyden has more than twice as many people as my small town of Hawley, but that population doesn’t qualify it as a metropolis by any means. I was surprised to learn that it could support a café.
Amy explained that the café was a very part-time affair, started in the fall of 2014 by a group of townspeople that included her and her friend Robin Neipp. Their aim was to give Leyden’s residents a gathering place and a stronger sense of community.
The café is located on the lower level of the Leyden Town Hall. In general, Amy and Robin informed me, the café is open only once a week, currently on Sundays from 9 to 11:30 a.m. It also operates as needed at town meetings and events.
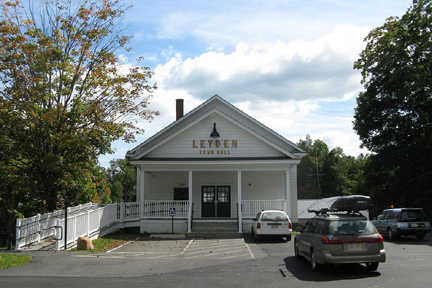
The Leyden Town Hall in better weather (courtesy of John Phelan)
The café hosts special offerings from time to time, including a market day last fall featuring, in Robin’s words, “Leyden bounty and wares”; movie nights; pottery workshops; and concerts. February’s highlight will be a game night this Friday, the 19th, beginning at 6 p.m.
The café also offers collectibles, maple syrup, and local pottery for sale. Robin Neipp told me that the café regularly welcomes 16 to 20 visitors.
“We are hoping to establish a habit for residents to come to the café, utilize the space, create community events, and maybe someday somewhere somehow perhaps have a store,” she explained.
Meanwhile, she said, she and her colleagues have a lot of fun “reconnecting with and meeting new neighbors and solving world problems in [their] little space.”
Of course, they also enjoy Karyn Brown’s baked goods! Karyn graciously shared this scone recipe with me.
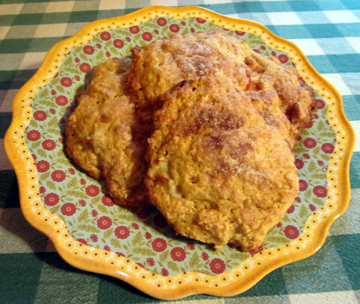
I have to admit that Karyn’s version of the scones is a bit different from mine, and her baked scones probably look much better than mine. She rolls out her scone dough. I am a less expert roller so I resorted to patting mine out.
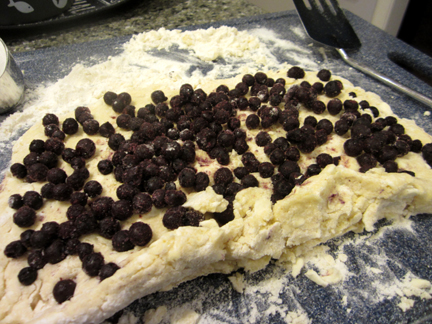
As you can see, my version of the dough (decorated here with the berries) is a bit rough.
She also manages to incorporate 1-1/2 cups of berries into her scones. I could only manage 1 cup. I added a little vanilla to make up for the lost flavor.
The scones were still delicious, denser and richer than my customary scone. My sister-in-law Leigh took one bite and said, “Wow.”
Karyn makes her scones with her own organic blueberries. Luckily, given the season, they are best prepared with frozen berries.

Ingredients:
2 cups flour
1/3 cup sugar, plus additional sugar as needed just before baking
1 tablespoon baking powder
1/2 teaspoon salt
6 tablespoons (3/4 stick) cold sweet butter, cut into cubes
3/4 cup heavy cream, plus additional cream as needed just before baking
2 egg yolks
1 teaspoon vanilla
1 cup frozen blueberries
Instructions:
Preheat the oven to 400 degrees. Process the 4 dry ingredients until mixed well in a food processor. Scatter the butter cubes evenly over the mixture and pulse until the butter is pea-sized. Place this mixture in a large bowl.
(If you don’t have a food processor, whisk the dry ingredients together in a large bowl and cut or grate the butter into them).
Measure the cream into a liquid measuring cup; then add the egg yolks and vanilla and mix with a fork or small whisk until the yolks are incorporated.
Add the cream mixture to the dry ingredients and bring the dough together with a rubber spatula. Knead it a few times in the bowl, without working it too much, and pat into a smooth thick rectangle that is about 12 inches long.
Scatter the blueberries evenly over the dough, leaving about an inch border around the edge of your rectangle. Press the berries lightly into the dough.
Roll the dough up like a jelly roll, pressing it gently as you make each rotation and checking to make sure that the dough isn’t sticking; add more flour if it is. When the dough is rolled up, transfer it to a parchment-lined baking sheet.
Let the roll sit in the freezer for 20 to 30 minutes to firm up to make cutting the scones easier.
After chilling the dough, cut it into four pieces with a serrated knife using a gentle sawing motion. Cut each section in half on the diagonal.
Return the scones to the lined baking sheet, spacing them evenly. Brush the tops lightly with a small amount of cream; then sprinkle on a bit of sugar or some seasonal sprinkles.
Bake the scones until they are golden and set to the touch (about 25 minutes), rotating the pan halfway through the baking time.
I had no trouble getting the scones off the baking sheet, but if you have any trouble let them cool completely before removing them.
Leftovers will keep for a couple days, although these treats taste best the day they are baked. Makes 8 scones.
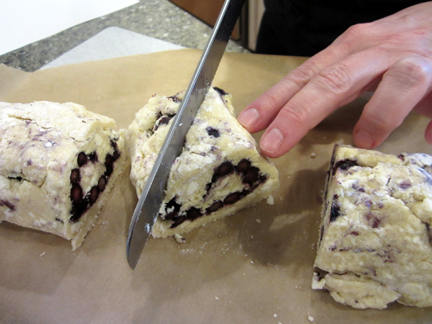
Cutting the scones