Archive for June, 2010

Stockton Asparagus and Chicken Enchiladas

Wednesday, June 9th, 2010

 
This creamy casserole comes from a small, gem-packed cookbook sent to me by the Stockton Asparagus Festival in Stockton, California. I think next time I may try spicing it up a little—or I may not! My family ate every bite of it this way.
 
In my constant quest for spice I often forget that mild flavors can be appealing as well.
 
The original recipe called for 3 to 4 cups chicken broth. I used 4—and as you can see from the photo below my enchiladas were very wet! So I suggest sticking to 3………
 
Have fun!

 
Asparagus and Chicken Enchiladas
 
Ingredients:
 
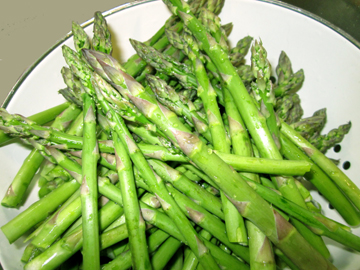
2 pounds asparagus, cut into 1-inch pieces
12 tortillas (I used flour)
oil as needed for softening tortillas
1/2 cup (1 stick) sweet butter
1/2 cup flour
3 cups chicken broth
1 cup sour cream
1/2 cup salsa verde (a little more if you like)
3 cups (generous) grated cheese—Monterery Jack or sharp cheddar or a mixture of the 2
2-1/2 to 3 cups cooked, shredded chicken
1/2 cup chopped onions
 
Instructions:
 
Blanch the asparagus for 2 minutes. Cool them with ice cubes and drain them; set them aside.
 
Preheat the oven to 425 degrees.
 
Cook each tortilla briefly on both sides in an oiled skillet until it softens. Set the tortillas aside to drain and cool.
 
In a saucepan melt the butter. Whisk in the flour for a minute; then whisk in the broth. Cook until thick and bubbly, stirring constantly.
 
Add the sour cream and salsa; heat thoroughly. Remove from heat.
 
Mix together 2 cups of the cheese, the chicken, the onion pieces, and the asparagus. Divide this mixture evenly among the tortillas, and top each with 3 tablespoons of sauce.
 
Roll up the tortillas and place them, seam-side down, in a 9-by-13-inch baking dish. Sprinkle with the remaining sauce and cheese.
 
Bake for 25 minutes. Serves 6.
 

If you enjoyed this post, please consider taking out an email subscription to my blog. Just click on the link below!

Subscribe to In Our Grandmothers’ Kitchens by Email.


Rhubarb Catch Up

Monday, June 7th, 2010

 
Here’s an early recipe for July 4. (Enjoy it: this will probably be the only time you’ll get a recipe early from In Our Grandmothers’ Kitchens!)
 
I’m not exactly a champion griller. In fact, as listeners to WFCR, our local public-radio station, learned a couple of years ago, I’ve been known to light an outdoor fire that almost turned into … well … an outdoor fire.
 
Condiments for grilled foods I can manage, however. And lately I’ve had a hankering to make some rhubarb ketchup (or catsup or however you want to spell it).
 
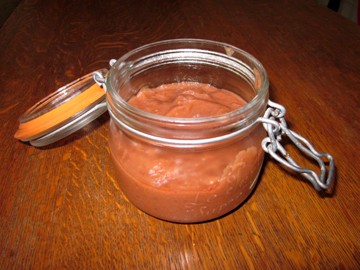
I’ve tried a couple of different formulas, and this is the best so far. It doesn’t taste like tomato ketchup. Why should it? It’s a lightly sweet, lightly spiced sauce that would be lovely with pork.
 
My spices came courtesy of Kalustyan, a wonderful spice company that has a retail outlet in New York City (yes, it will ship spices to you!). I particularly love Kalustyan’s aromatic cinnamon. And its mixture of pickling spices was just right for this recipe.
 
I can’t tell you yet how long this ketchup will last in the refrigerator since I made it less than a week ago. I don’t think I’d push it more than two weeks or so. So if you would like to try it as a condiment for Independence Day you should wait a little while to make it.
 
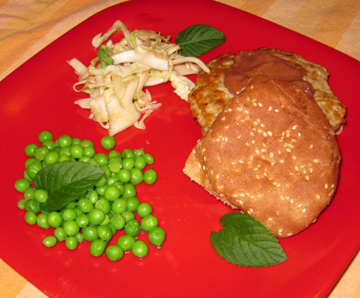
On the other hand, like me, you might want to make some now and some later. It really was tasty last night! I pan grilled chicken cutlets and served them with fresh peas with mint and maple-rhubarb coleslaw.
 
While you’re making your ketchup, do listen to my WFCR grilling broadcast. I’m not in great voice when I sing (and the less said the better about my piano playing), but my mother’s childhood memories are fun.
 
And Truffle’s cheerful bark more than makes up for my shortcomings! She really knows how to celebrate Independence Day.
 
 
Rhubarb Ketchup
 
Ingredients:
 
3 cups rhubarb (in small pieces!)
1/2 cup brown sugar, firmly packed
1/4 cup apple cider plus 1/2 cup later
3 tablespoons cider vinegar
1/4 teaspoon (generous) ground ginger
1/4 teaspoon ground cinnamon
1 pinch ground allspice
1/2 teaspoon pickling spices
1/2 teaspoon salt
a few turns of your pepper grinder
 
Instructions:
 
In a 2-quart nonreactive saucepan, toss together the rhubarb and brown sugar.
 
In a tiny nonreactive saucepan, heat the 1/4 cup cider and the vinegar. When they come to a boil remove them from the heat and stir in the ginger, cinnamon, allspice, and pickling spices.
 
Let the two pans sit at room temperature for 2 hours. The rhubarb should juice up a little, and the spices should steep nicely in the liquid.
 
After the resting period add the spices and their liquid to the rhubarb. Toss the remaining cider into the pot that held the spices to pick up any remaining spices, and add it to the rhubarb as well. Stir in the salt and pepper.
 
Bring the rhubarb mixture to a boil. Reduce the heat and boil the resulting sauce, stirring frequently, for 20 minutes. Turn off and let cool.
 
In a blender or food processor puree the cooled ketchup. Ladle it into a sterilized jar or two and refrigerate it until you are ready to use it.
 

Makes about 2-1/2 cups ketchup.


If you enjoyed this post, please consider taking out an email subscription to my blog. Just click on the link below!

Subscribe to In Our Grandmothers’ Kitchens by Email.

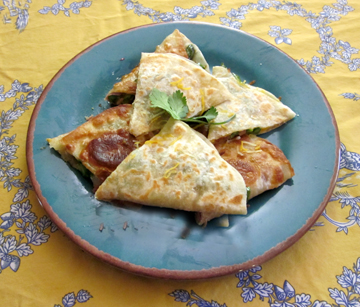
Asparadillas

Friday, June 4th, 2010

 
Recently I made a batch of tasty asparagus enchiladas. It’s been so hot lately that I don’t have the heart to post the recipe, however! Presumably we’ll have a cooler spell before summer sets in permanently.
 
In the meantime, here’s a recipe that doesn’t involve turning on the oven. It’s easy to boot. And it’s extremely toothsome.
 

I recommend it with all the options, but one of my tasters felt the Prosciutto was out of place (too Italian for a southwestern sandwich) so I am exercising caution in my recipe writing.

 
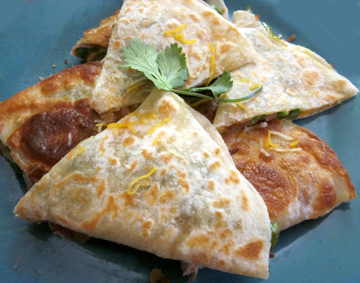
Asparagus Quesadillas
 
Ingredients:
 
canola or peanut oil as needed for light frying
1/4 red onion, thinly sliced
1/2 pound asparagus, cut into 1-inch pieces and blanched for 1 minute
lots of freshly ground pepper
4 small flour tortillas
1/2 to 1-1/2 cups grated cheese (cheddar, Monterey Jack, or a blend)
4 slices Prosciutto (optional but good)
chopped cilantro to taste (ditto)
 
Instructions:
 
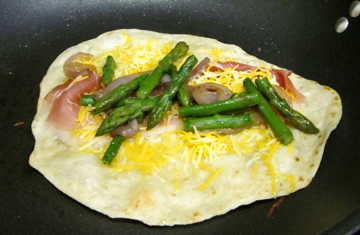
In a small saucepan heat a small amount of oil and sauté the slices of onion until they brown around the edges—about 10 minutes over low to medium heat. Stir in the asparagus, and toss for a minute or two. Grind pepper over the combination and toss again. Remove from heat.
 
In a larger pan or griddle place a small amount of additional oil and let it heat up. Place the first tortilla in the oil, let it heat for just a moment, and then flip it over. Toss on cheese to taste plus a quarter of the asparagus mixture.
 
At this point you may add a slice of Prosciutto (for a sort of Italian-American quesadilla) or a little cilantro (for a more Mexican-American quesadilla). Or you may leave well enough alone.
 
Fold the tortilla in half to seal the quesadilla, and make sure it is brown on both sides.
 
Remove it from heat and keep it warm while you repeat the process with the remaining tortillas. 

Serves 4.


If you enjoyed this post, please consider taking out an email subscription to my blog. Just click on the link below!

Subscribe to In Our Grandmothers’ Kitchens by Email.

Hooray for Rhubarb!

Tuesday, June 1st, 2010

 
Sometimes I find it hard to recognize my childhood memories as being about the real me.
 
I have no trouble recalling the loquaciousness, the adorability, or (I admit it!) the mule-like stubbornness of the young Tinky.
 
Nevertheless, it’s hard to believe that I spent my earliest years disliking some of the foods I now adore.
 
I thought spinach was bitter and ugly.
 
I disliked Chinese food so much that when my parents wanted to teach me to eat with chopsticks they fed me ravioli. (By the way, ravioli are A LOT harder to pick up with chopsticks than most Chinese food.)
 
And I was determined not to eat rhubarb in any form.
 
Today I’m thrilled to see fresh spinach at a farmstand. I long for Chinese food regularly.
 
Rhubarb represents my biggest conversion. Rhubarb is probably my favorite fruit. Don’t bother to tell me that it’s not really a fruit. I know. We treat it as a fruit, however.
 
Rhubarb is beautiful. It’s resilient. It’s sweet and tart simultaneously. And it’s versatile. (Gosh, I just realized that I may love rhubarb because IT’S LIKE ME!)
 
Today I am happy to post my first rhubarb recipe of this spring, courtesy of Sue Haas of Seattle, Washington, a regular reader of this blog. Sue received it in turn from her mother in Albion, Michigan, a bastion of rhubarb almost as strong as my own western Massachusetts.
 
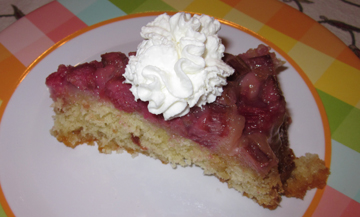
Their cake is excellent for supper or even for breakfast. The marshmallows (yes, marshmallows!) tone down the tartness of the rhubarb, and the cake is substantial without being over heavy.
 

Before I get to the recipe, I’d like to remind readers that I have several other rhubarb recipes on this blog, including cole slaw, crumble, salsa, and soda. And then there’s the rhubarb baked Alaska….

 
Michigan Rhubarb Upside-Down Cake
 
Ingredients:
 
for the topping:
 
3 cups rhubarb (1/2-inch chunks)
3/4 cup sugar
10 large marshmallows, cut in half
 
for the cake:
 
1/2 cup (1 stick) sweet butter, at room temperature
1 cup sugar
2 eggs
1/4 teaspoon salt
3 teaspoons baking powder
1-3/4 cups flour
1/2 cup milk
1 teaspoon vanilla
 
Instructions:
 
Preheat the oven to 350 degrees. Generously grease a 10-inch iron skillet, and arrange the rhubarb pieces in the bottom. (If you don’t have a 10-inch skillet, use an 8- or 9-inch square baking pan.) Sprinkle the sugar on top, followed by the marshmallows.
 
For the cake cream together the butter and sugar. Beat in the eggs, 1 at a time. Add the baking powder and salt. Stir in the flour alternately with the milk, beginning and ending with the flour. Stir in the vanilla, and pour the batter over the rhubarb mixture.
 
Bake the cake until a toothpick inserted into the center (but not too far down; don’t hit the rhubarb!) comes out clean, about 50 minutes. If the cake is brown but not done before this happens, decrease the oven temperature and continue baking.
 
Allow the cake to cool for 5 to 10 minutes. Loosen the edges with a knife, and invert the cake onto a serving plate held over the skillet. Turn upside down. Remove skillet.
 

Serve alone or with whipped cream. Serves 12.

If you enjoyed this post, please consider taking out an email subscription to my blog. Just click on the link below!

Subscribe to In Our Grandmothers’ Kitchens by Email.